3. Usage and Installation
|
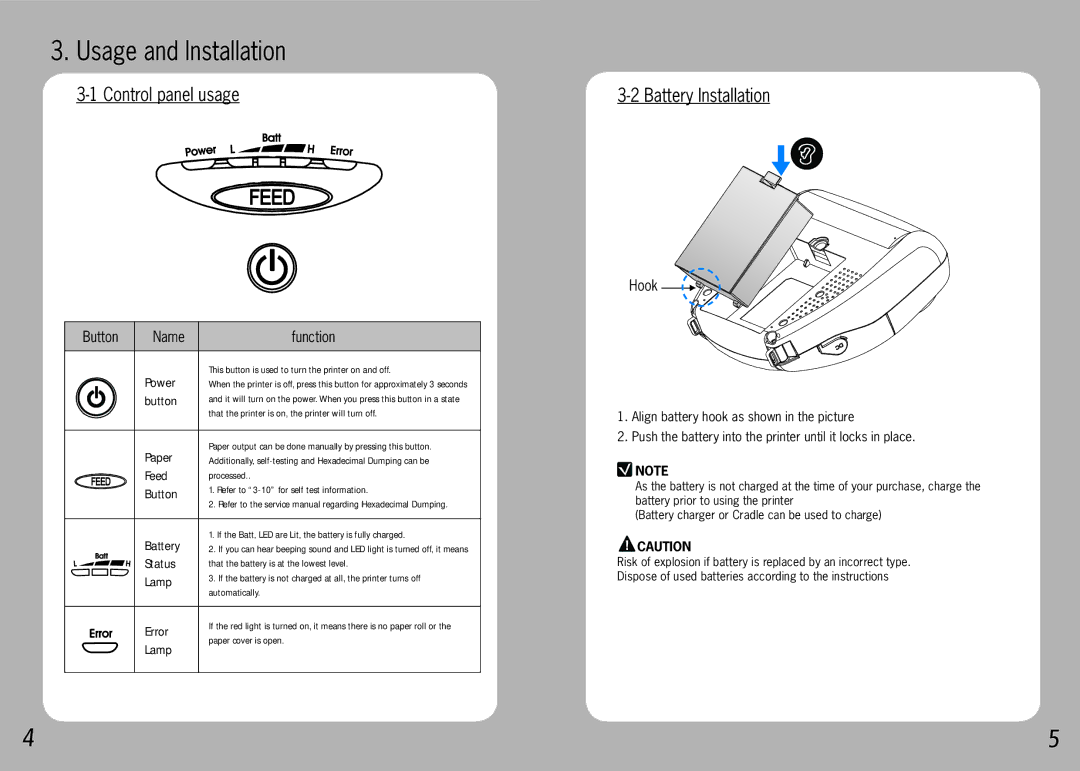
Button | Name | function |
| Power | This button is used to turn the printer on and off. |
| When the printer is off, press this button for approximately 3 seconds | |
| button | and it will turn on the power. When you press this button in a state |
|
| that the printer is on, the printer will turn off. |
| Paper | Paper output can be done manually by pressing this button. |
| Additionally, | |
| Feed | processed.. |
| Button | 1. Refer to |
|
| 2. Refer to the service manual regarding Hexadecimal Dumping. |
| Battery | 1. If the Batt, LED are Lit, the battery is fully charged. |
| 2. If you can hear beeping sound and LED light is turned off, it means | |
| Status | that the battery is at the lowest level. |
| Lamp | 3. If the battery is not charged at all, the printer turns off |
|
| automatically. |
| Error | If the red light is turned on, it means there is no paper roll or the |
| paper cover is open. | |
| Lamp | |
|
|
Hook
1.Align battery hook as shown in the picture
2.Push the battery into the printer until it locks in place.
![]() NOTE
NOTE
As the battery is not charged at the time of your purchase, charge the battery prior to using the printer
(Battery charger or Cradle can be used to charge)
![]() CAUTION
CAUTION
Risk of explosion if battery is replaced by an incorrect type. Dispose of used batteries according to the instructions
4 | 5 |
