RIM ASSEMBLY & INSTALLATION
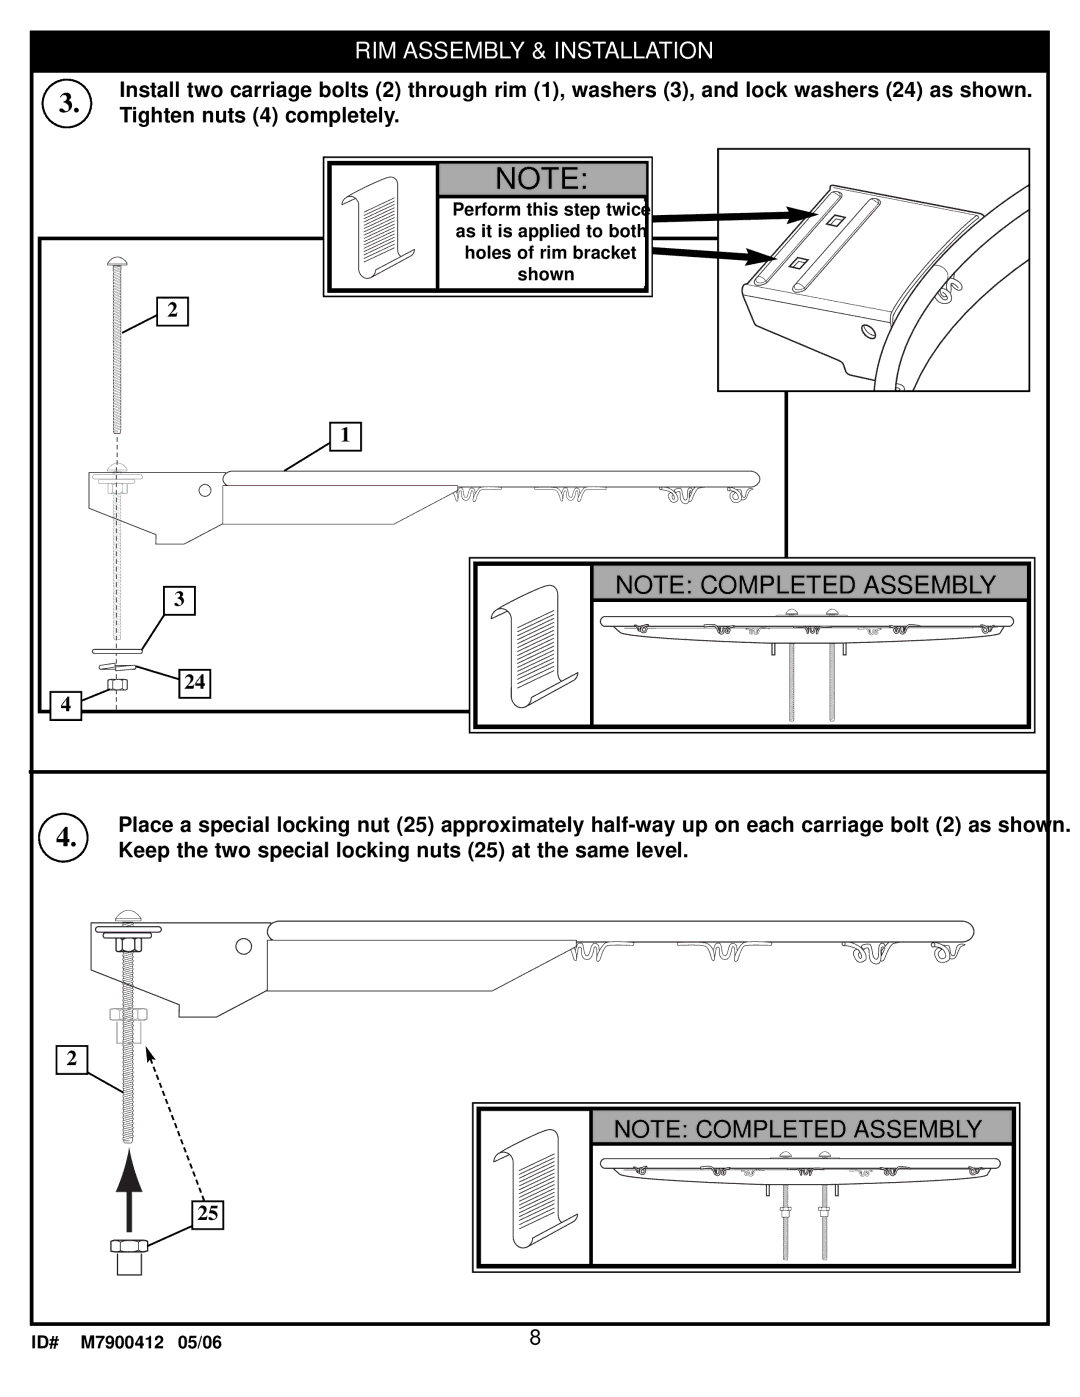
3. | Install two carriage bolts (2) through rim (1), washers (3), and lock washers (24) as shown. | |
Tighten nuts (4) completely. | ||
|
NOTE:
Perform this step twice as it is applied to both holes of rim bracket ![]() shown
shown
2
1
3
NOTE: COMPLETED ASSEMBLY
4![]()
24
4. | Place a special locking nut (25) approximately | ||
Keep the two special locking nuts (25) at the same level. | |||
| |||
|
|
| |
2
NOTE: COMPLETED ASSEMBLY
25
ID# M7900412 05/06 | 8 |
