28. C.
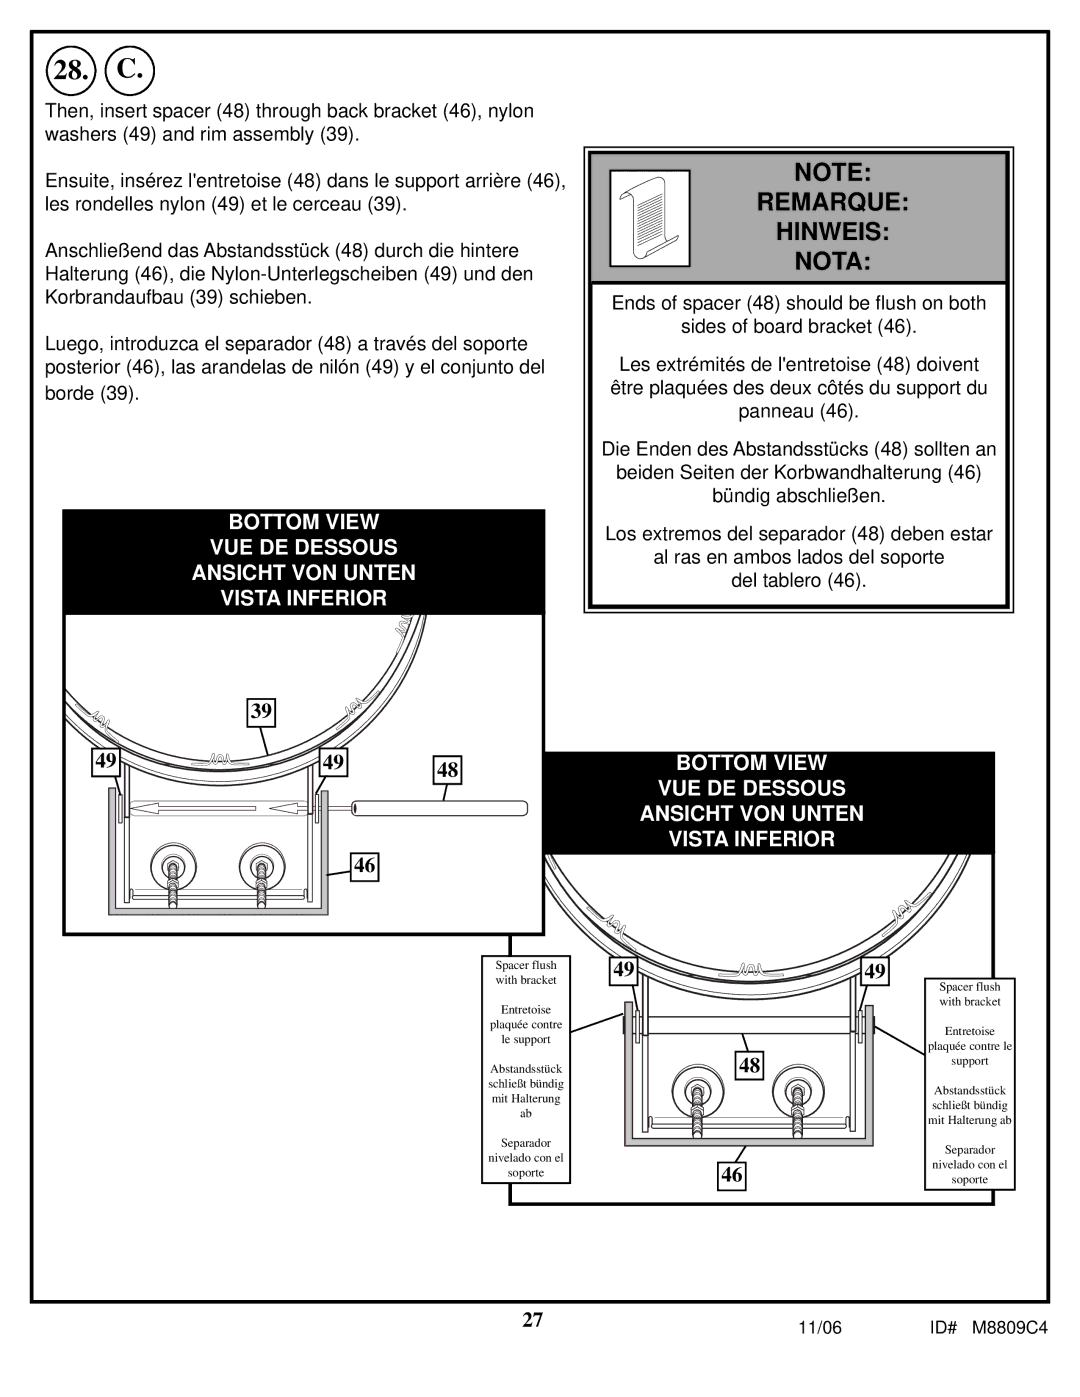
Then, insert spacer (48) through back bracket (46), nylon washers (49) and rim assembly (39).
Ensuite, insérez l'entretoise (48) dans le support arrière (46), les rondelles nylon (49) et le cerceau (39).
Anschließend das Abstandsstück (48) durch die hintere Halterung (46), die
Luego, introduzca el separador (48) a través del soporte posterior (46), las arandelas de nilón (49) y el conjunto del borde (39).
BOTTOM VIEW
VUE DE DESSOUS
ANSICHT VON UNTEN
VISTA INFERIOR
| 39 |
|
49 | 49 | 48 |
|
| |
|
| 46 |
NOTE:
REMARQUE:
HINWEIS:
NOTA:
Ends of spacer (48) should be flush on both
sides of board bracket (46).
Les extrémités de l'entretoise (48) doivent être plaquées des deux côtés du support du panneau (46).
Die Enden des Abstandsstücks (48) sollten an beiden Seiten der Korbwandhalterung (46) bündig abschließen.
Los extremos del separador (48) deben estar
al ras en ambos lados del soporte
del tablero (46).
BOTTOM VIEW
VUE DE DESSOUS
ANSICHT VON UNTEN
VISTA INFERIOR
Spacer flush with bracket
Entretoise
plaquée contre
le support
Abstandsstück schließt bündig mit Halterung ab
Separador
nivelado con el
soporte
49 ![]()
![]()
48
46
![]()
![]() 49
49
Spacer flush with bracket
Entretoise
plaquée contre le
support
Abstandsstück schließt bündig mit Halterung ab
Separador
nivelado con el
soporte
27 | 11/06 | ID# M8809C4 |
|
