STEP4:Plastic Parts
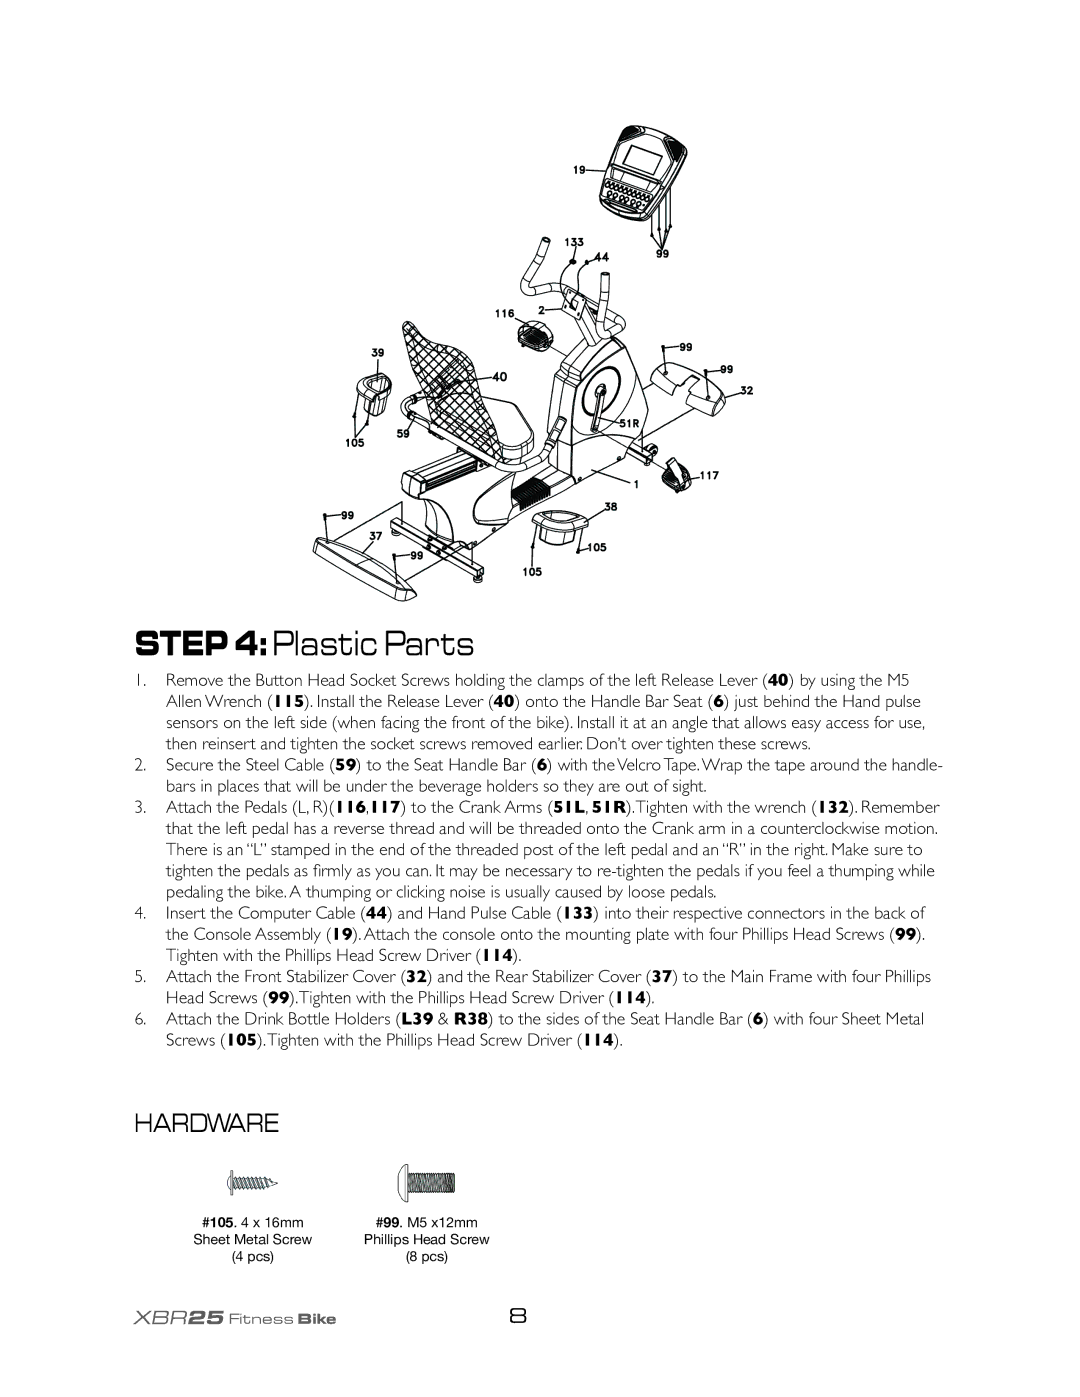
1.Remove the Button Head Socket Screws holding the clamps of the left Release Lever (40) by using the M5 Allen Wrench (115). Install the Release Lever (40) onto the Handle Bar Seat (6) just behind the Hand pulse sensors on the left side (when facing the front of the bike). Install it at an angle that allows easy access for use, then reinsert and tighten the socket screws removed earlier. Don’t over tighten these screws.
2.Secure the Steel Cable (59) to the Seat Handle Bar (6) with the Velcro Tape. Wrap the tape around the handle- bars in places that will be under the beverage holders so they are out of sight.
3.Attach the Pedals (L, R)(116,117) to the Crank Arms (51L, 51R).Tighten with the wrench (132). Remember that the left pedal has a reverse thread and will be threaded onto the Crank arm in a counterclockwise motion. There is an “L” stamped in the end of the threaded post of the left pedal and an “R” in the right. Make sure to tighten the pedals as firmly as you can. It may be necessary to
4.Insert the Computer Cable (44) and Hand Pulse Cable (133) into their respective connectors in the back of the Console Assembly (19). Attach the console onto the mounting plate with four Phillips Head Screws (99). Tighten with the Phillips Head Screw Driver (114).
5.Attach the Front Stabilizer Cover (32) and the Rear Stabilizer Cover (37) to the Main Frame with four Phillips Head Screws (99).Tighten with the Phillips Head Screw Driver (114).
6.Attach the Drink Bottle Holders (L39 & R38) to the sides of the Seat Handle Bar (6) with four Sheet Metal Screws (105).Tighten with the Phillips Head Screw Driver (114).
HARDWARE
#105. 4 x 16mm | #99. M5 x12mm |
Sheet Metal Screw | Phillips Head Screw |
(4 pcs) | (8 pcs) |
XBR25 Fitness Bike | 8 |
