ASSEMBLY INSTRUCTIONS
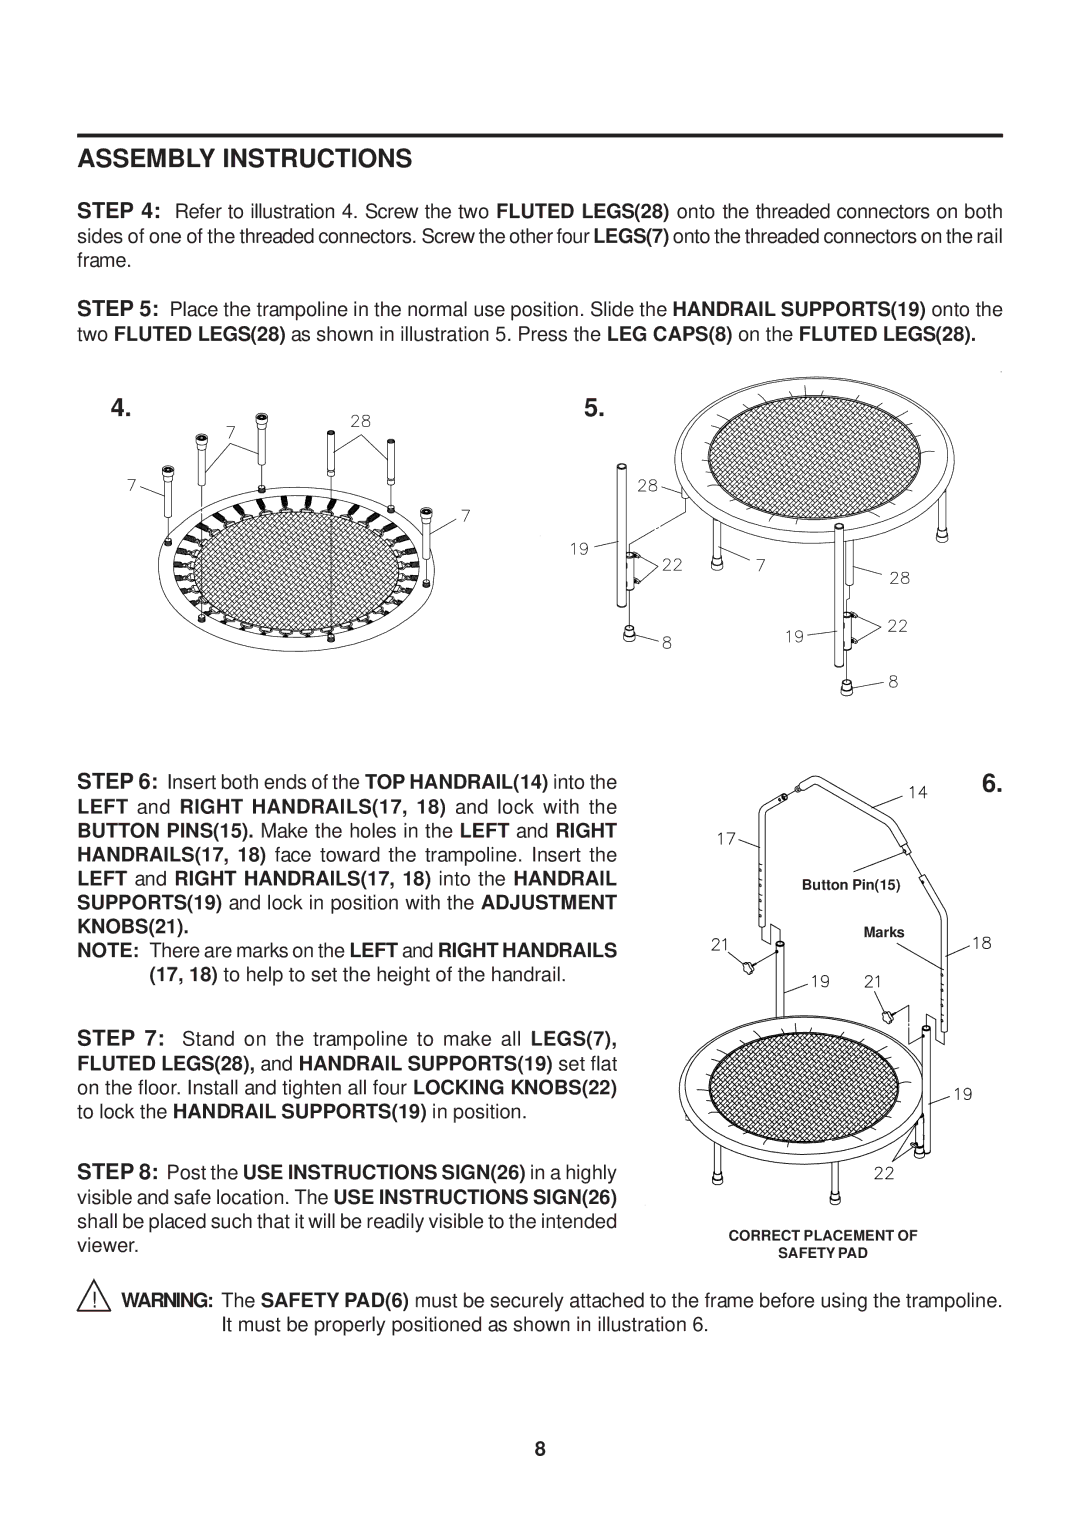
STEP 4: Refer to illustration 4. Screw the two FLUTED LEGS(28) onto the threaded connectors on both sides of one of the threaded connectors. Screw the other four LEGS(7) onto the threaded connectors on the rail frame.
STEP 5: Place the trampoline in the normal use position. Slide the HANDRAIL SUPPORTS(19) onto the two FLUTED LEGS(28) as shown in illustration 5. Press the LEG CAPS(8) on the FLUTED LEGS(28).
4.5.
STEP 6: Insert both ends of the TOP HANDRAIL(14) into the LEFT and RIGHT HANDRAILS(17, 18) and lock with the BUTTON PINS(15). Make the holes in the LEFT and RIGHT HANDRAILS(17, 18) face toward the trampoline. Insert the LEFT and RIGHT HANDRAILS(17, 18) into the HANDRAIL SUPPORTS(19) and lock in position with the ADJUSTMENT
KNOBS(21).
NOTE: There are marks on the LEFT and RIGHT HANDRAILS (17, 18) to help to set the height of the handrail.
STEP 7: Stand on the trampoline to make all LEGS(7), FLUTED LEGS(28), and HANDRAIL SUPPORTS(19) set flat on the floor. Install and tighten all four LOCKING KNOBS(22) to lock the HANDRAIL SUPPORTS(19) in position.
STEP 8: Post the USE INSTRUCTIONS SIGN(26) in a highly visible and safe location. The USE INSTRUCTIONS SIGN(26) shall be placed such that it will be readily visible to the intended viewer.
6.
Button Pin(15)
Marks
CORRECT PLACEMENT OF
SAFETY PAD
!WARNING: The SAFETY PAD(6) must be securely attached to the frame before using the trampoline. It must be properly positioned as shown in illustration 6.
8