ASSEMBLY INSTRUCTIONS
Place all parts from the box in a cleared area and position them on the floor in front of you. Remove all packing materials from your area and place them back into the box. Do not dispose of the packing materials until assembly is completed. Read each step carefully before beginning. If you are missing a part please call our
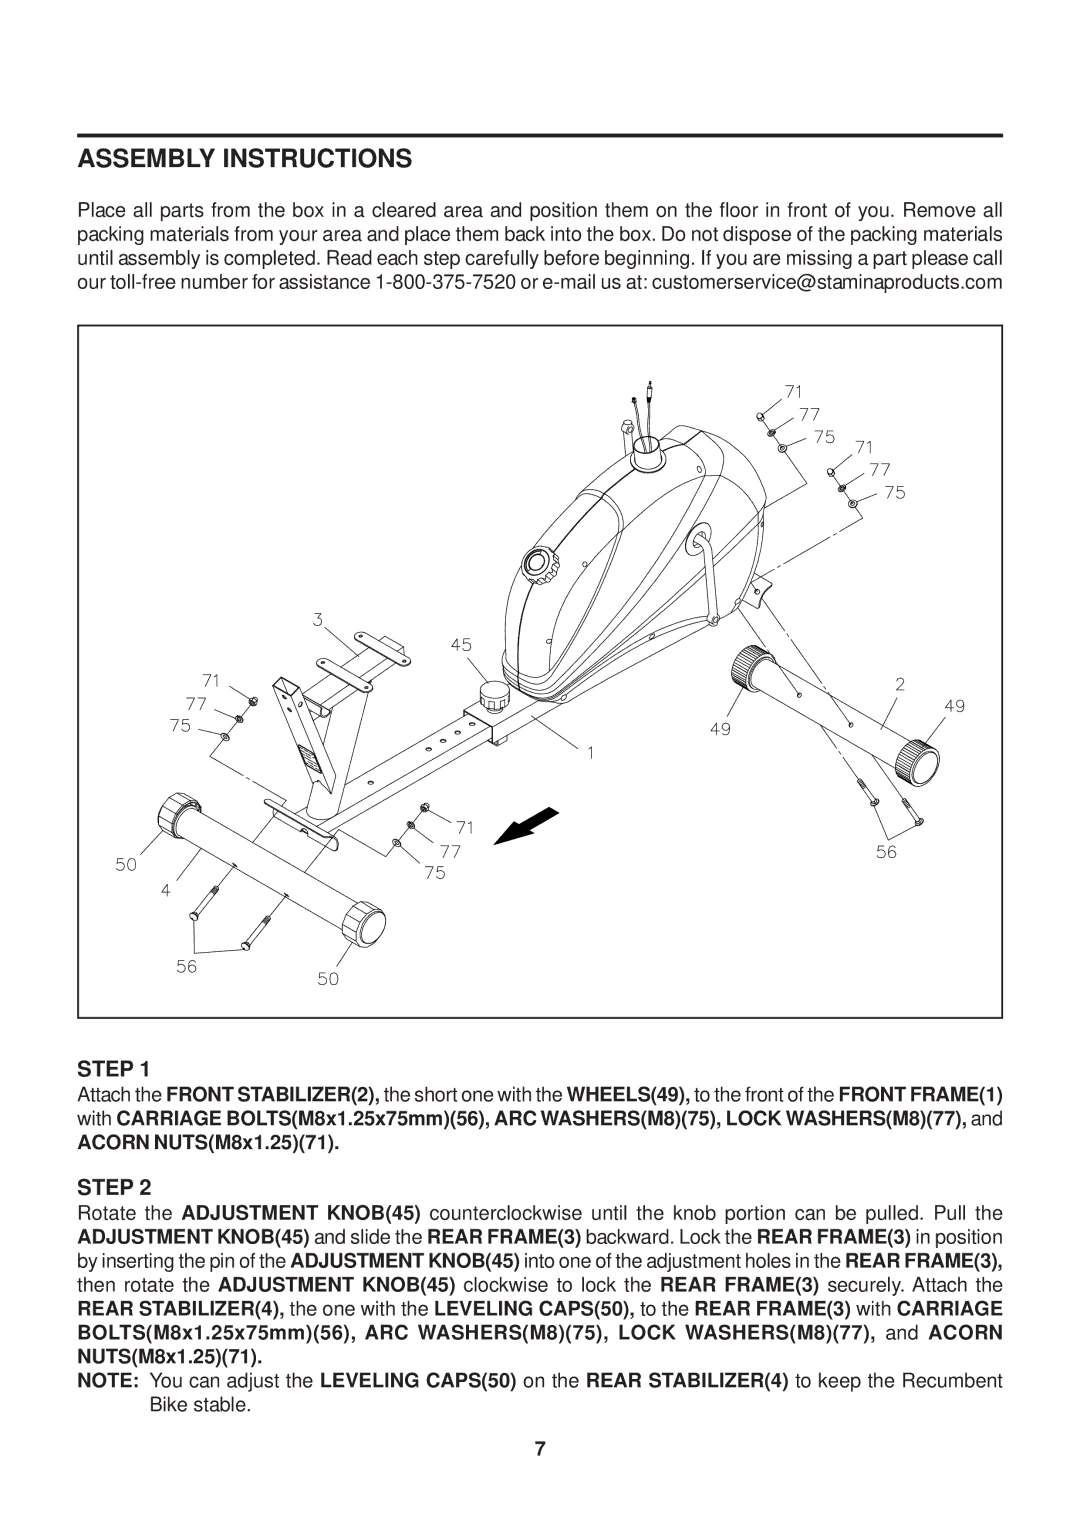
STEP 1
Attach the FRONT STABILIZER(2), the short one with the WHEELS(49), to the front of the FRONT FRAME(1) with CARRIAGE BOLTS(M8x1.25x75mm)(56), ARC WASHERS(M8)(75), LOCK WASHERS(M8)(77), and
ACORN NUTS(M8x1.25)(71).
STEP 2
Rotate the ADJUSTMENT KNOB(45) counterclockwise until the knob portion can be pulled. Pull the ADJUSTMENT KNOB(45) and slide the REAR FRAME(3) backward. Lock the REAR FRAME(3) in position by inserting the pin of the ADJUSTMENT KNOB(45) into one of the adjustment holes in the REAR FRAME(3), then rotate the ADJUSTMENT KNOB(45) clockwise to lock the REAR FRAME(3) securely. Attach the REAR STABILIZER(4), the one with the LEVELING CAPS(50), to the REAR FRAME(3) with CARRIAGE BOLTS(M8x1.25x75mm)(56), ARC WASHERS(M8)(75), LOCK WASHERS(M8)(77), and ACORN
NUTS(M8x1.25)(71).
NOTE: You can adjust the LEVELING CAPS(50) on the REAR STABILIZER(4) to keep the Recumbent Bike stable.
7