OPERATION
Check the chain adjustment bolts and secure the nuts if required.
Check the Housing Cover plate bolts and tighten if needed. Check the hydraulic hoses, fittings and valves for any leaks and repair as required.
With the machine turned off, oil the chain over the top sprocket with a heavy duty gear oil such as Mobil Gear 600 Series. Refer to the table below for recommended chain oil.
Ambient Temperature | Lubricant Rating (SAE) | Viscosity Grade | |
(Hydraulic Fluid) | |||
|
| ||
|
|
| |
23° - 41°F / | 20 | 46 - 68 | |
41° - 104°F / 5° - 40°C | 30 | 100 | |
|
|
| |
104° - 122°F / 40° - 50°C | 40 | 150 - 220 | |
|
|
| |
122° - 140°F / 50° - 60°C | 50 | 320 | |
|
|
|
FIRST 10 / 20 HOURS OF OPERATION, CHECK
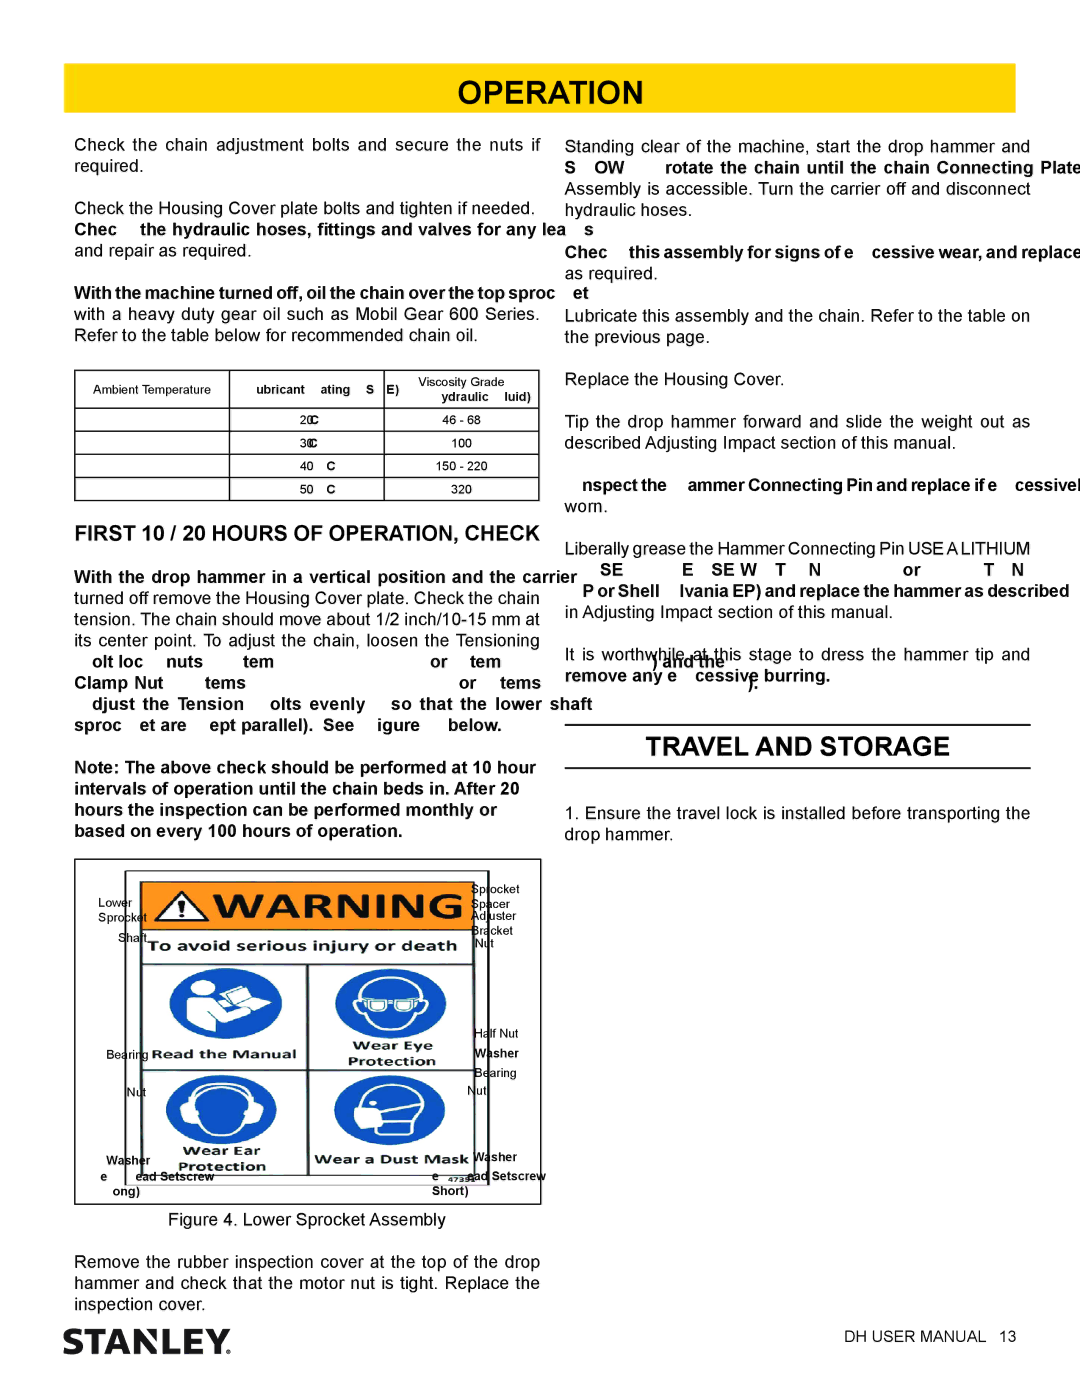
With the drop hammer in a vertical position and the carrier turned off remove the Housing Cover plate. Check the chain tension. The chain should move about 1/2
Note: The above check should be performed at 10 hour intervals of operation until the chain beds in. After 20 hours the inspection can be performed monthly or based on every 100 hours of operation.
Lower | Sprocket | |
Spacer | ||
Sprocket | Adjuster | |
Shaft | Bracket | |
Nut | ||
| ||
| Half Nut | |
Bearing | Washer | |
| Bearing | |
Nut | Nut | |
Washer | Washer | |
Hex Head Setscrew | Hex Head Setscrew | |
(Long) | (Short) |
Figure 4. Lower Sprocket Assembly
Remove the rubber inspection cover at the top of the drop hammer and check that the motor nut is tight. Replace the inspection cover.
Standing clear of the machine, start the drop hammer and SLOWLY rotate the chain until the chain Connecting Plate Assembly is accessible. Turn the carrier off and disconnect hydraulic hoses.
Check this assembly for signs of excessive wear, and replace as required.
Lubricate this assembly and the chain. Refer to the table on the previous page.
Replace the Housing Cover.
Tip the drop hammer forward and slide the weight out as described Adjusting Impact section of this manual.
Inspect the Hammer Connecting Pin and replace if excessively worn.
Liberally grease the Hammer Connecting Pin USE A LITHIUM BASED GREASE WITH NGLI 1 or 2 RATING (Mobilgrease HP or Shell Alvania EP) and replace the hammer as described in Adjusting Impact section of this manual.
It is worthwhile at this stage to dress the hammer tip and remove any excessive burring.
TRAVEL AND STORAGE
1.Ensure the travel lock is installed before transporting the drop hammer.
DH USER MANUAL 13
