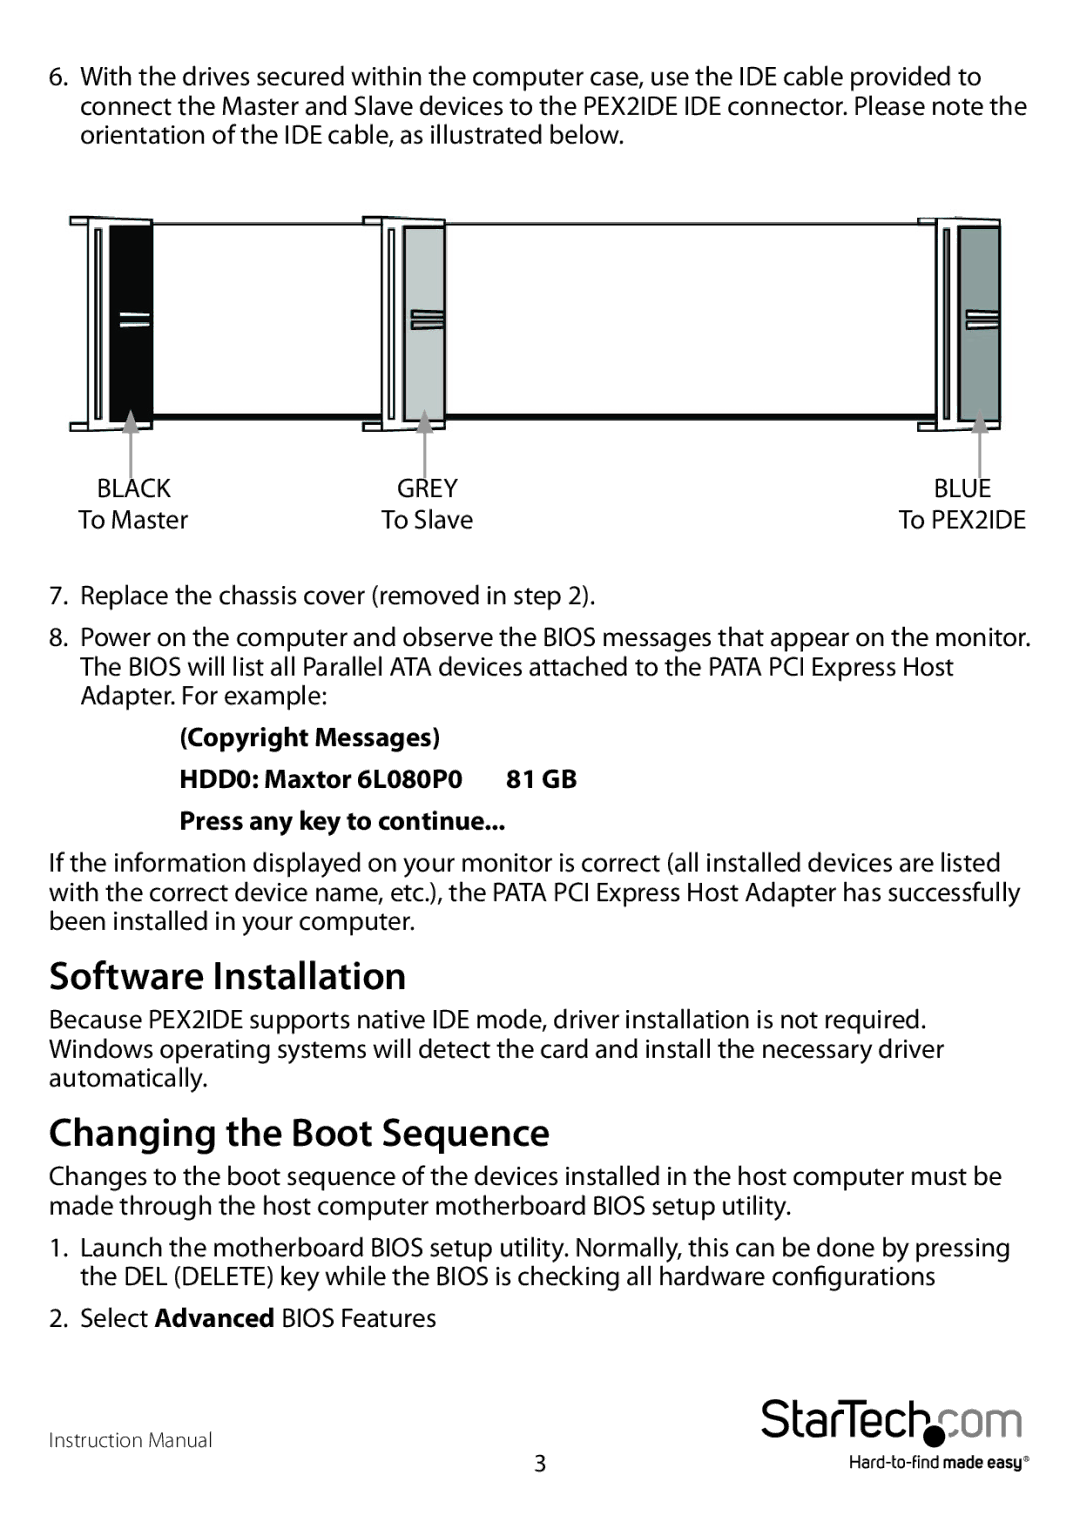
6.With the drives secured within the computer case, use the IDE cable provided to connect the Master and Slave devices to the PEX2IDE IDE connector. Please note the orientation of the IDE cable, as illustrated below.
|
|
|
|
|
|
BLACK | GREY | BLUE | |||
To Master | To Slave | To PEX2IDE | |||
7.Replace the chassis cover (removed in step 2).
8.Power on the computer and observe the BIOS messages that appear on the monitor. The BIOS will list all Parallel ATA devices attached to the PATA PCI Express Host Adapter. For example:
(Copyright Messages)
HDD0: Maxtor 6L080P0 81 GB Press any key to continue...
If the information displayed on your monitor is correct (all installed devices are listed with the correct device name, etc.), the PATA PCI Express Host Adapter has successfully been installed in your computer.
Software Installation
Because PEX2IDE supports native IDE mode, driver installation is not required. Windows operating systems will detect the card and install the necessary driver automatically.
Changing the Boot Sequence
Changes to the boot sequence of the devices installed in the host computer must be made through the host computer motherboard BIOS setup utility.
1.Launch the motherboard BIOS setup utility. Normally, this can be done by pressing the DEL (DELETE) key while the BIOS is checking all hardware configurations
2.Select Advanced BIOS Features
Instruction Manual
3
