|
| SERVICING INSTRUCTIONS | ||
|
| REPLACING PARTS | ||
|
| 8. MAIN INJECTOR | 9.2 | Refit a new sensor ensuring the spacers are located between |
|
|
| the sensor and the bracket. Replace the two leads. | |
|
|
| 9.3 | If it has been necessary to remove the stove, ensure that all |
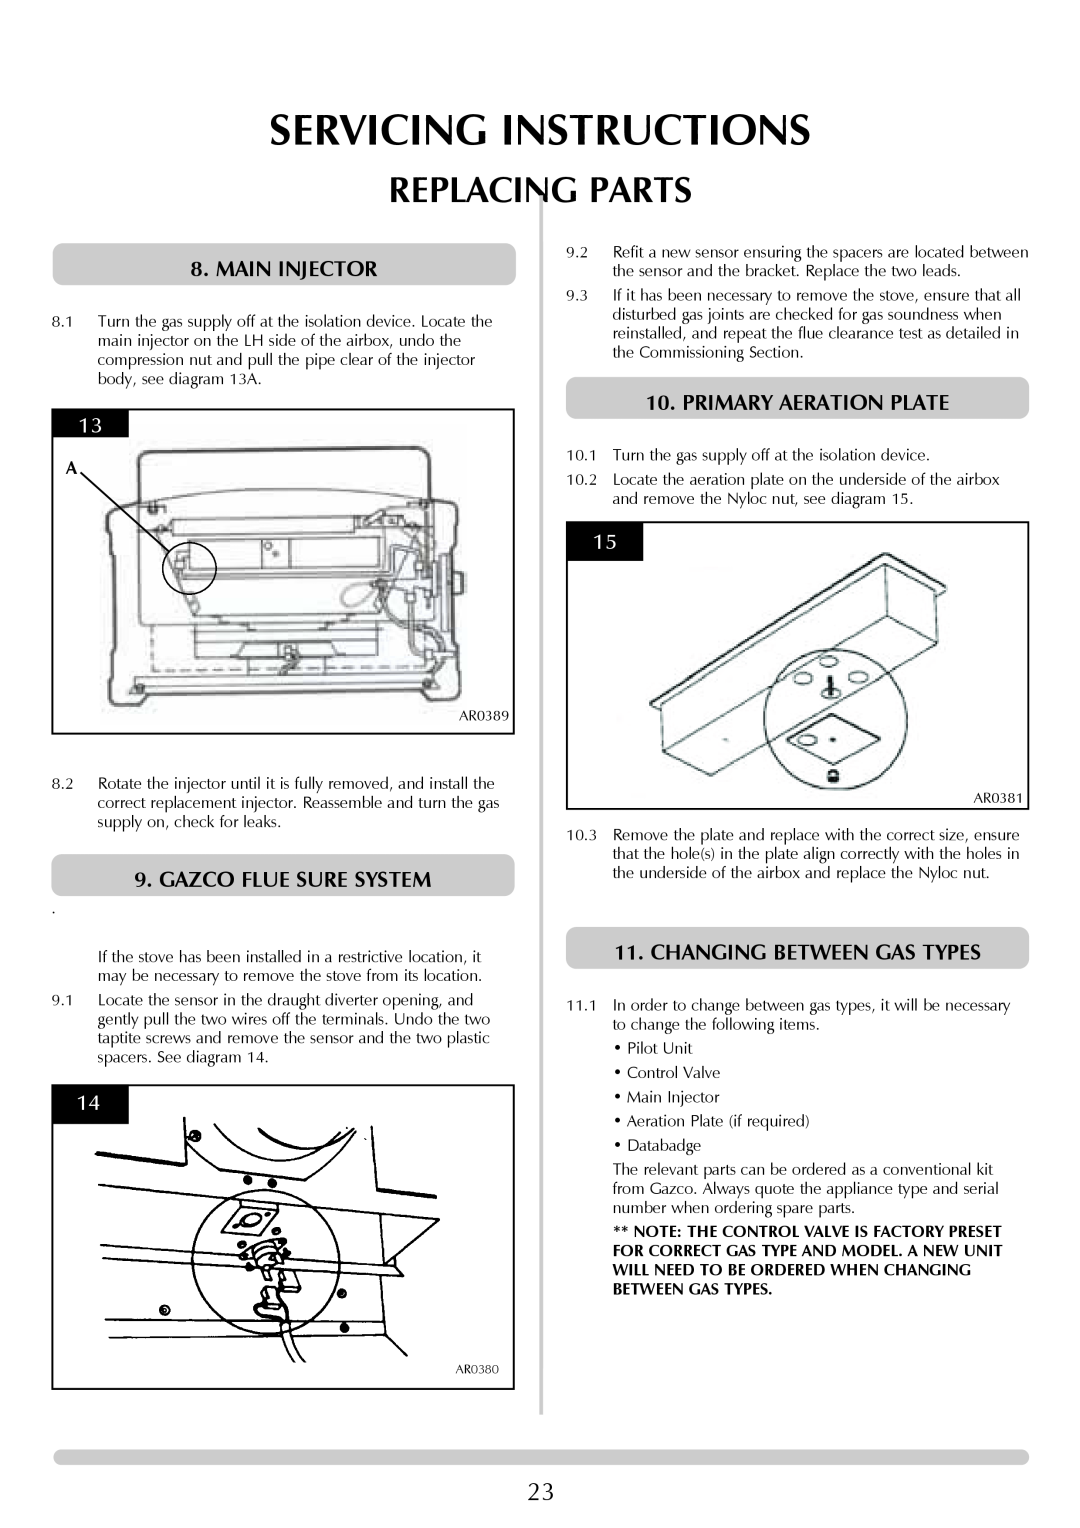
8.1 Turn the gas supply off at the isolation device. Locate the |
| disturbed gas joints are checked for gas soundness when | ||
| reinstalled, and repeat the flue clearance test as detailed in | |||
| main injector on the LH side of the airbox, undo the |
| ||
|
| the Commissioning Section. | ||
| compression nut and pull the pipe clear of the injector |
| ||
|
|
| ||
| body, see diagram 13A. |
|
| |
|
|
|
| 10. PRIMARY AERATION PLATE |
| 13 |
|
|
|
A |
|
| 10.1 | Turn the gas supply off at the isolation device. |
|
| 10.2 | Locate the aeration plate on the underside of the airbox | |
|
|
| ||
|
|
|
| and remove the Nyloc nut, see diagram 15. |
15
AR0389
8.2 Rotate the injector until it is fully removed, and install the |
| AR0381 | ||
correct replacement injector. Reassemble and turn the gas |
| |||
supply on, check for leaks. | 10.3 Remove the plate and replace with the correct size, ensure | |||
|
| |||
|
|
| that the hole(s) in the plate align correctly with the holes in | |
| 9. GAZCO FLUE SURE SYSTEM |
| the underside of the airbox and replace the Nyloc nut. | |
|
|
| ||
. |
|
|
| |
If the stove has been installed in a restrictive location, it |
| 11. CHANGING BETWEEN GAS TYPES | ||
may be necessary to remove the stove from its location. |
|
| ||
9.1 Locate the sensor in the draught diverter opening, and | 11.1 In order to change between gas types, it will be necessary | |||
gently pull the two wires off the terminals. Undo the two | ||||
| to change the following items. | |||
taptite screws and remove the sensor and the two plastic |
| |||
| • Pilot Unit | |||
spacers. See diagram 14. |
| |||
| • Control Valve | |||
|
|
| ||
14 |
|
| • Main Injector | |
|
|
| • Aeration Plate (if required) | |
|
| |||
|
|
| • Databadge | |
|
|
| The relevant parts can be ordered as a conventional kit | |
|
|
| from Gazco. Always quote the appliance type and serial | |
|
|
| number when ordering spare parts. | |
|
|
| ** NOTE: THE CONTROL VALVE IS FACTORY PRESET | |
|
|
| FOR CORRECT GAS TYPE AND MODEL. A NEW UNIT | |
|
|
| WILL NEED TO BE ORDERED WHEN CHANGING | |
|
|
| BETWEEN GAS TYPES. | |
| AR0380 |
|
| |
|
|
|
| |
23