USER INSTRUCTIONS
1.GENERAL
1.1Installation and servicing must be carried out by a competent person in accordance with Gas Safety (Installation and Use) Regulations 1998, the relevant British Standards for Installation, appropriate Codes of Practice and in accordance with the manufacturers instructions. It is a requirement that a CORGI registered engineer be used for this purpose as they are approved by the HSE under the above regulations.
1.2This appliance is suitable for use in G.B. and I.E. using Natural Gas at a supply pressure of 20mbar or LPG at a supply pressure of 29mbar (Butane) or 37mbar (propane).
1.3The installation shall also be completed in accordance with:
The Building Regulations issued by The Department of The Environment.
The Building Standards (Scotland) Regulations issued by the Scottish Development Department.
For Republic of Ireland, reference should be made to the relevant standards governing installations (IS813:1996)
1.4Read all these instructions before commencing installation.
1.5This appliance must be installed in accordance with the rules in force and only used in a sufficiently ventilated space.
1.6Ensure that curtains are not positioned above the stove, and that there is at least a clearance of 300mm between the sides of the stove and any curtains.
1.7The manufacturer considers the full outer casing of this stove to be a working surface which becomes hot whilst in operation. A suitable guard is recommended to protect young children, the aged and the infirm.
1.8This stove must only be operated with the door secured firmly in position. If any cracks appear in the glass the appliance must not be used until the glass panel is replaced.
1.9Do not attempt to burn rubbish in this stove.
1.10Any combustible shelves or surrounding furniture must only be fitted in accordance with the minimum dimensions detailed in diagram 1.
1
A
B
AR0531a/c
1.11Contact a competent service engineer to carry out relevant spillage checks etc. following home improvements after installation of this stove (e.g. the fitting of double glazing).
1.12In all correspondence, please quote the appliance type and serial number which can be found on the databadge at the rear of the stove.
1.13This product is guaranteed for 2 years from the date of installation, as set out in the terms and conditions of sale between Gazco and your local Gazco dealer. Please consult with your local Gazco dealer if you have any questions. In all correspondence always quote the Model No. and Serial No. Please ensure the commissioning checklist is completed by your installer; this is a requirement of your Guarantee.
2.LIGHTING THE APPLIANCE
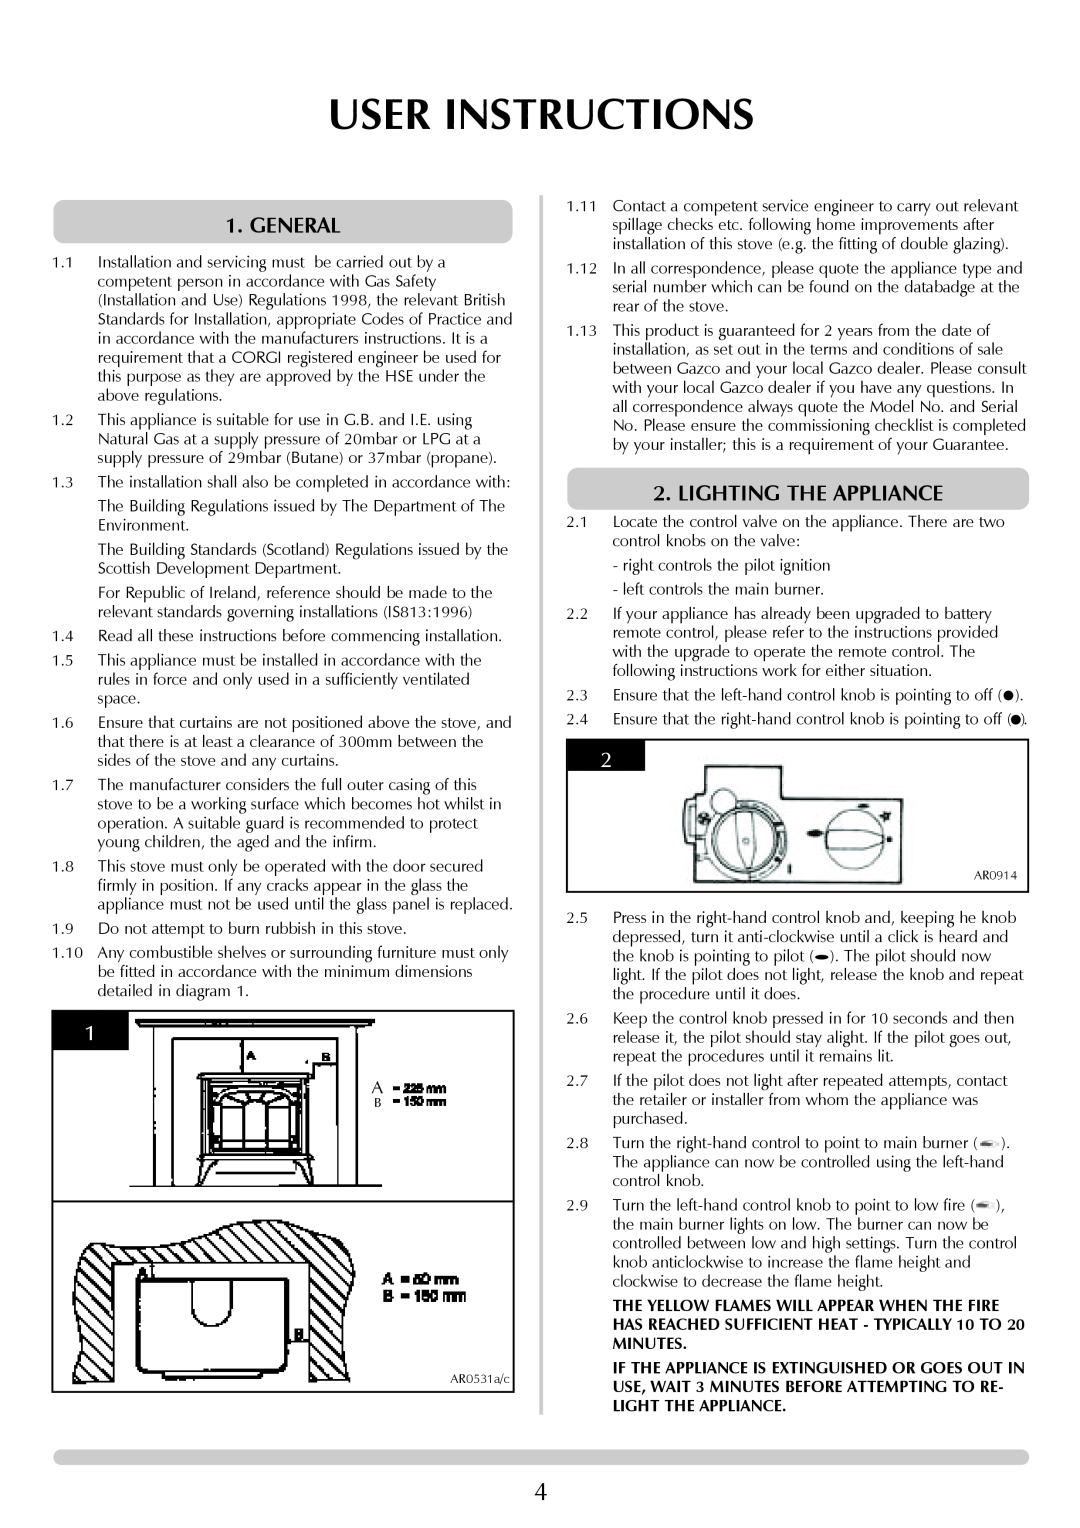
2.1Locate the control valve on the appliance. There are two control knobs on the valve:
-right controls the pilot ignition
-left controls the main burner.
2.2If your appliance has already been upgraded to battery remote control, please refer to the instructions provided with the upgrade to operate the remote control. The following instructions work for either situation.
2.3Ensure that the ![]() ).
).
2.4Ensure that the ![]() ).
).
2
AR0914
2.5Press in the ![]() ). The pilot should now light. If the pilot does not light, release the knob and repeat the procedure until it does.
). The pilot should now light. If the pilot does not light, release the knob and repeat the procedure until it does.
2.6Keep the control knob pressed in for 10 seconds and then release it, the pilot should stay alight. If the pilot goes out, repeat the procedures until it remains lit.
2.7If the pilot does not light after repeated attempts, contact the retailer or installer from whom the appliance was purchased.
2.8Turn the ![]() ). The appliance can now be controlled using the
). The appliance can now be controlled using the
2.9Turn the ![]() ), the main burner lights on low. The burner can now be controlled between low and high settings. Turn the control knob anticlockwise to increase the flame height and clockwise to decrease the flame height.
), the main burner lights on low. The burner can now be controlled between low and high settings. Turn the control knob anticlockwise to increase the flame height and clockwise to decrease the flame height.
THE YELLOW FLAMES WILL APPEAR WHEN THE FIRE HAS REACHED SUFFICIENT HEAT - TYPICALLY 10 TO 20 MINUTES.
IF THE APPLIANCE IS EXTINGUISHED OR GOES OUT IN USE, WAIT 3 MINUTES BEFORE ATTEMPTING TO RE- LIGHT THE APPLIANCE.
4