J. SEAT SLING
The seat sling can be adjusted through the use of hook and loop material beneath the seat. Seat sling also includes a folding strap on the seat to assist in folding the chair. 16 NOTE– The seat sling folding strap is not intended as a carrying strap.
Adjustment 16
a.Remove seat rail end caps at the front of the chair (A).
b.Slide the seat sling, plastic retaining rods, and spacers (if present) from the channels in the seat rails.
c.Readjust hook and loop material to obtain the desired tension in the seat sling.
d.Reinsert the seat sling and plastic retaining rods into the channels in the seat rails.
e.Replace the end caps.
K.CUSHION INSTALLATION (OPTIONAL)
a.Place cushion on seat sling with hook material side down. The beveled edge of the cushion should be in front.
b.Press firmly into place.
A
I X .
16
L. REAR AXLES
The most important adjustment on your Quickie wheelchair is the position of the rear axle. The center of gravity, wheel camber and wheelbase are all determined by the axle adjustment.
Use a torque setting of 100
![]() WARNING
WARNING
The more you move your rear wheels forward, the more likely your chair will tip over backwards. Always make adjustments in small increments, and check the sta- bility of your chair with a spotter to prevent a
NOTE– Adjusting your chair’s center of gravity will require
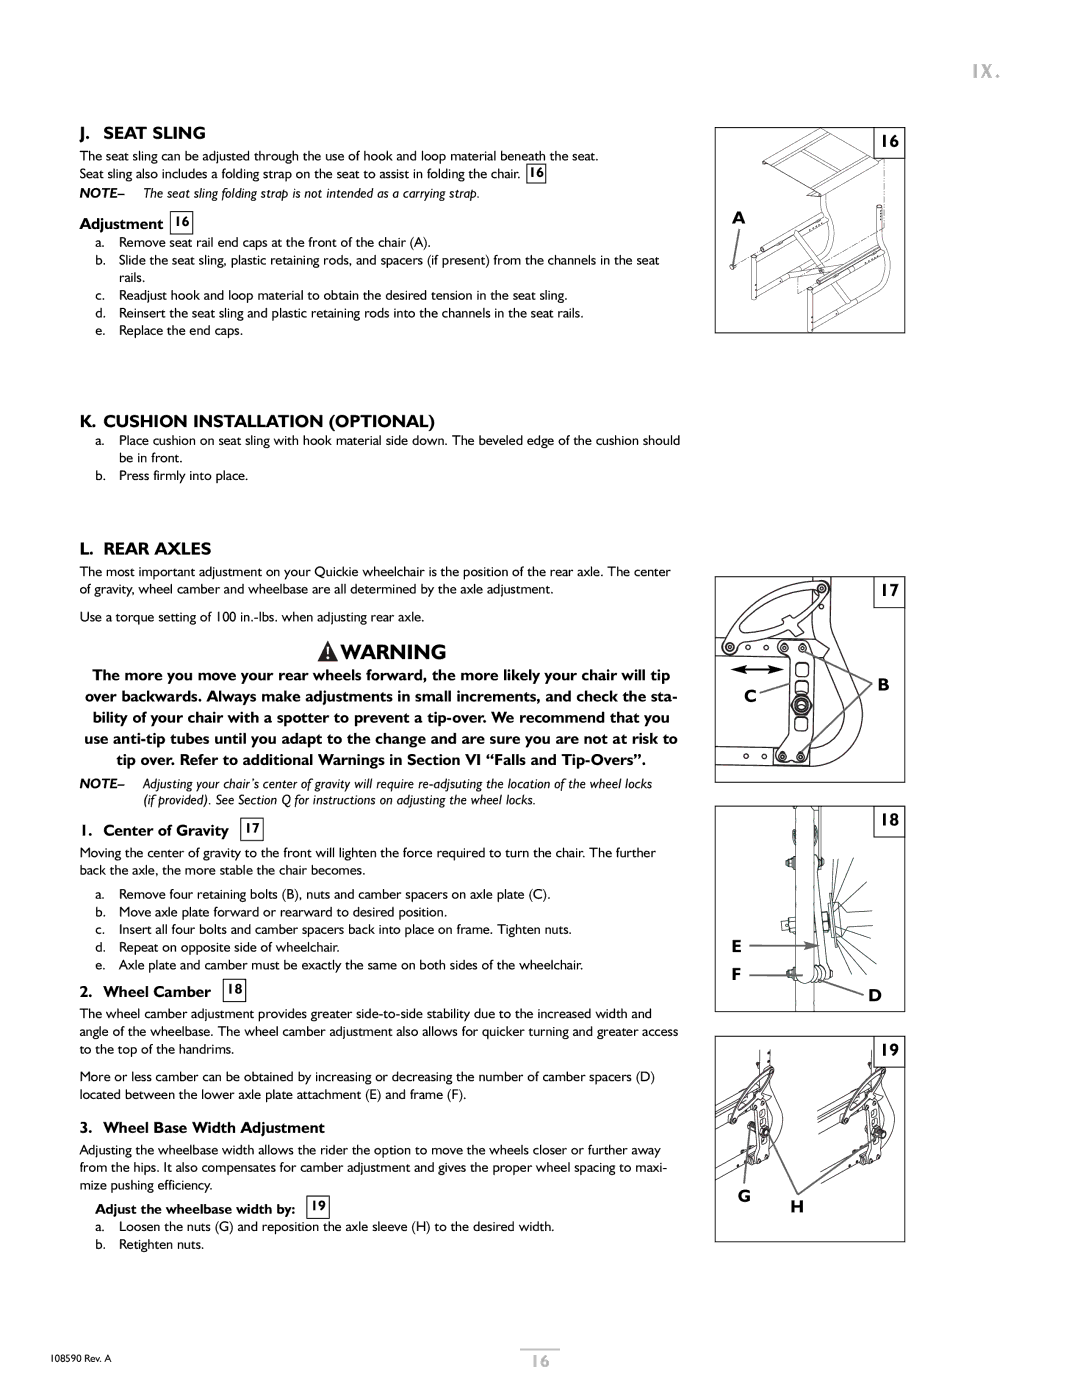
1. Center of Gravity 17
Moving the center of gravity to the front will lighten the force required to turn the chair. The further back the axle, the more stable the chair becomes.
a.Remove four retaining bolts (B), nuts and camber spacers on axle plate (C).
b.Move axle plate forward or rearward to desired position.
c.Insert all four bolts and camber spacers back into place on frame. Tighten nuts.
d.Repeat on opposite side of wheelchair.
e.Axle plate and camber must be exactly the same on both sides of the wheelchair.
2. Wheel Camber 18
The wheel camber adjustment provides greater
More or less camber can be obtained by increasing or decreasing the number of camber spacers (D) located between the lower axle plate attachment (E) and frame (F).
3. Wheel Base Width Adjustment
Adjusting the wheelbase width allows the rider the option to move the wheels closer or further away from the hips. It also compensates for camber adjustment and gives the proper wheel spacing to maxi- mize pushing efficiency.
Adjust the wheelbase width by: 19
a.Loosen the nuts (G) and reposition the axle sleeve (H) to the desired width.
b.Retighten nuts.
17 |
B |
C |
18 |
E |
|
F |
|
| D |
| 19 |
G | H |
|
108590 Rev. A | 16 |
|