Reverse the door handle
1.Place the outer door assembly face down on work space.
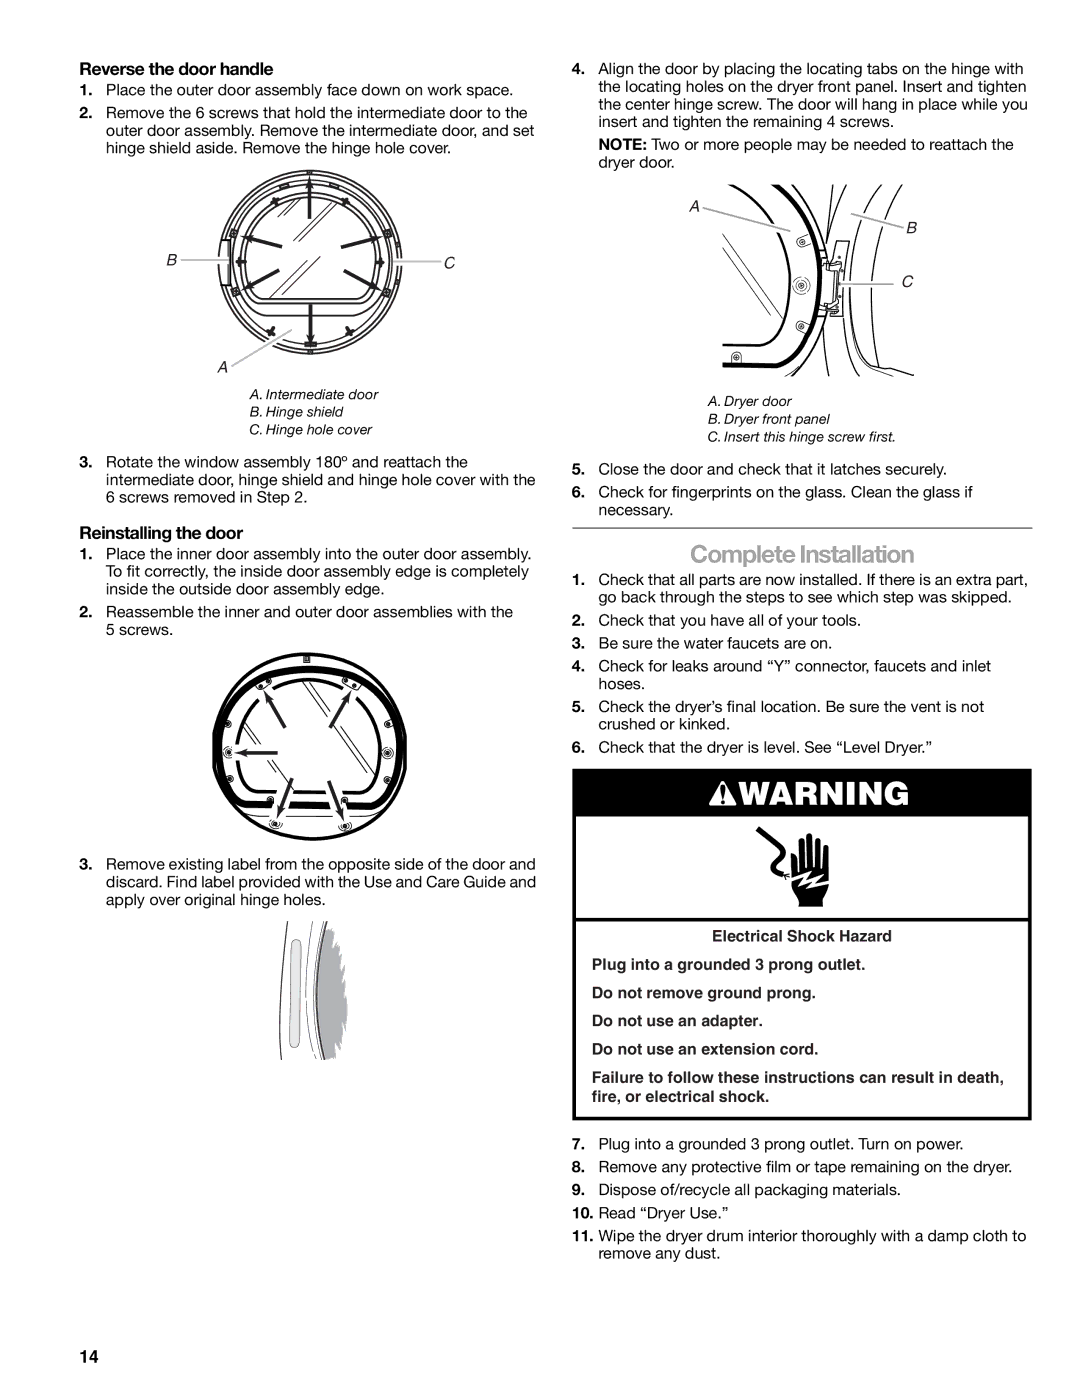
2.Remove the 6 screws that hold the intermediate door to the outer door assembly. Remove the intermediate door, and set hinge shield aside. Remove the hinge hole cover.
B | C |
A
A. Intermediate door
B. Hinge shield
C. Hinge hole cover
3.Rotate the window assembly 180º and reattach the intermediate door, hinge shield and hinge hole cover with the 6 screws removed in Step 2.
Reinstalling the door
1.Place the inner door assembly into the outer door assembly. To fit correctly, the inside door assembly edge is completely inside the outside door assembly edge.
2.Reassemble the inner and outer door assemblies with the 5 screws.
3.Remove existing label from the opposite side of the door and discard. Find label provided with the Use and Care Guide and apply over original hinge holes.
4.Align the door by placing the locating tabs on the hinge with the locating holes on the dryer front panel. Insert and tighten the center hinge screw. The door will hang in place while you insert and tighten the remaining 4 screws.
NOTE: Two or more people may be needed to reattach the dryer door.
A
![]() B
B
![]() C
C
A. Dryer door
B. Dryer front panel
C. Insert this hinge screw first.
5.Close the door and check that it latches securely.
6.Check for fingerprints on the glass. Clean the glass if necessary.
Complete Installation
1.Check that all parts are now installed. If there is an extra part, go back through the steps to see which step was skipped.
2.Check that you have all of your tools.
3.Be sure the water faucets are on.
4.Check for leaks around “Y” connector, faucets and inlet hoses.
5.Check the dryer’s final location. Be sure the vent is not crushed or kinked.
6.Check that the dryer is level. See “Level Dryer.”
![]() WARNING
WARNING
Electrical Shock Hazard
Plug into a grounded 3 prong outlet.
Do not remove ground prong.
Do not use an adapter.
Do not use an extension cord.
Failure to follow these instructions can result in death, fire, or electrical shock.
7.Plug into a grounded 3 prong outlet. Turn on power.
8.Remove any protective film or tape remaining on the dryer.
9.Dispose of/recycle all packaging materials.
10.Read “Dryer Use.”
11.Wipe the dryer drum interior thoroughly with a damp cloth to remove any dust.
14