Page 6 Page 6
SV Sound
Setup, calibrating and integration
What’s to know? Well, first of all, setting up an SVS subwoofer is pretty darn easy. There are a few key things to get right though if you want to get the most out of your sub…
Unpacking. You’re probably eager to fire up your sub, but take time to carefully unpack everything. Save the box and shipping materials, just in case you need to return the sub for any reason.
Location. They say it’s all about location right? It’s the same with setting up your subwoofer. So, where to put it? Go for a corner if you can. Avoid putting your sub where it might adjoin large open areas. Studies have shown the deepest and flattest bass response is typically attained when a subwoofer is placed within a few feet of one of your home theater’s corners. A corner near your seat is best of all (the further it is from your seat the harder it has to work). The front- firing configuration of this SVS sub makes this easy. Whether you put the sub in front or to the rear of your seating area makes surprisingly little difference. Deep music or home theater bass, like that from “5.1 channel” DVDs, is largely
SVS
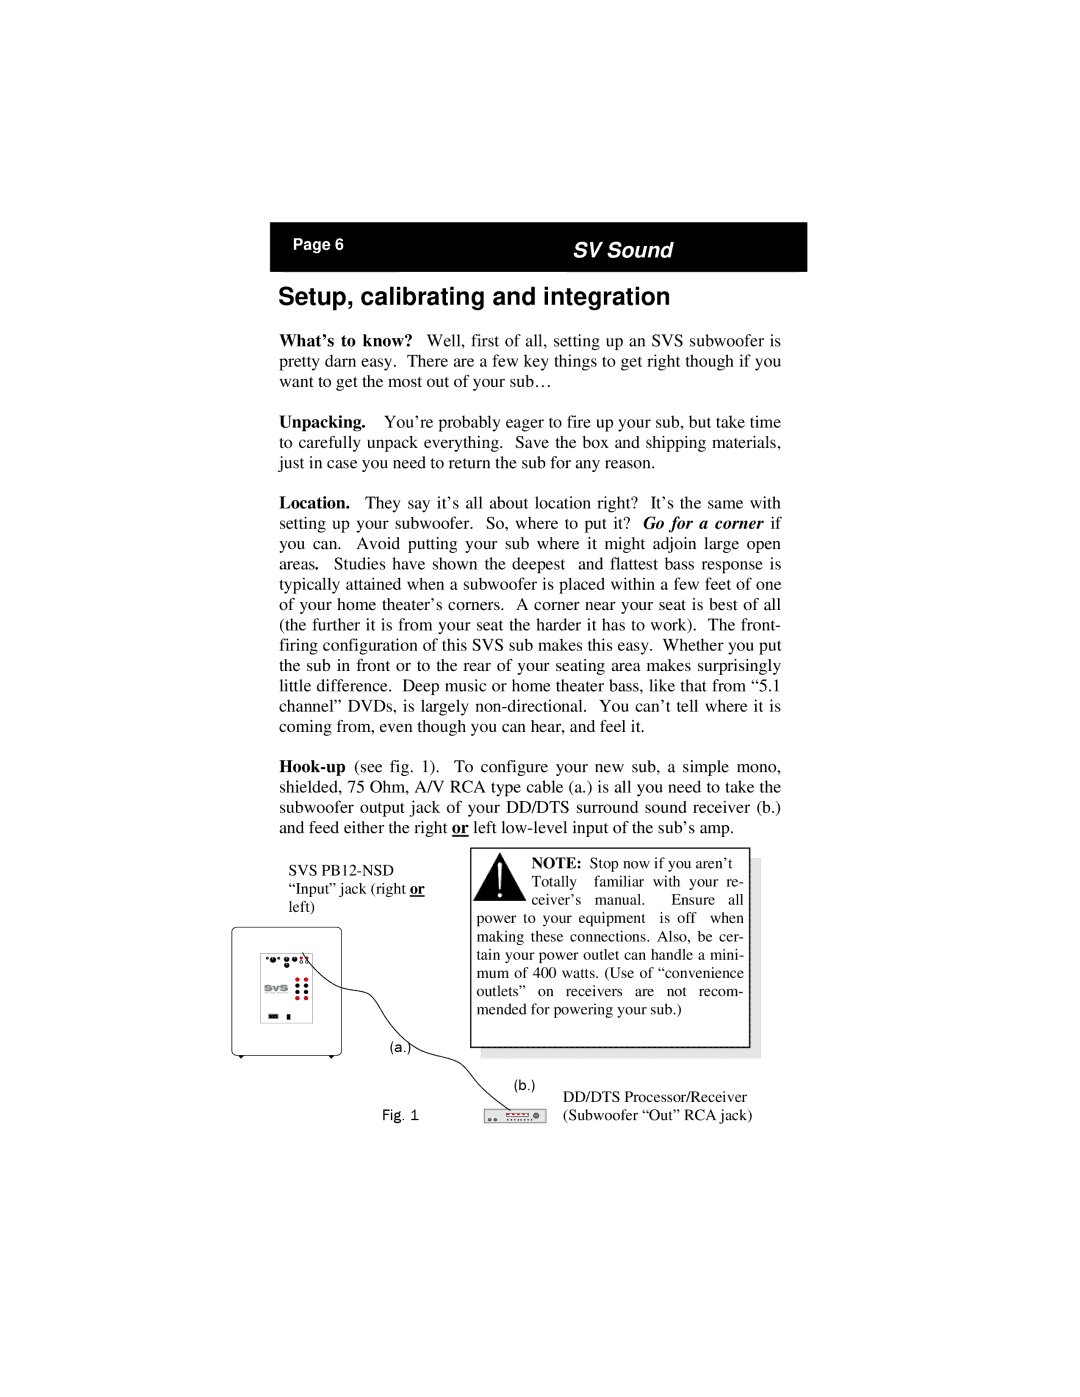
(a.)
Fig. 1
NOTE: Stop now if you aren’t Totally familiar with your re- ceiver’s manual. Ensure all
power to your equipment is off when making these connections. Also, be cer- tain your power outlet can handle a mini- mum of 400 watts. (Use of “convenience outlets” on receivers are not recom- mended for powering your sub.)
(b.)
DD/DTS Processor/Receiver (Subwoofer “Out” RCA jack)