INSTALLATION Cont’d...
RECEIVER
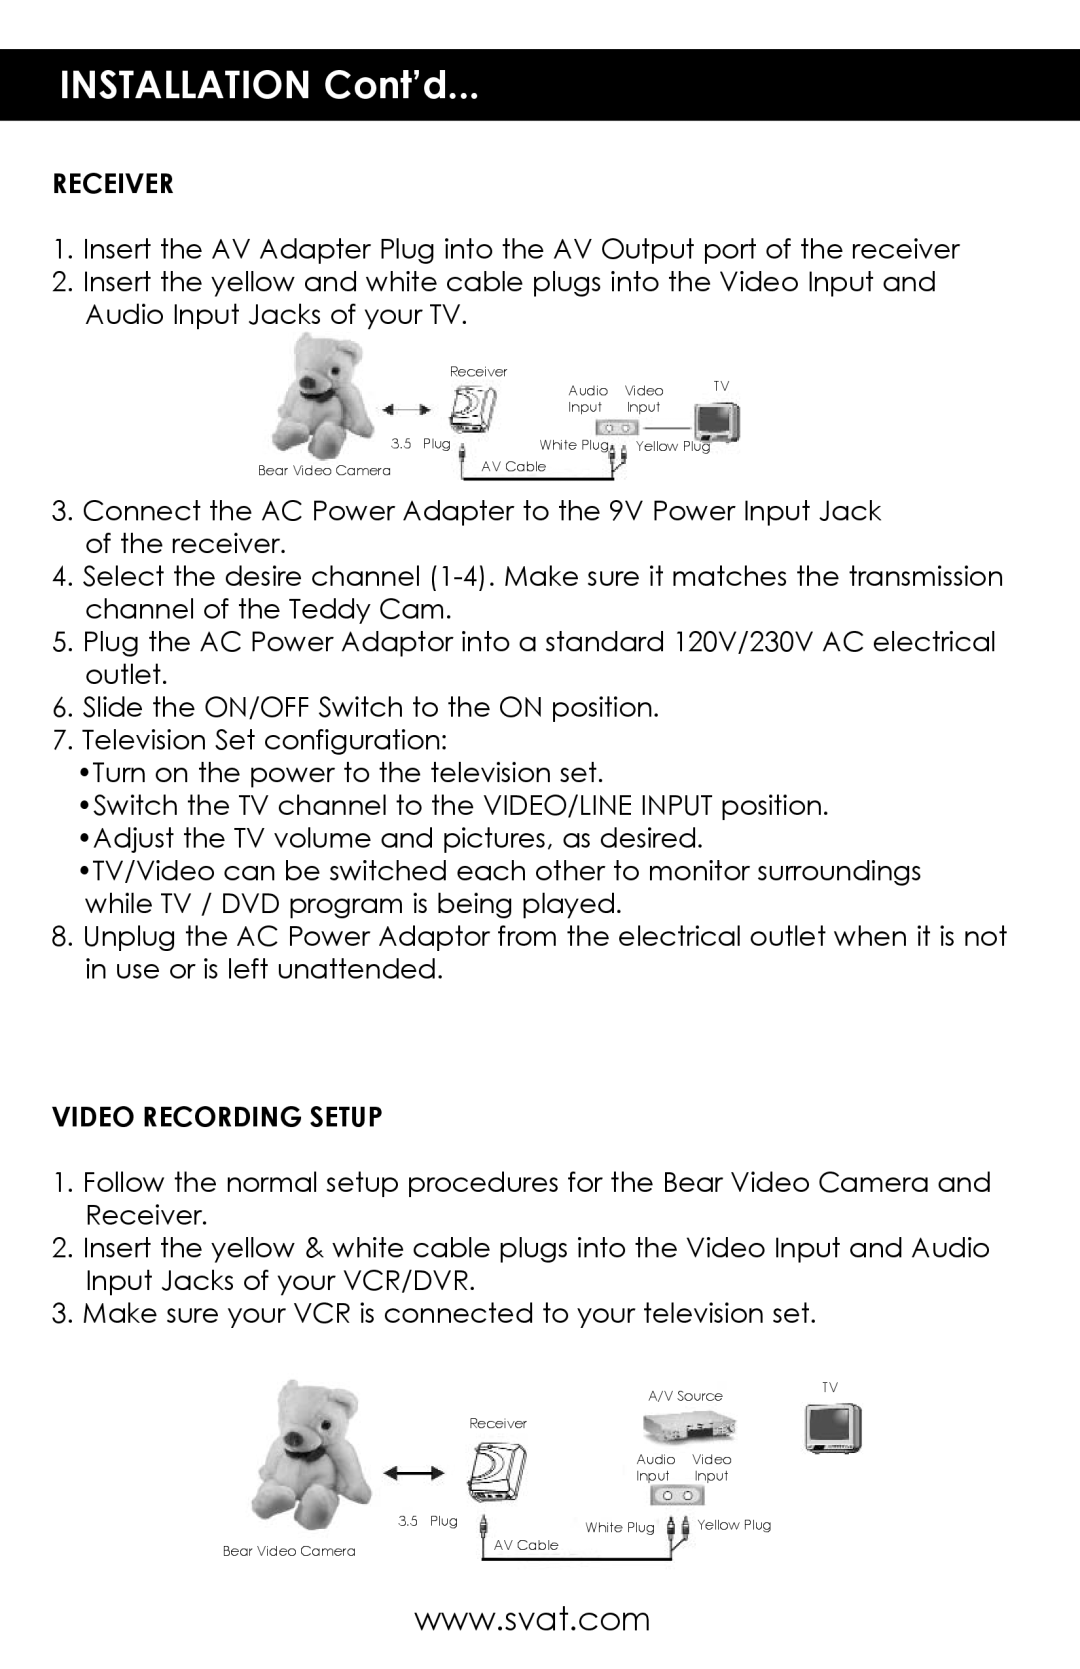
1.Insert the AV Adapter Plug into the AV Output port of the receiver
2.Insert the yellow and white cable plugs into the Video Input and Audio Input Jacks of your TV.
| Receiver |
| TV | |
|
| Audio | Video | |
|
| Input | Input |
|
3.5 | Plug | White Plug | Yellow Plug |
|
Bear Video Camera |
| AV Cable |
|
|
3.Connect the AC Power Adapter to the 9V Power Input Jack of the receiver.
4.Select the desire channel
5.Plug the AC Power Adaptor into a standard 120V/230V AC electrical outlet.
6.Slide the ON/OFF Switch to the ON position.
7.Television Set configuration:
•Turn on the power to the television set.
•Switch the TV channel to the VIDEO/LINE INPUT position. •Adjust the TV volume and pictures, as desired.
•TV/Video can be switched each other to monitor surroundings while TV / DVD program is being played.
8.Unplug the AC Power Adaptor from the electrical outlet when it is not in use or is left unattended.
VIDEO RECORDING SETUP
1.Follow the normal setup procedures for the Bear Video Camera and Receiver.
2.Insert the yellow & white cable plugs into the Video Input and Audio Input Jacks of your VCR/DVR.
3.Make sure your VCR is connected to your television set.
|
|
|
| A/V Source | TV | ||
|
|
|
|
| |||
|
|
| Receiver |
|
| ||
|
|
|
| Audio | Video |
| |
|
|
|
| Input | Input |
| |
| 3.5 Plug |
| |||||
|
| White Plug | Yellow Plug |
| |||
Bear Video Camera |
| AV Cable |
|
| |||
|
|
|
|
| |||
www.svat.com
