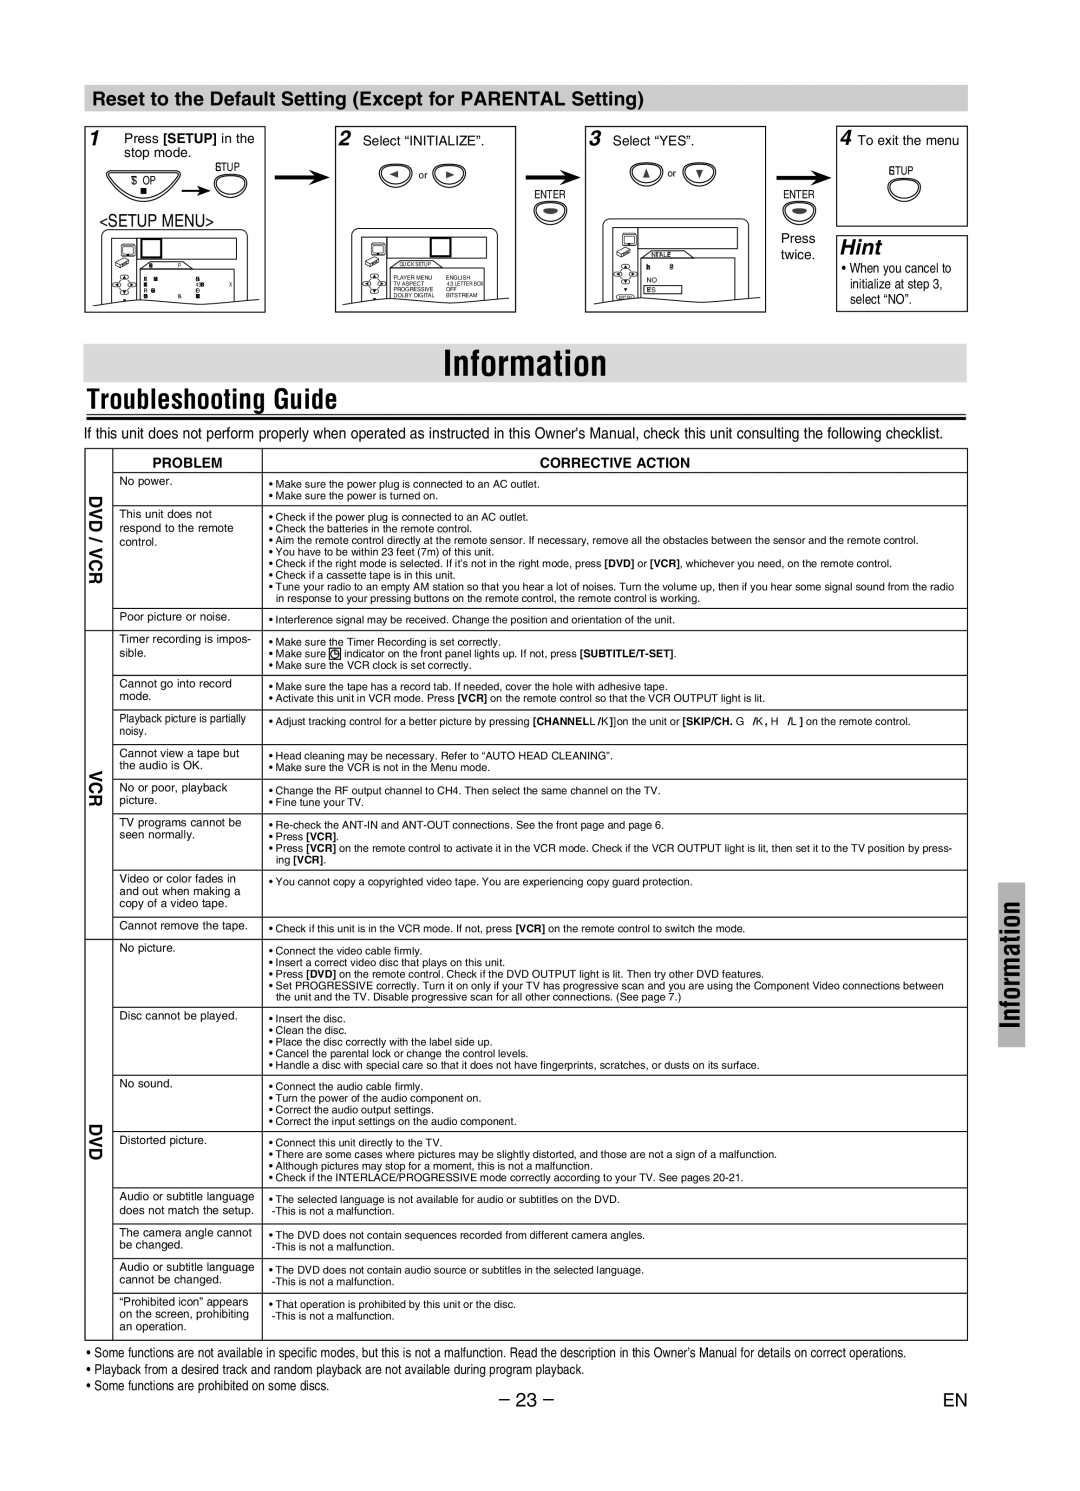
Reset to the Default Setting (Except for PARENTAL Setting)

1

Press [SETUP] in the

2 Select “INITIALIZE”.

3 Select “YES”.


stop mode.


SETUP

or

or


STOP


ENTER

<SETUP MENU>


INITIALIZE

QUICK SETUP


QUICK SETUP


Initialize?

PLAYER MENU

ENGLISH

PLAYER MENU

ENGLISH

NO

TV ASPECT

4:3 LETTER BOX

TV ASPECT

4:3 LETTER BOX

YES

PROGRESSIVE

OFF

PROGRESSIVE

OFF

DOLBY DIGITAL

BITSTREAM

DOLBY DIGITAL

BITSTREAM

ENTER

To exit the menu

SETUP

ENTER

Presstwice. Hint

When you cancel to initialize at step , select “NO”.

Information

Troubleshooting Guide

If this unit does not perform properly when operated as instructed in this Owner's Manual, check this unit consulting the following checklist.

DVD / VCR

VCR

DVD

PROBLEM

No power.

This unit does not respond to the remote control.

Poor picture or noise.

Timer recording is impos- sible.

Cannot go into record mode.

Playback picture is partially noisy.

Cannot view a tape but the audio is OK.

No or poor, playback picture.

TV programs cannot be seen normally.

Video or color fades in and out when making a copy of a video tape.

Cannot remove the tape.

No picture.

Disc cannot be played.

No sound.

Distorted picture.

Audio or subtitle language does not match the setup.

The camera angle cannot be changed.

Audio or subtitle language cannot be changed.

“Prohibited icon” appears on the screen, prohibiting an operation.

CORRECTIVE ACTION

Make sure the power plug is connected to an AC outlet.

Make sure the power is turned on.

Check if the power plug is connected to an AC outlet.

Check the batteries in the remote control.

Aim the remote control directly at the remote sensor. If necessary, remove all the obstacles between the sensor and the remote control.

You have to be within 2 feet (7m) of this unit.

Check if the right mode is selected. If it’s not in the right mode, press [DVD] or [VCR], whichever you need, on the remote control.

Check if a cassette tape is in this unit.

Tune your radio to an empty AM station so that you hear a lot of noises. Turn the volume up, then if you hear some signal sound from the radio in response to your pressing buttons on the remote control, the remote control is working.

Interference signal may be received. Change the position and orientation of the unit.

Make sure the Timer Recording is set correctly.

Make sure indicator on the front panel lights up. If not, press [SUBTITLE/T-SET].

Make sure the VCR clock is set correctly.

Make sure the tape has a record tab. If needed, cover the hole with adhesive tape.

Activate this unit in VCR mode. Press [VCR] on the remote control so that the VCR OUTPUT light is lit.

Adjust tracking control for a better picture by pressing [CHANNELL/K]] on the unit or [SKIP/CH. G/K, H/L] on the remote control.

Head cleaning may be necessary. Refer to “AUTO HEAD CLEANING”.

Make sure the VCR is not in the Menu mode.

Change the RF output channel to CH4. Then select the same channel on the TV.

Fine tune your TV.

Re-check the ANT-IN and ANT-OUT connections. See the front page and page 6.

Press [VCR].

Press [VCR] on the remote control to activate it in the VCR mode. Check if the VCR OUTPUT light is lit, then set it to the TV position by press- ing [VCR].

You cannot copy a copyrighted video tape. You are experiencing copy guard protection.

Check if this unit is in the VCR mode. If not, press [VCR] on the remote control to switch the mode.

Connect the video cable fi rmly.

Insert a correct video disc that plays on this unit.

Press [DVD] on the remote control. Check if the DVD OUTPUT light is lit. Then try other DVD features.

Set PROGRESSIVE correctly. Turn it on only if your TV has progressive scan and you are using the Component Video connections between the unit and the TV. Disable progressive scan for all other connections. (See page 7.)

Insert the disc.

Clean the disc.

Place the disc correctly with the label side up.

Cancel the parental lock or change the control levels.

Handle a disc with special care so that it does not have fi ngerprints, scratches, or dusts on its surface.

Connect the audio cable fi rmly.

Turn the power of the audio component on.

Correct the audio output settings.

Correct the input settings on the audio component.

Connect this unit directly to the TV.

There are some cases where pictures may be slightly distorted, and those are not a sign of a malfunction.

Although pictures may stop for a moment, this is not a malfunction.

Check if the INTERLACE/PROGRESSIVE mode correctly according to your TV. See pages 20-21.

The selected language is not available for audio or subtitles on the DVD.

-This is not a malfunction.

The DVD does not contain sequences recorded from different camera angles. -This is not a malfunction.

The DVD does not contain audio source or subtitles in the selected language. -This is not a malfunction.

That operation is prohibited by this unit or the disc.

-This is not a malfunction.

Information

• Some functions are not available in specific modes, but this is not a malfunction. Read the description in this Owner’s Manual for details on correct operations.


• Playback from a desired track and random playback are not available during program playback.


• Some functions are prohibited on some discs.

– 2

EN


Page 23
Image 23
Sylvania DVC840G owner manual Information, Troubleshooting Guide, Reset to the Default Setting Except for Parental Setting

DVC840G specifications

The Sylvania DVC840G is a versatile multimedia device designed for those who appreciate quality entertainment on the go. Combining the functionalities of a portable DVD player with a host of modern features, it caters to a variety of viewing preferences, making it an excellent choice for family outings or solo adventures.

One of the standout features of the DVC840G is its impressive 8-inch LCD screen, which provides a bright, vibrant display for an enhanced visual experience. The screen is designed with a high resolution, ensuring that movies, videos, and images appear sharp and clear. Additionally, its swivel feature allows users to adjust the screen for optimal viewing angles, whether sitting in a car or lounging on the couch.

The DVC840G supports a wide range of media formats. It plays DVDs, CD-Rs, CD-RWs, and even MP3 files, making it suitable for various types of content. The device can also handle different video formats, enabling users to enjoy their favorite media without compatibility issues. This flexibility is particularly appealing for families with varied entertainment preferences.

In terms of connectivity, the DVC840G features both USB and SD card slots, allowing users to access their digital media files with ease. This means users can bring along their favorite movies or music stored on USB drives or memory cards, adding convenience and versatility to the device.

Battery life is another key characteristic of the DVC840G. Equipped with a rechargeable battery, it provides ample playtime, enabling users to watch movies without continually searching for an outlet. This feature is especially beneficial for long trips, during which access to charging points may be limited.

The DVC840G also boasts a built-in AV output, which enables users to connect the device to external displays or televisions. This feature allows for larger viewing experiences, making it suitable for family gatherings or movie nights with friends.

In summary, the Sylvania DVC840G is an all-in-one portable DVD player that stands out with its 8-inch LCD screen, extensive media format compatibility, multiple connectivity options, and rechargeable battery. Its user-friendly design and versatility make it an essential device for anyone looking to enjoy films and music on the move. Whether for family trips or personal use, the DVC840G is a reliable companion for entertainment enthusiasts.