CAUTION
Invisible laser radiation will be emitted when the product is open and interlocks are defeated. Do not defeat the safety interlocks.
GRAPHIC SYMBOLS WITH SUPPLEMENTARY MARKINGS ARE LOCATED ON THE BOTTOM OF THE UNIT.
USE OF CONTROLS, ADJUSTMENTS, OR PERFORMANCE PROCEDURE HEREIN MAY RESULT IN HAZARDOUS RADIATION EXPOSURE.
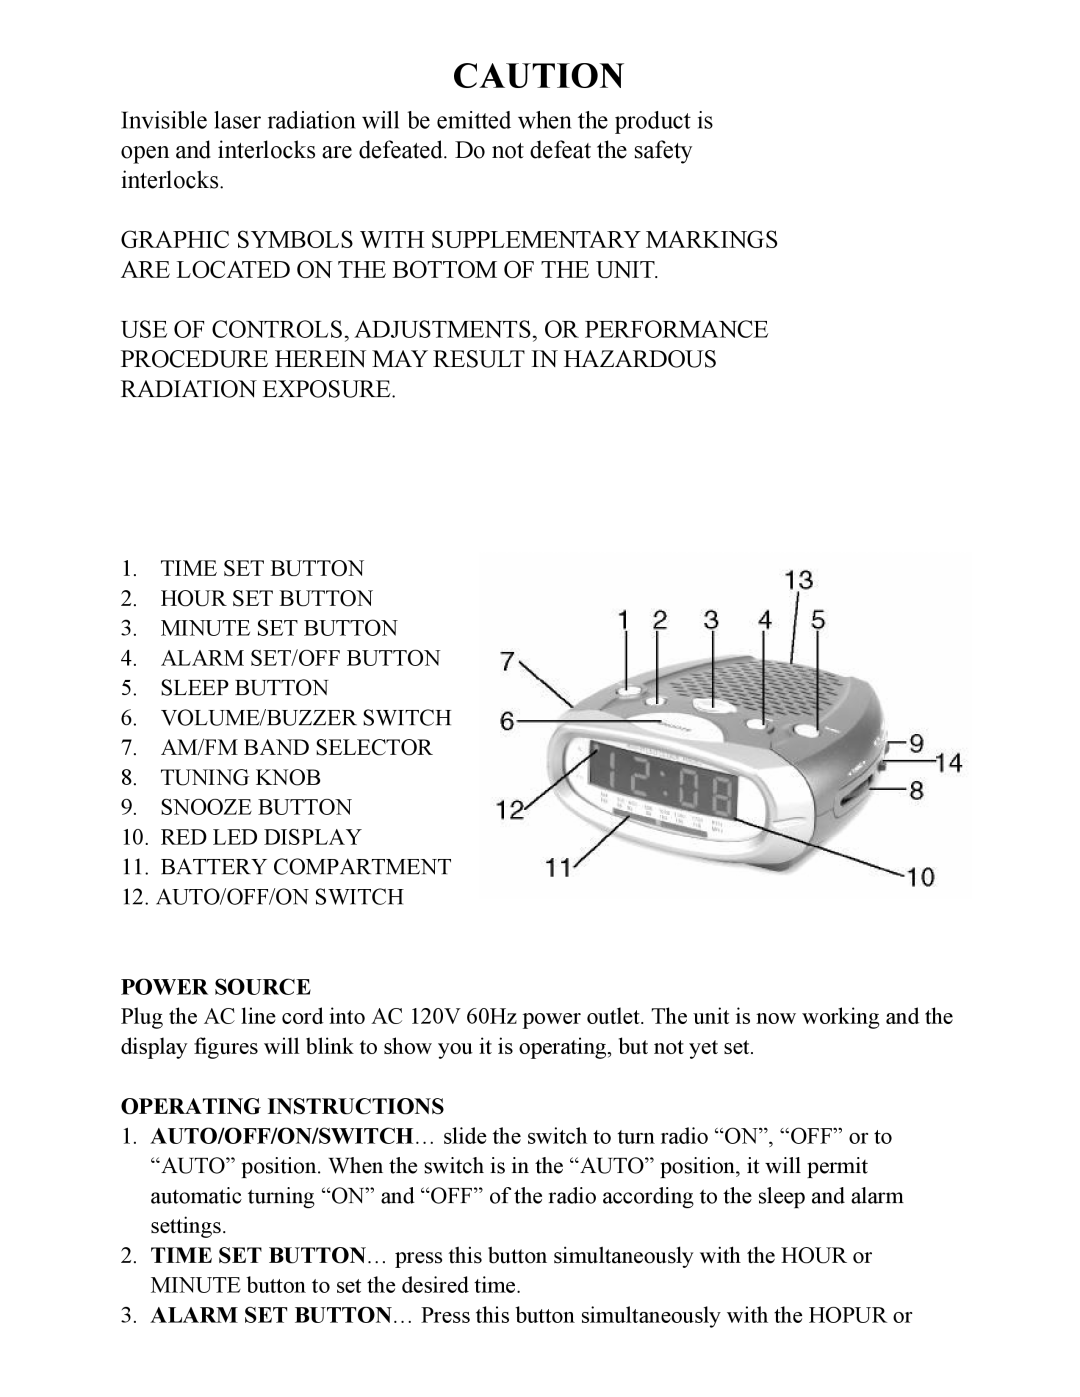
1.TIME SET BUTTON
2.HOUR SET BUTTON
3.MINUTE SET BUTTON
4.ALARM SET/OFF BUTTON
5.SLEEP BUTTON
6.VOLUME/BUZZER SWITCH
7.AM/FM BAND SELECTOR
8.TUNING KNOB
9.SNOOZE BUTTON
10.RED LED DISPLAY
11.BATTERY COMPARTMENT
12.AUTO/OFF/ON SWITCH
POWER SOURCE
Plug the AC line cord into AC 120V 60Hz power outlet. The unit is now working and the display figures will blink to show you it is operating, but not yet set.
OPERATING INSTRUCTIONS
1.AUTO/OFF/ON/SWITCH… slide the switch to turn radio “ON”, “OFF” or to “AUTO” position. When the switch is in the “AUTO” position, it will permit automatic turning “ON” and “OFF” of the radio according to the sleep and alarm settings.
2.TIME SET BUTTON… press this button simultaneously with the HOUR or MINUTE button to set the desired time.
3.ALARM SET BUTTON… Press this button simultaneously with the HOPUR or