Fig. 1
1
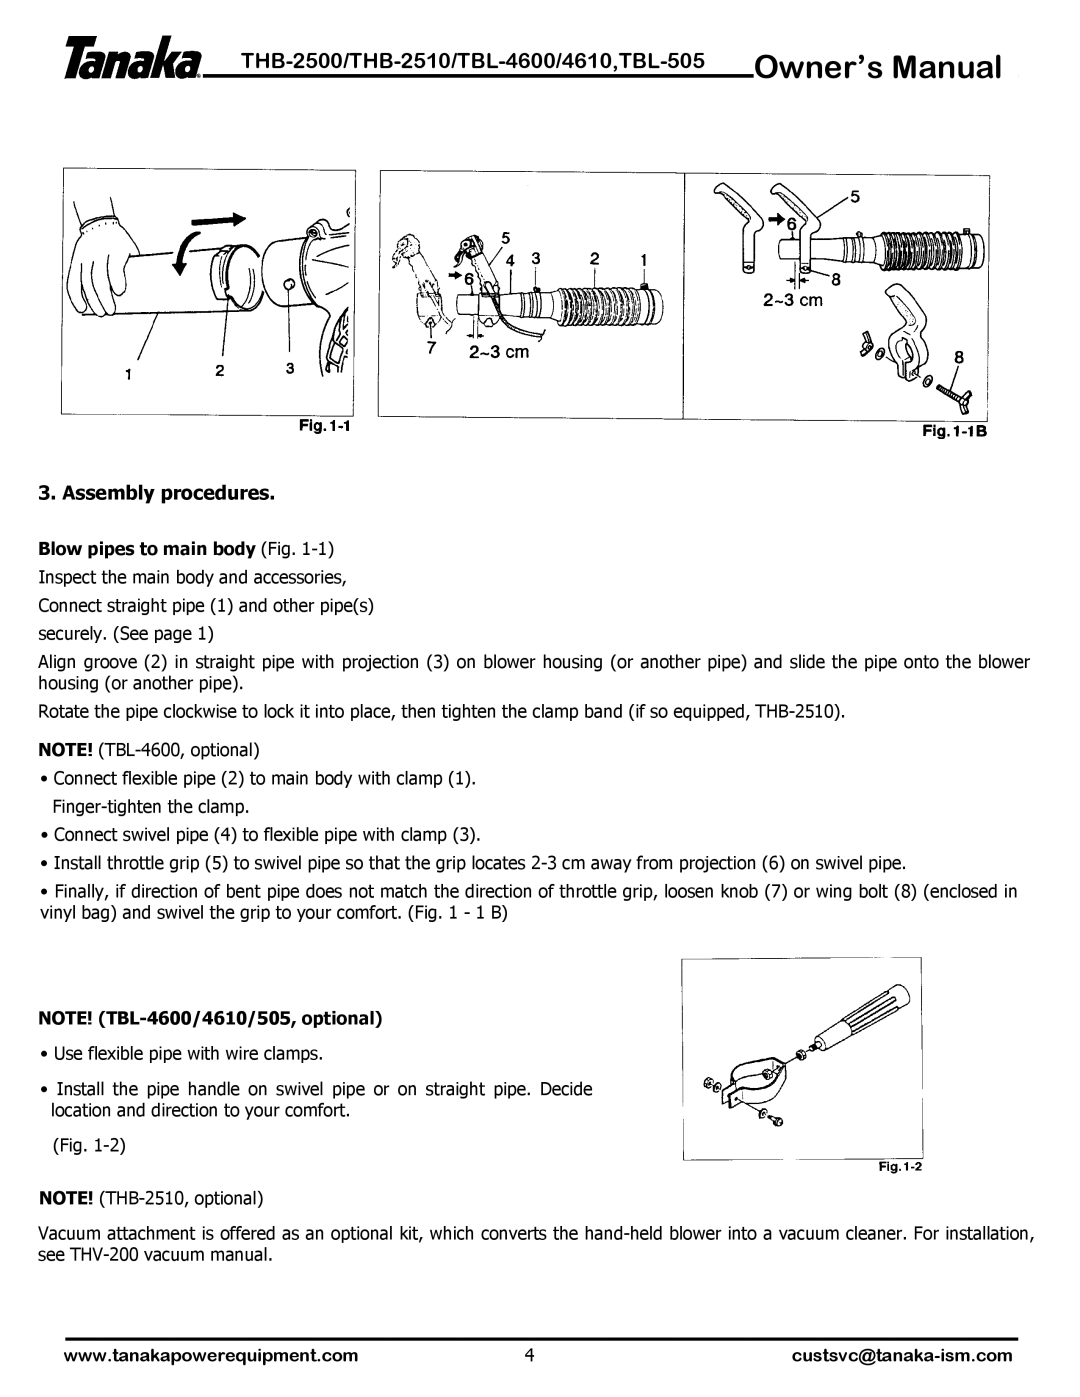
3. Assembly procedures.
Blow pipes to main body (Fig. 1-1)
Inspect the main body and accessories, Connect straight pipe (1) and other pipe(s) securely. (See page 1)
Align groove (2) in straight pipe with projection (3) on blower housing (or another pipe) and slide the pipe onto the blower housing (or another pipe).
Rotate the pipe clockwise to lock it into place, then tighten the clamp band (if so equipped,
NOTE!
•Connect flexible pipe (2) to main body with clamp (1).
•Connect swivel pipe (4) to flexible pipe with clamp (3).
•Install throttle grip (5) to swivel pipe so that the grip locates
•Finally, if direction of bent pipe does not match the direction of throttle grip, loosen knob (7) or wing bolt (8) (enclosed in vinyl bag) and swivel the grip to your comfort. (Fig. 1 - 1 B)
NOTE!
•Use flexible pipe with wire clamps.
•Install the pipe handle on swivel pipe or on straight pipe. Decide location and direction to your comfort.
(Fig.
NOTE!
Vacuum attachment is offered as an optional kit, which converts the
www.tanakapowerequipment.com | 4 |