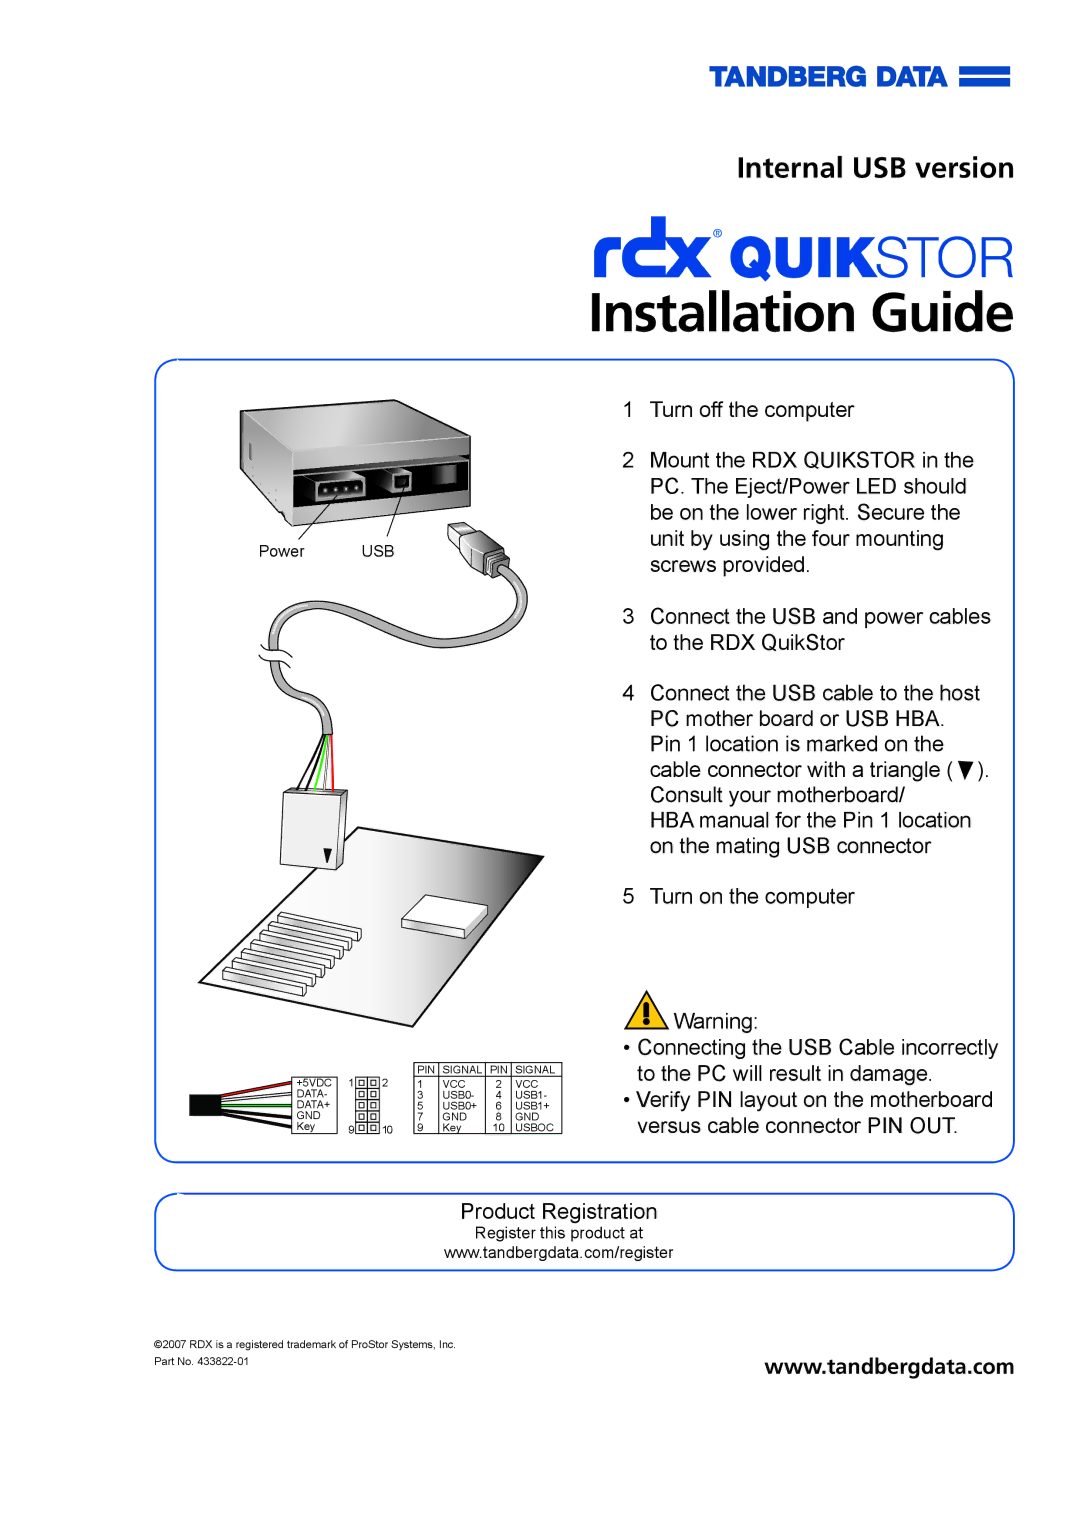
Power USB
|
|
|
|
|
|
| PIN | SIGNAL | PIN | SIGNAL |
|
| +5VDC | 1 |
|
| 2 | 1 | VCC | 2 | VCC |
|
| DATA- |
|
|
|
| 3 | USB0- | 4 | USB1- |
|
| DATA+ |
|
|
|
| 5 | USB0+ | 6 | USB1+ |
|
| GND |
|
|
|
| 7 | GND | 8 | GND |
|
| Key | 9 |
|
| 10 | 9 | Key | 10 | USBOC |
Internal USB version
Installation Guide
1Turn off the computer
2Mount the RDX Quikstor in the PC. The Eject/Power LED should be on the lower right. Secure the unit by using the four mounting screws provided.
3Connect the USB and power cables to the RDX QuikStor
4Connect the USB cable to the host PC mother board or USB HBA. Pin 1 location is marked on the
cable connector with a triangle ( ![]() ). Consult your motherboard/
). Consult your motherboard/
HBA manual for the Pin 1 location on the mating USB connector
5Turn on the computer
![]() Warning:
Warning:
•Connecting the USB Cable incorrectly to the PC will result in damage.
•Verify pin layout on the motherboard versus cable connector pin out.
Product Registration
Register this product at
www.tandbergdata.com/register
©2007 RDX is a registered trademark of ProStor Systems, Inc.
Part No. | www.tandbergdata.com |