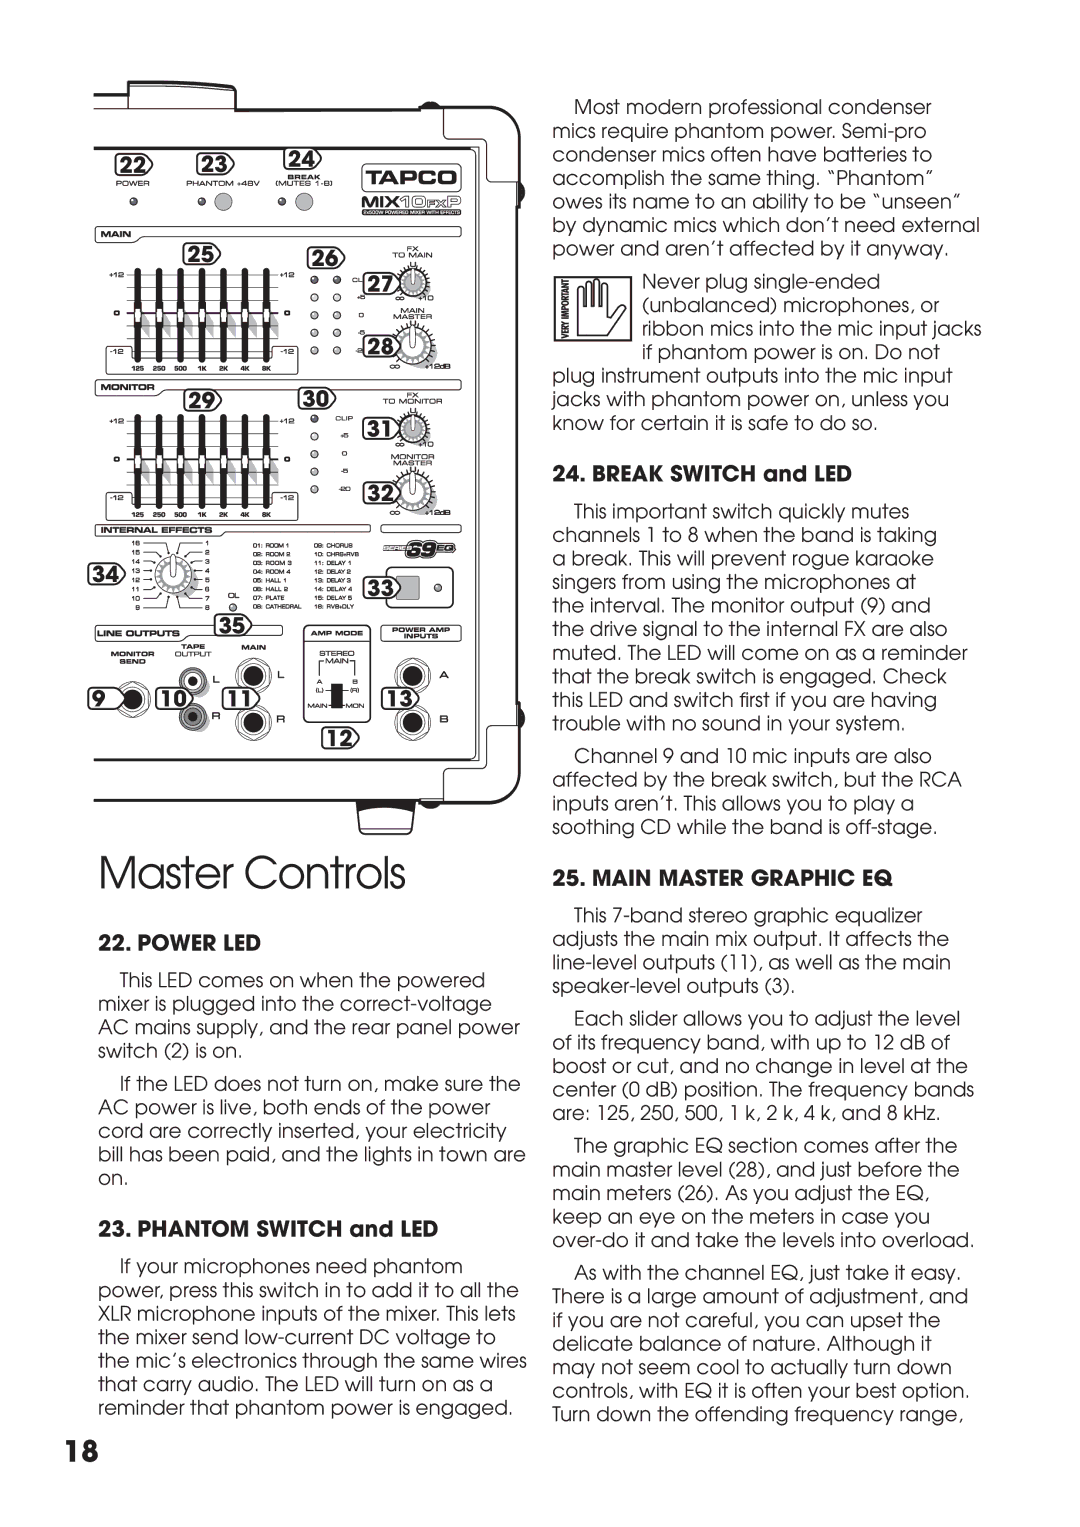
22 |
| 23 | 24 |
|
| 25 | 26 |
|
|
| 27 |
|
|
| 28 |
|
| 29 | 30 |
|
|
| 31 |
|
|
| 32 |
34 |
|
| 33 |
|
|
| |
|
| 35 |
|
9 | 10 | 11 | 13 |
|
|
| 12 |
Most modern professional condenser mics require phantom power.
![]() Never plug
Never plug
(unbalanced) microphones, or
ribbon mics into the mic input jacks if phantom power is on. Do not
plug instrument outputs into the mic input jacks with phantom power on, unless you know for certain it is safe to do so.
24. BREAK SWITCH and LED
This important switch quickly mutes channels 1 to 8 when the band is taking a break. This will prevent rogue karaoke singers from using the microphones at the interval. The monitor output (9) and the drive signal to the internal FX are also muted. The LED will come on as a reminder that the break switch is engaged. Check this LED and switch fi rst if you are having trouble with no sound in your system.
Channel 9 and 10 mic inputs are also affected by the break switch, but the RCA inputs aren’t. This allows you to play a soothing CD while the band is
Master Controls
22. POWER LED
This LED comes on when the powered mixer is plugged into the
If the LED does not turn on, make sure the AC power is live, both ends of the power cord are correctly inserted, your electricity bill has been paid, and the lights in town are on.
23. PHANTOM SWITCH and LED
If your microphones need phantom power, press this switch in to add it to all the XLR microphone inputs of the mixer. This lets the mixer send
18
25. MAIN MASTER GRAPHIC EQ
This
Each slider allows you to adjust the level of its frequency band, with up to 12 dB of boost or cut, and no change in level at the center (0 dB) position. The frequency bands are: 125, 250, 500, 1 k, 2 k, 4 k, and 8 kHz.
The graphic EQ section comes after the main master level (28), and just before the main meters (26). As you adjust the EQ, keep an eye on the meters in case you
As with the channel EQ, just take it easy. There is a large amount of adjustment, and if you are not careful, you can upset the delicate balance of nature. Although it may not seem cool to actually turn down controls, with EQ it is often your best option. Turn down the offending frequency range,