1 − Introduction
Use of the remote control unit
•Do not expose the infrared receiver (light receptive area on the front panel) to direct sunlight or intense light for extended periods of time. Long exposure to this light may result in failure of the remote control sensor.
•When the remote control will not be used over one month, please remove the batteries to prevent the pos- sibility of battery acid leakage which could damage the unit. Should leakage occur, remove and discard the batteries, and wipe the battery case thoroughly with a cloth. Avoid getting the battery liquid on the skin. After cleaning, replace with new batteries.
•The remote control functions by using an infrared light signal. When using the unit to control the
other devices that are turned on could be operated by its signal.
•If the range of remote operation becomes smaller, or commands do not always function properly, the batter- ies have become weak and should be replaced. Always replace both batteries with new batteries of the same type.
•Point the remote control to the remote sensor on the main unit. Do not obstruct the path between the remote control and the remote sensor.
Batteries
If batteries are used improperly, or if leakage or breakage occurs, the unit will not function.
Please observe the cautions indicated on the batteries and their packaging to ensure proper usage.
•Confirm + and – polarity and follow the indications when inserting new batteries into the remote control.
•Do not use old and new batteries together.
•Even if the battery is the same size, the voltage may differ. Do not use batteries of different specifications together.
•Do not attempt to recharge batteries that are non- rechargeable.
•Do not open or disassemble batteries, throw them into a fire or put them in water.
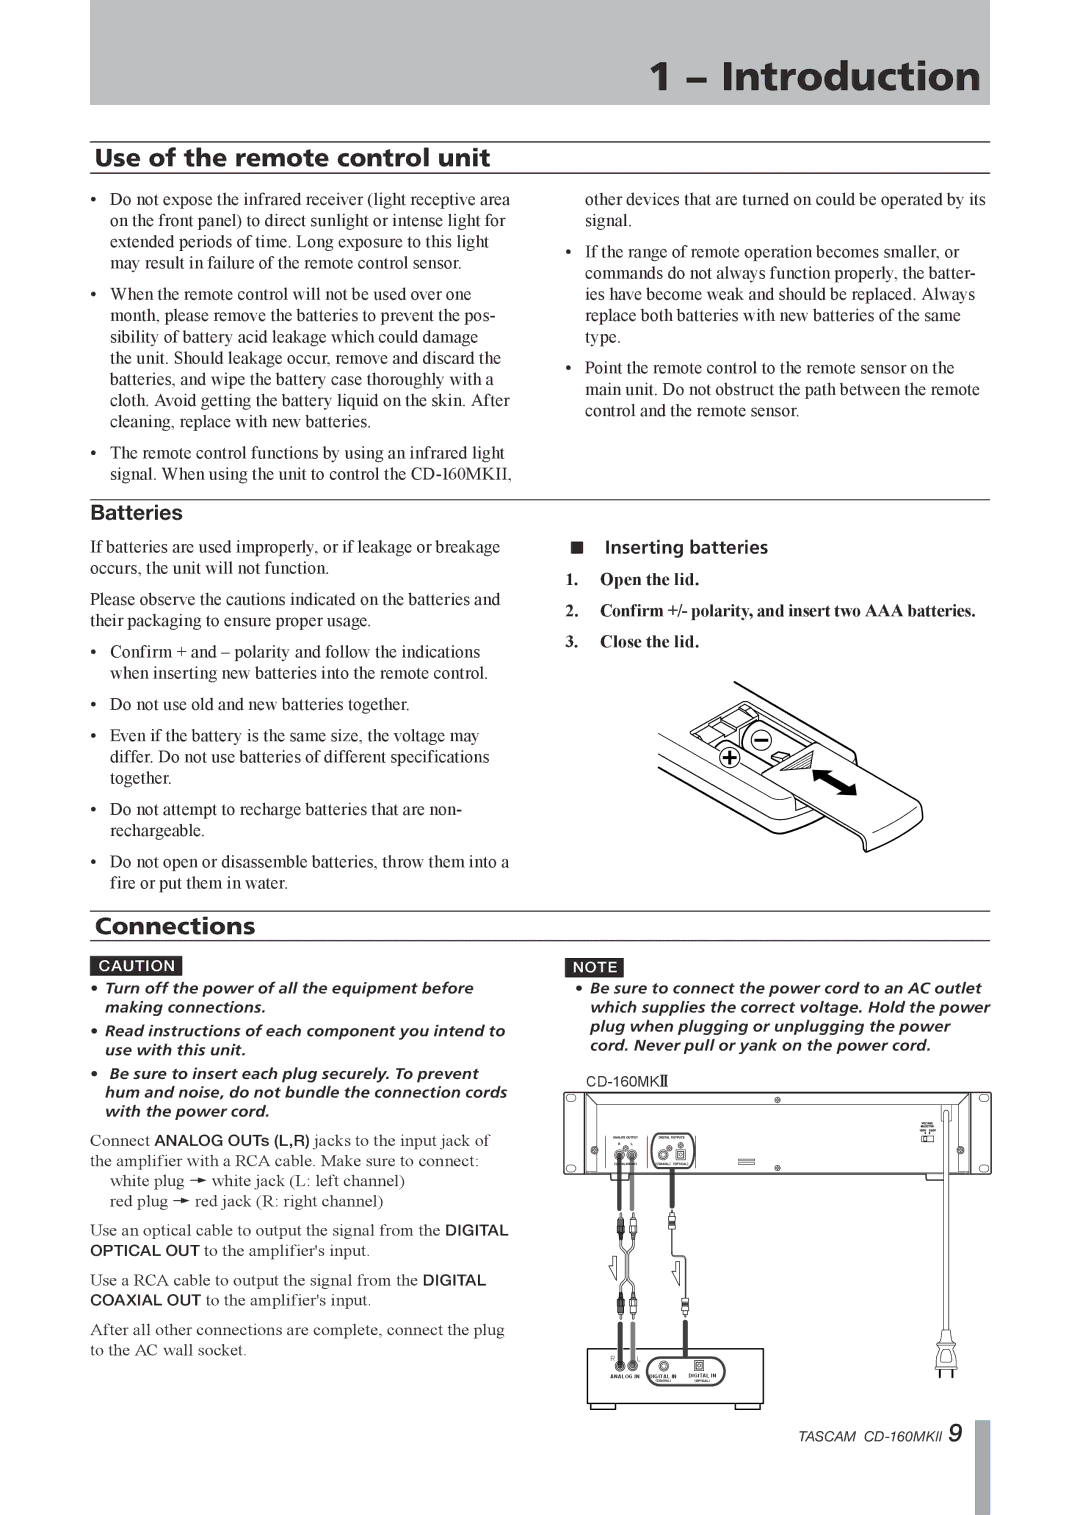
ªInserting batteries
1.Open the lid.
2.Confirm +/- polarity, and insert two AAA batteries.
3.Close the lid.
Connections
CAUTION |
| NOTE |
|
|
|
•Turn off the power of all the equipment before making connections.
•Read instructions of each component you intend to use with this unit.
•Be sure to insert each plug securely. To prevent hum and noise, do not bundle the connection cords with the power cord.
Connect ANALOG OUTs (L,R) jacks to the input jack of the amplifier with a RCA cable. Make sure to connect:
white plug ∑ white jack (L: left channel)
red plug ∑ red jack (R: right channel)
Use an optical cable to output the signal from the DIGITAL OPTICAL OUT to the amplifier's input.
Use a RCA cable to output the signal from the DIGITAL COAXIAL OUT to the amplifier's input.
After all other connections are complete, connect the plug to the AC wall socket.
•Be sure to connect the power cord to an AC outlet which supplies the correct voltage. Hold the power plug when plugging or unplugging the power cord. Never pull or yank on the power cord.
R L
ANALOG IN DIGITAL IN | DIGITAL IN |
TASCAM