CAMERA SETUP
Open the Cam by pulling out on the two latches on the right side. Install 4 “C” cell batteries (flat base of all batteries contacting springs), and insert an SD card (not included, use any capacity from 16MB to 8GB. Do not substitute MMC cards.) in the slot to the right of the 5 buttons as indicated on the slot cover (upside down, with the notched corner of the card on the left and metal contacts of the card facing the back of the slot). Press the card down until you hear it click into place. If the Cam is turned on without a card in place, it may not turn
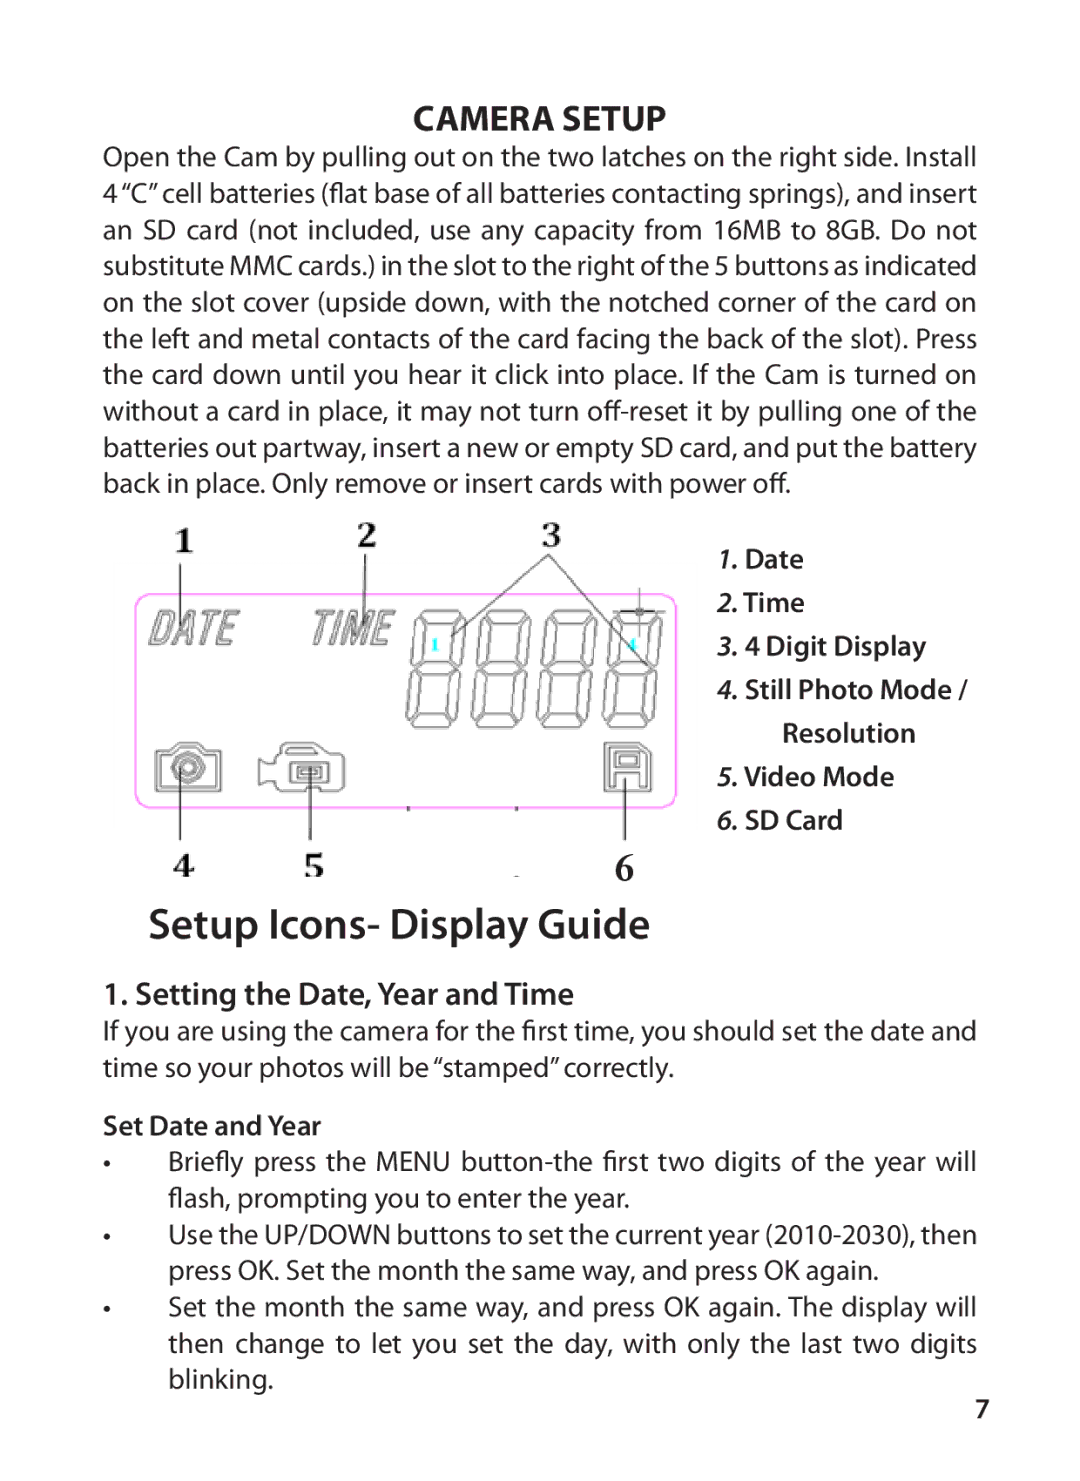
1. Date
2. Time
3. 4 Digit Display
4. Still Photo Mode /
Resolution
5. Video Mode
6. SD Card
6
Setup Icons- Display Guide
1. Setting the Date, Year and Time
If you are using the camera for the first time, you should set the date and time so your photos will be “stamped” correctly.
Set Date and Year
•Briefly press the MENU
•Use the UP/DOWN buttons to set the current year
•Set the month the same way, and press OK again. The display will then change to let you set the day, with only the last two digits blinking.
7