Placing the Antenna |
SIR6 | Section 1: Antenna should be mounted facing |
| |
| EAST or NORTHEAST |
| Section 2: Antenna should be mounted facing |
| NORTH or NORTHEAST |
| Section 3: Antenna should be mounted facing |
| NORTH or NORTHWEST |
| Section 4: Antenna should be mounted facing |
| WEST or NORTHWEST |
| Section 5: Place the antenna |
| ONLY ON THE ROOF or MAST ON THE ROOF |
NOTE: To achieve best SIRIUS Satellite Radio reception, also refer to your SIRIUS radio owner’s manual.
Installation
Now that you have determined where to place the antenna, you have three different mounting options. Each option is described below.
or
Wall Mount
We recommend mounting the bracket horizontally if mounting to a
the house. Then screw in the bottom two. At this point, move onto the Adjustment section of the owner‘s manual on page 6.![]()
Roof Mount
4
Installation
SIR6 | We recommend mounting the bracket vertically on a |
| |
| roof as high up as possible as shown on page 4. |
| The antenna should not be blocked by an obstruction like |
| trees or a chimney. Once you have determined your |
| mounting location, place the mounting bracket on that |
| location on the roof. Take your drill and |
| using a 3/32 drill bit, through the top two holes on the |
| mounting bracket. Screw in two of the #10 screws |
| included with this package, through the mounting bracket |
| into the |
| the bottom two holes. At this point, move onto the |
| Adjustment section of the owner’s manual on page 6. |
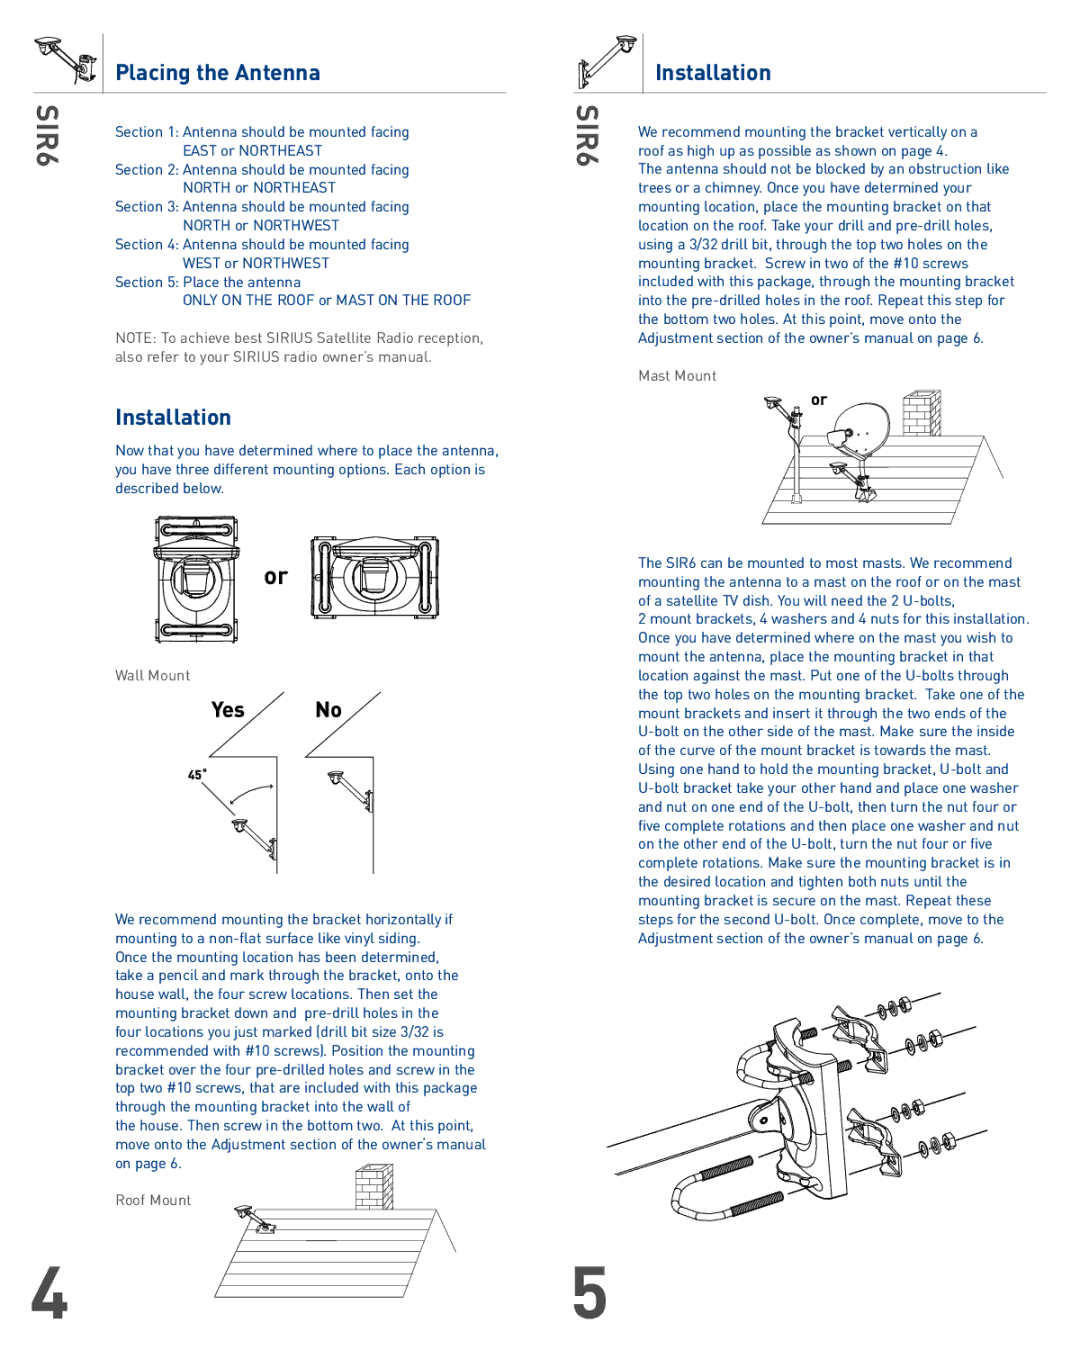
Mast Mount
or |
The SIR6 can be mounted to most masts. We recommend mounting the antenna to a mast on the roof or on the mast of a satellite TV dish. You will need the 2
2 mount brackets, 4 washers and 4 nuts for this installation. Once you have determined where on the mast you wish to mount the antenna, place the mounting bracket in that location against the mast. Put one of the
5