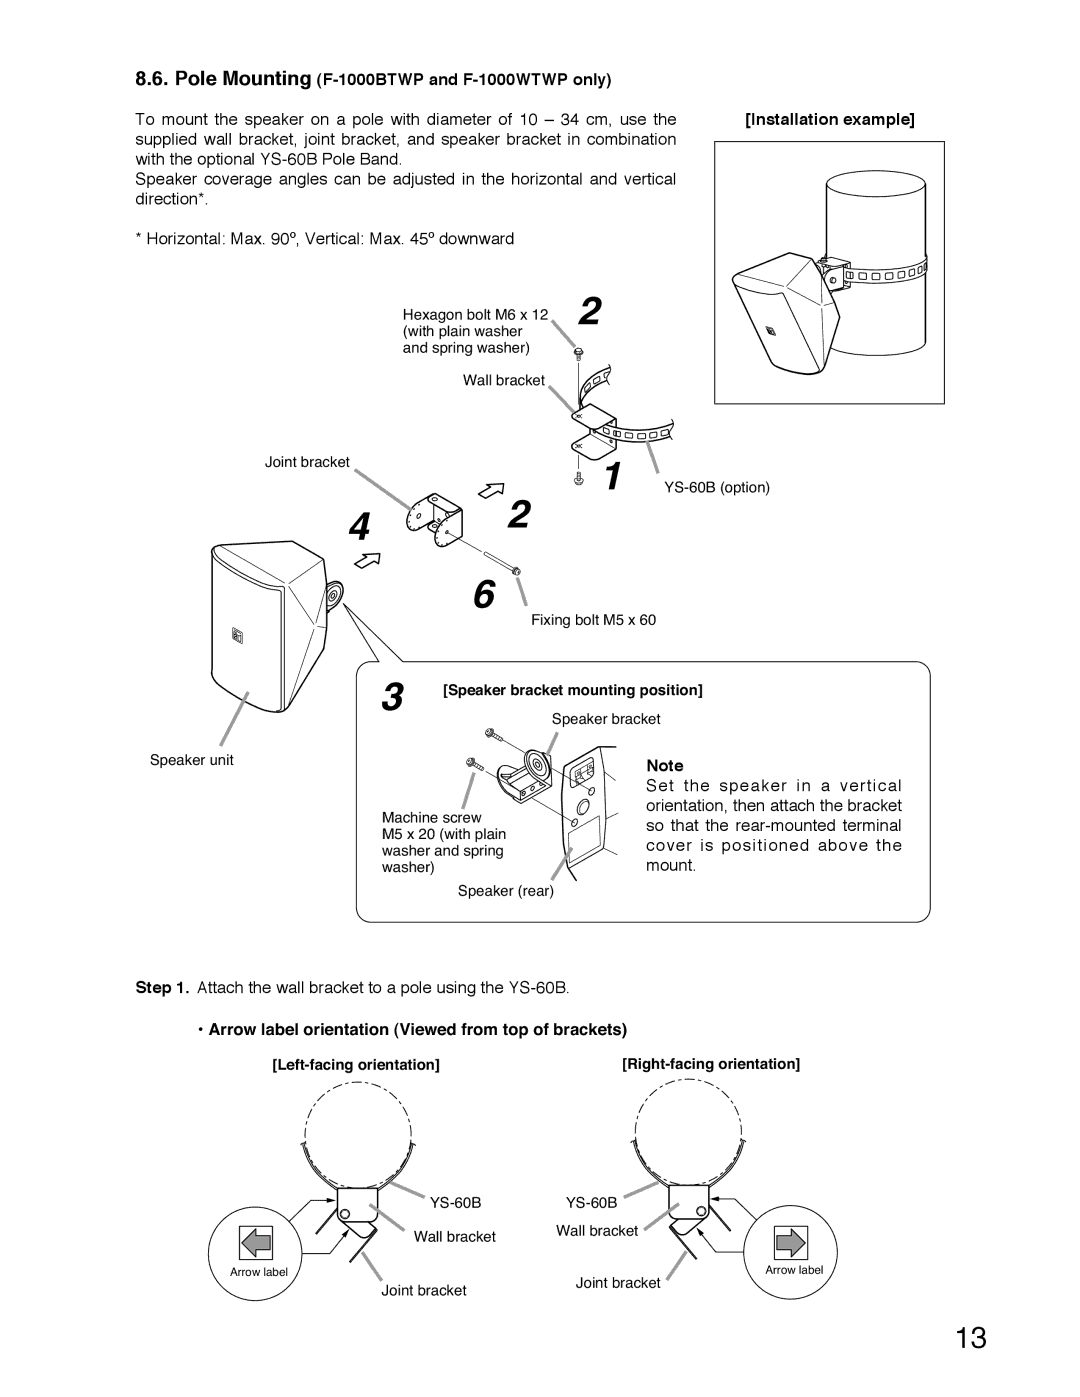
8.6. Pole Mounting |
|
|
|
To mount the speaker on a pole with diameter of 10 – 34 cm, use the | [Installation example] | ||
supplied wall bracket, joint bracket, and speaker bracket in combination |
|
|
|
|
|
| |
with the optional |
|
|
|
Speaker coverage angles can be adjusted in the horizontal and vertical |
|
|
|
direction*. |
|
|
|
* Horizontal: Max. 90º, Vertical: Max. 45º downward |
|
|
|
|
|
|
|
Joint bracket
4
Hexagon bolt M6 x 12 (with plain washer and spring washer)
Wall bracket
 2 6
2 6
2
1 |
Fixing bolt M5 x 60
3[Speaker bracket mounting position] Speaker bracket
Speaker unit
Machine screw
M5 x 20 (with plain washer and spring washer)
Speaker (rear)
Note
Set the speaker in a vertical orientation, then attach the bracket so that the
Step 1. Attach the wall bracket to a pole using the
• Arrow label orientation (Viewed from top of brackets)
Wall bracket | Wall bracket |
| |
Arrow label | Arrow label |
Joint bracket | Joint bracket |
|
13