To Install the Normal Thread Spool
1.Loosen the Bobbin Nut and take off Bobbin.
2.Connect the Spool Pin on Bobbin Shaft.
3.Slip thread spool on spool pin.
4.Put the white Spool Cap on the Spool Pin to secure the
thread spool.
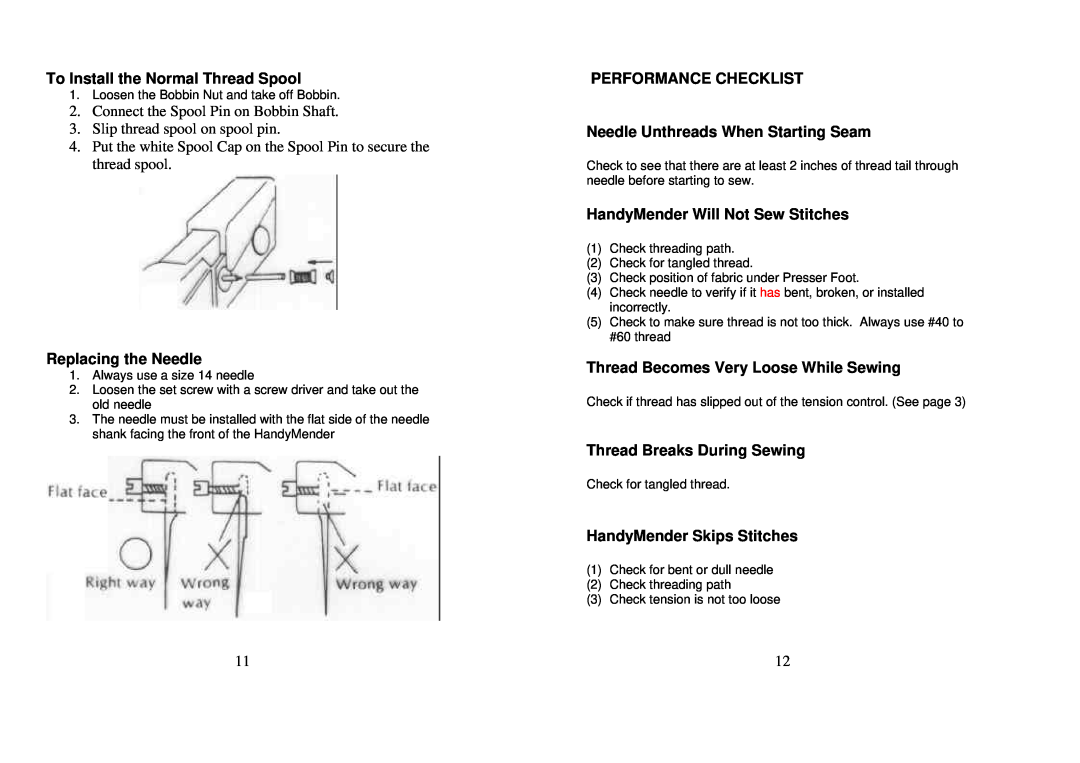
Replacing the Needle
1.Always use a size 14 needle
2.Loosen the set screw with a screw driver and take out the old needle
3.The needle must be installed with the flat side of the needle shank facing the front of the HandyMender
PERFORMANCE CHECKLIST
Needle Unthreads When Starting Seam
Check to see that there are at least 2 inches of thread tail through needle before starting to sew.
HandyMender Will Not Sew Stitches
(1)Check threading path.
(2)Check for tangled thread.
(3)Check position of fabric under Presser Foot.
(4)Check needle to verify if it has bent, broken, or installed incorrectly.
(5)Check to make sure thread is not too thick. Always use #40 to #60 thread
Thread Becomes Very Loose While Sewing
Check if thread has slipped out of the tension control. (See page 3)
Thread Breaks During Sewing
Check for tangled thread.
HandyMender Skips Stitches
(1)Check for bent or dull needle
(2)Check threading path
(3)Check tension is not too loose
11 | 12 |