2.Installing the Discharge Chute
3 | Screws |
|
|
1 | Chute assembly |
|
|
Procedure
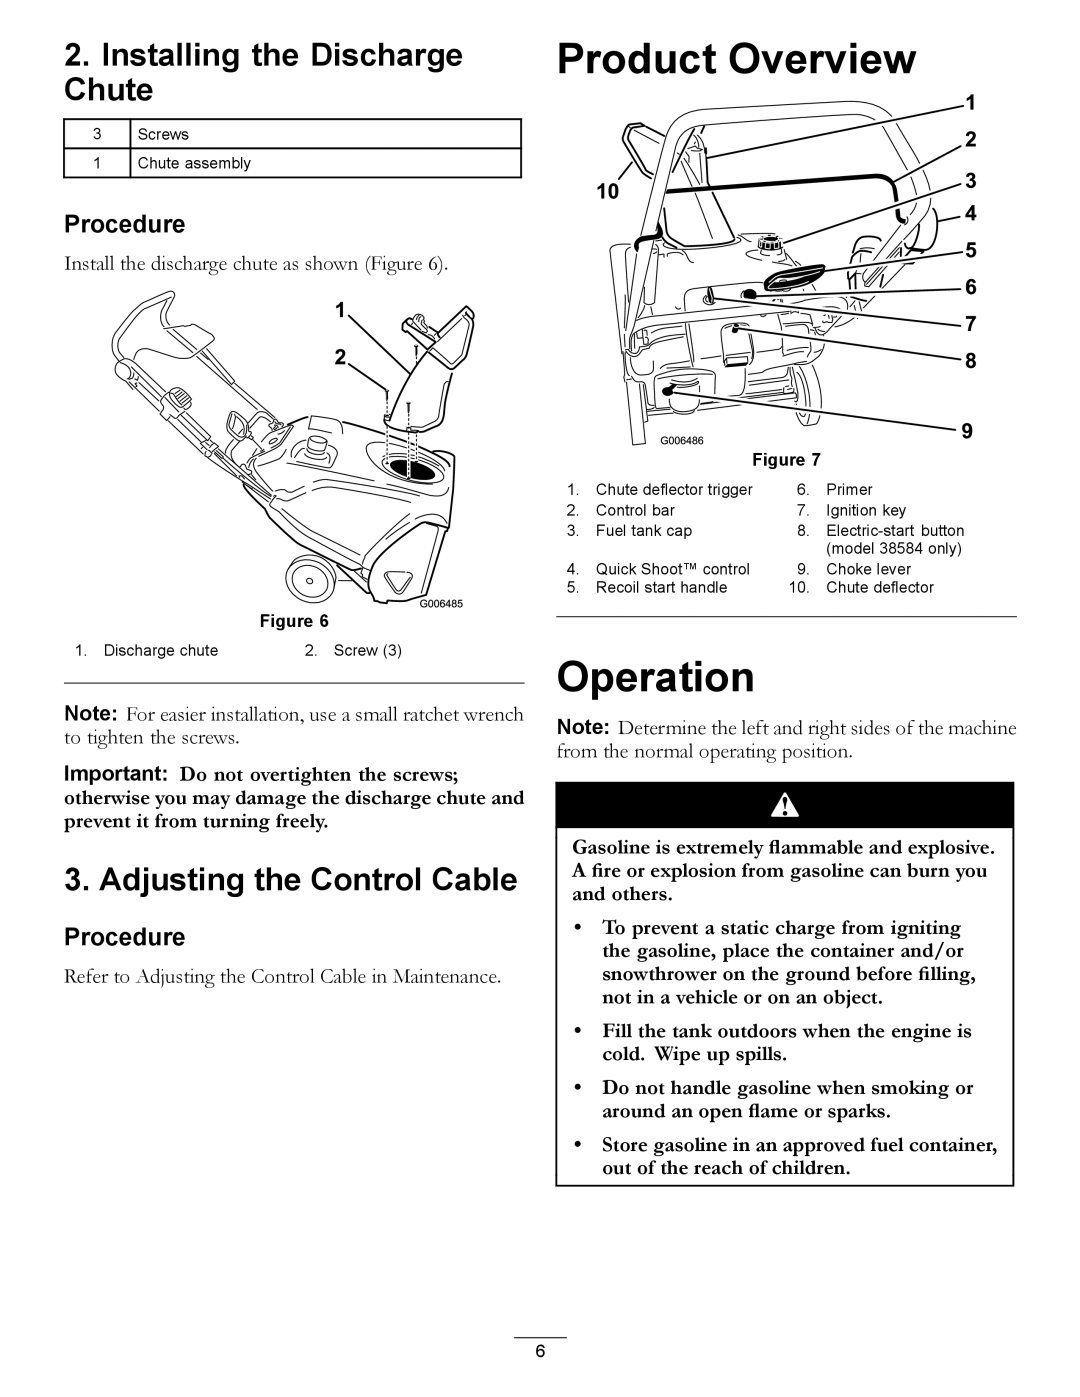
Install the discharge chute as shown (Figure 6).
Figure 6
1. Discharge chute | 2. Screw (3) |
Note: For easier installation, use a small ratchet wrench to tighten the screws.
Important: Do not overtighten the screws; otherwise you may damage the discharge chute and prevent it from turning freely.
3. Adjusting the Control Cable
Procedure
Refer to Adjusting the Control Cable in Maintenance.
Product Overview
Figure 7
1. | Chute deflector trigger | 6. | Primer |
2. | Control bar | 7. | Ignition key |
3. | Fuel tank cap | 8. | |
|
|
| (model 38584 only) |
4. | Quick Shoot™ control | 9. | Choke lever |
5. | Recoil start handle | 10. | Chute deflector |
|
|
|
|
Operation
Note: Determine the left and right sides of the machine from the normal operating position.
Gasoline is extremely flammable and explosive. A fire or explosion from gasoline can burn you and others.
•To prevent a static charge from igniting the gasoline, place the container and/or snowthrower on the ground before filling, not in a vehicle or on an object.
•Fill the tank outdoors when the engine is cold. Wipe up spills.
•Do not handle gasoline when smoking or around an open flame or sparks.
•Store gasoline in an approved fuel container, out of the reach of children.
6