
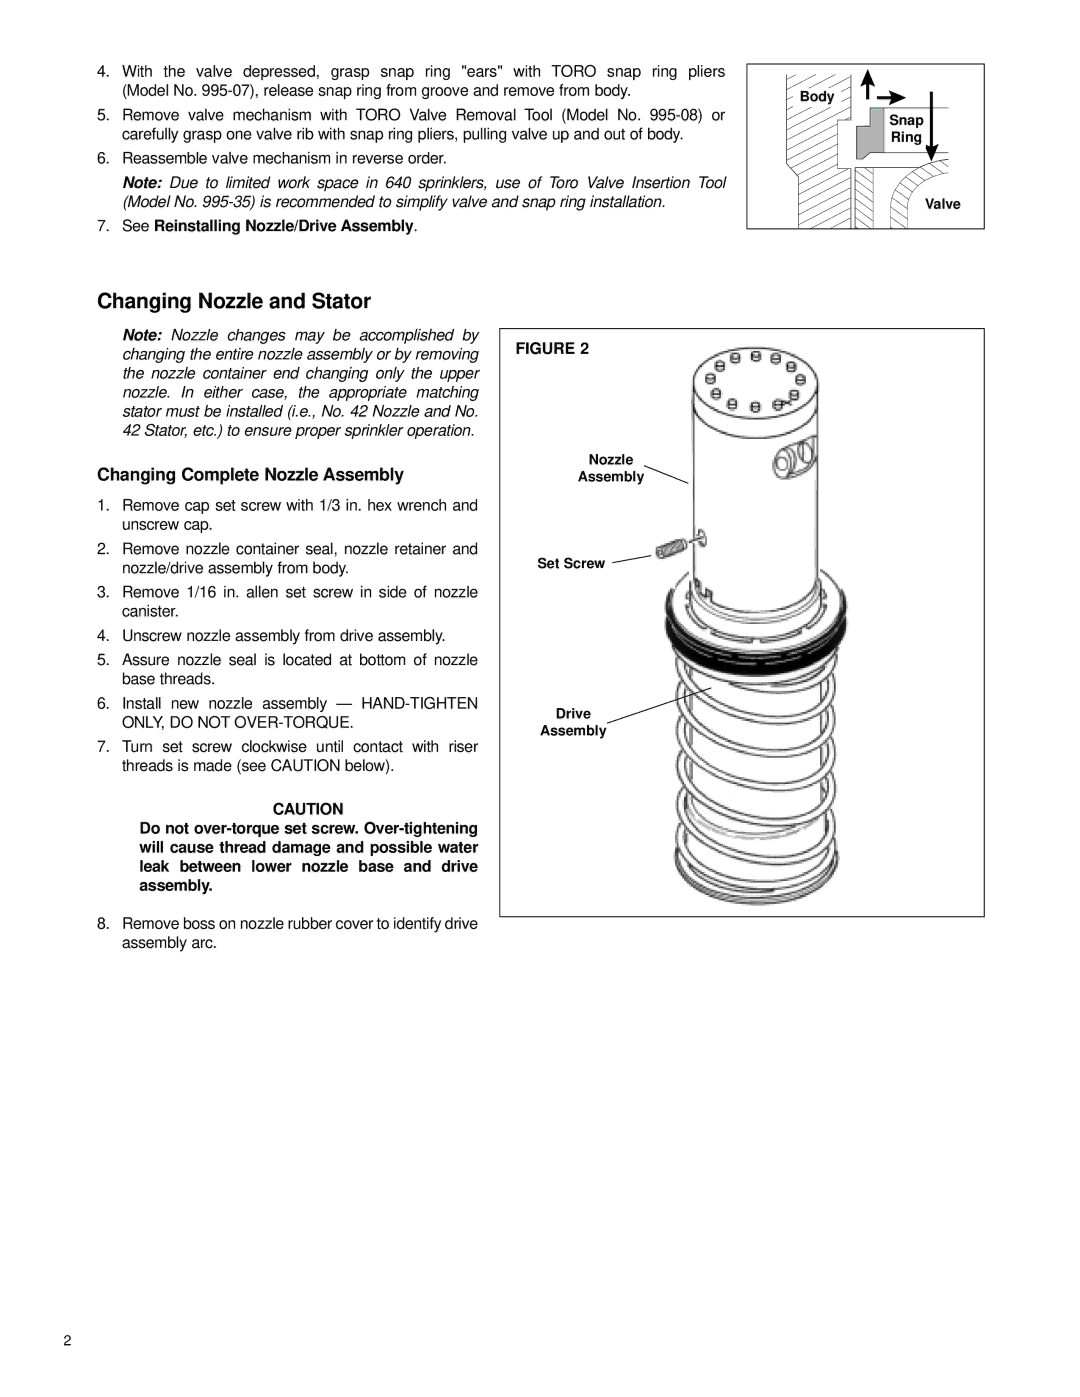
640 specifications
The Toro 640 is a highly regarded model in the Toro lineup, offering exceptional performance and advanced features that cater to both professional landscapers and homeowners. Designed for versatility and efficiency, the Toro 640 stands out with its robust construction and cutting-edge technology.One of the standout features of the Toro 640 is its powerful engine. Equipped with a reliable and efficient engine, the 640 ensures that users can tackle a variety of lawn care tasks with ease. Whether it’s mowing, mulching, or bagging, this model delivers top-notch performance, ensuring a flawless cut every time.
The Toro 640 is renowned for its innovative SmartStow technology. This feature allows for convenient storage by folding the handle and standing the mower upright. This design not only saves space but also makes it easier to access tighter storage areas. This is especially beneficial for those with limited garage or shed space, as it maximizes efficiency and organization.
Another significant characteristic of the Toro 640 is its cutting system. The model typically includes a superior deck design that promotes an even cut and allows for exceptional grass dispersal. The adjustable cutting height provides users with the flexibility to manage different grass lengths, ensuring that the lawn always looks its best.
The Toro 640 is also designed with user comfort in mind. Its ergonomic handle provides a comfortable grip, reducing fatigue during prolonged use. Additionally, the self-propulsion feature allows users to move with ease across various terrains without requiring excessive effort, making lawn care a more enjoyable task.
In terms of technology, the Toro 640 incorporates advanced features such as an intuitive control panel and maintenance reminders. These elements ensure that the mower remains in optimal condition and that users are aware of necessary servicing, thus extending the life of the equipment.
For those concerned about environmental impact, the Toro 640 promotes eco-friendly practices. With options for mulching and bagging, users can choose to recycle the clippings back into the lawn or collect them for disposal, contributing to better lawn health while reducing waste.
In summary, the Toro 640 is a powerful, innovative lawn mower packed with features that enhance performance and user experience. Its smart storage capabilities, ergonomic design, and advanced cutting technology make it a top choice for anyone looking to achieve a pristine lawn. Whether for occasional use or daily yard maintenance, the Toro 640 stands as a reliable partner in lawn care.