27
:ADJUST
ENTER:SET
EXIT:END
OPTION MENU
CLEAR

Selecting the video input source

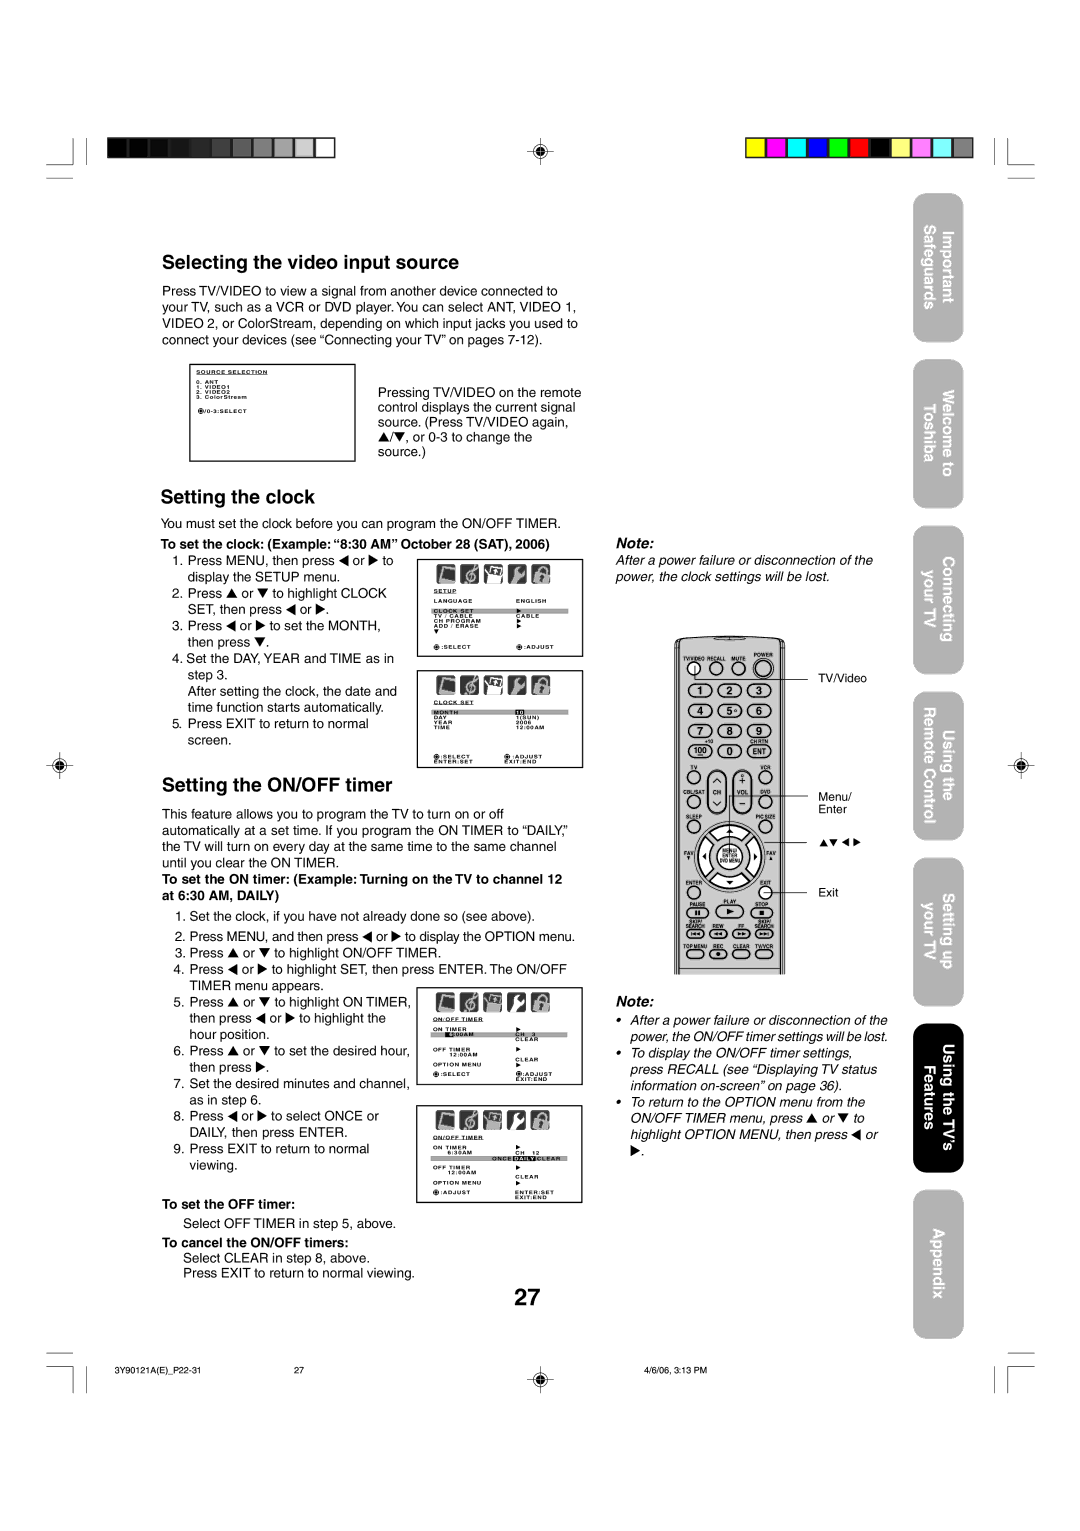
Press TV/VIDEO to view a signal from another device connected to your TV, such as a VCR or DVD player. You can select ANT, VIDEO 1, VIDEO 2, or ColorStream, depending on which input jacks you used to connect your devices (see “Connecting your TV” on pages 7-12).

SOURCE SELECTION


0

. ANT


1

. VIDEO1

Pressing TV/VIDEO on the remote

3

. ColorStream

2

. VIDEO2


/0 - 3:SELECT

control displays the current signal


source. (Press TV/VIDEO again,


/, or 0-3 to change the


source.)

Setting the clock

You must set the clock before you can program the ON/OFF TIMER.

To set the clock: (Example: “8:30 AM” October 28 (SAT), 2006)

Note:

Safeguards

Important

TWelcome oshiba to

1.Press MENU, then press or to display the SETUP menu.

2.Press or to highlight CLOCK SET, then press or .

3.Press or to set the MONTH, then press .

4.Set the DAY, YEAR and TIME as in step 3.

After setting the clock, the date and time function starts automatically.

5.Press EXIT to return to normal screen.

SETUP


LANGUAGE

ENGLISH

CLOCK SET


TV / CABLE

CABLE

CH PROGRAM


ADD / ERASE


:SELECT

:ADJUST


CLOCK SET


MONTH


10


DAY


1(SUN)


YEAR

2006


TIME


12:00AM


:SELECT


:ADJUST


ENTER:SET


EXIT:END


After a power failure or disconnection of the power, the clock settings will be lost.

TV/Video

yourConnecting TV

RemoteUsing

Setting the ON/OFF timer

This feature allows you to program the TV to turn on or off automatically at a set time. If you program the ON TIMER to “DAILY,” the TV will turn on every day at the same time to the same channel until you clear the ON TIMER.

To set the ON timer: (Example: Turning on the TV to channel 12 at 6:30 AM, DAILY)

1.Set the clock, if you have not already done so (see above).

2.Press MENU, and then press or to display the OPTION menu.

3.Press or to highlight ON/OFF TIMER.

4.Press or to highlight SET, then press ENTER. The ON/OFF


TIMER menu appears.


5.

Press or to highlight ON TIMER,


then press

or to highlight the


ON/OFF TIMER


hour position.


ON TIMER


6

:00AM


CH 3


CLEAR


6.

Press or to set the desired hour,


OFF TIMER


12:00AM


CLEAR


then press .


OPTION MENU


:SELECT


:ADJUST


7.

Set the desired minutes and channel,


EXIT:END


as in step 6.


8.

Press or

to select ONCE or


DAILY, then press ENTER.


ON/OFF TIMER


9.

Press EXIT to return to normal

ON TIMER


6:30AM


CH 12


viewing.


ONCE

DAILY

CLEAR


OFF TIMER


12:00AM


To set the OFF timer:

Select OFF TIMER in step 5, above.

To cancel the ON/OFF timers:

Select CLEAR in step 8, above.

Press EXIT to return to normal viewing.

Menu/

Enter

Exit

Note:

After a power failure or disconnection of the power, the ON/OFF timer settings will be lost.

To display the ON/OFF timer settings, press RECALL (see “Displaying TV status information on-screen” on page 36).

To return to the OPTION menu from the ON/OFF TIMER menu, press or to highlight OPTION MENU, then press or .

Controlthe

your TVSetting up

FeaturesUsing the TV’s

Appendix

3Y90121A(E)_P22-31

27

4/6/06, 3:13 PM

Page 27
Image 27
Toshiba 26DF56 appendix Selecting the video input source, Setting the clock, Setting the ON/OFF timer

26DF56 specifications

The Toshiba 26DF56 is a compact yet feature-rich LCD television that has made its mark in the realm of consumer electronics. Designed with a sleek profile, it is ideal for smaller living spaces, such as bedrooms and kitchens, where size and functionality are paramount. This television may be small in stature, but it boasts a wide array of features and technologies that deliver a satisfying viewing experience.

One of the key characteristics of the Toshiba 26DF56 is its 26-inch screen. The screen size strikes a balance between offering a generous viewing area while remaining compact enough to fit in tight spaces. The LCD panel provides vibrant colors and sharp images, thanks to its native resolution of 1366 x 768 pixels. This resolution allows viewers to enjoy high-definition content in a clear and crisp manner, enhancing the overall viewing experience.

The Toshiba 26DF56 integrates various technologies to optimize picture quality. Its advanced image processing capabilities help reduce motion blur, ensuring that fast-paced scenes appear smooth and dynamic. The television also features multiple aspect ratios, giving users the flexibility to view content in the format that suits their preferences best, whether it’s widescreen movies or traditional TV shows.

Another noteworthy aspect of the Toshiba 26DF56 is its connectivity options. Equipped with multiple inputs, including HDMI and USB ports, this television is designed to easily connect with various devices, such as gaming consoles, Blu-ray players, or external storage devices. This versatility allows users to switch seamlessly between different media sources, enhancing the entertainment options available.

In terms of audio, the Toshiba 26DF56 does not disappoint. It includes built-in speakers that deliver reasonable sound quality for everyday viewing. However, for those seeking a more immersive audio experience, external sound systems can be connected through the audio output options.

With its energy-efficient design, the Toshiba 26DF56 also appeals to environmentally conscious consumers. It complies with energy-saving standards, ensuring reduced power consumption without compromising performance.

Overall, the Toshiba 26DF56 exemplifies a solid choice for viewers seeking an efficient, compact, and versatile television. With its clear display, comprehensive connectivity options, and energy-saving features, it caters to a variety of entertainment needs, making it a practical addition to any home.