Menu Function
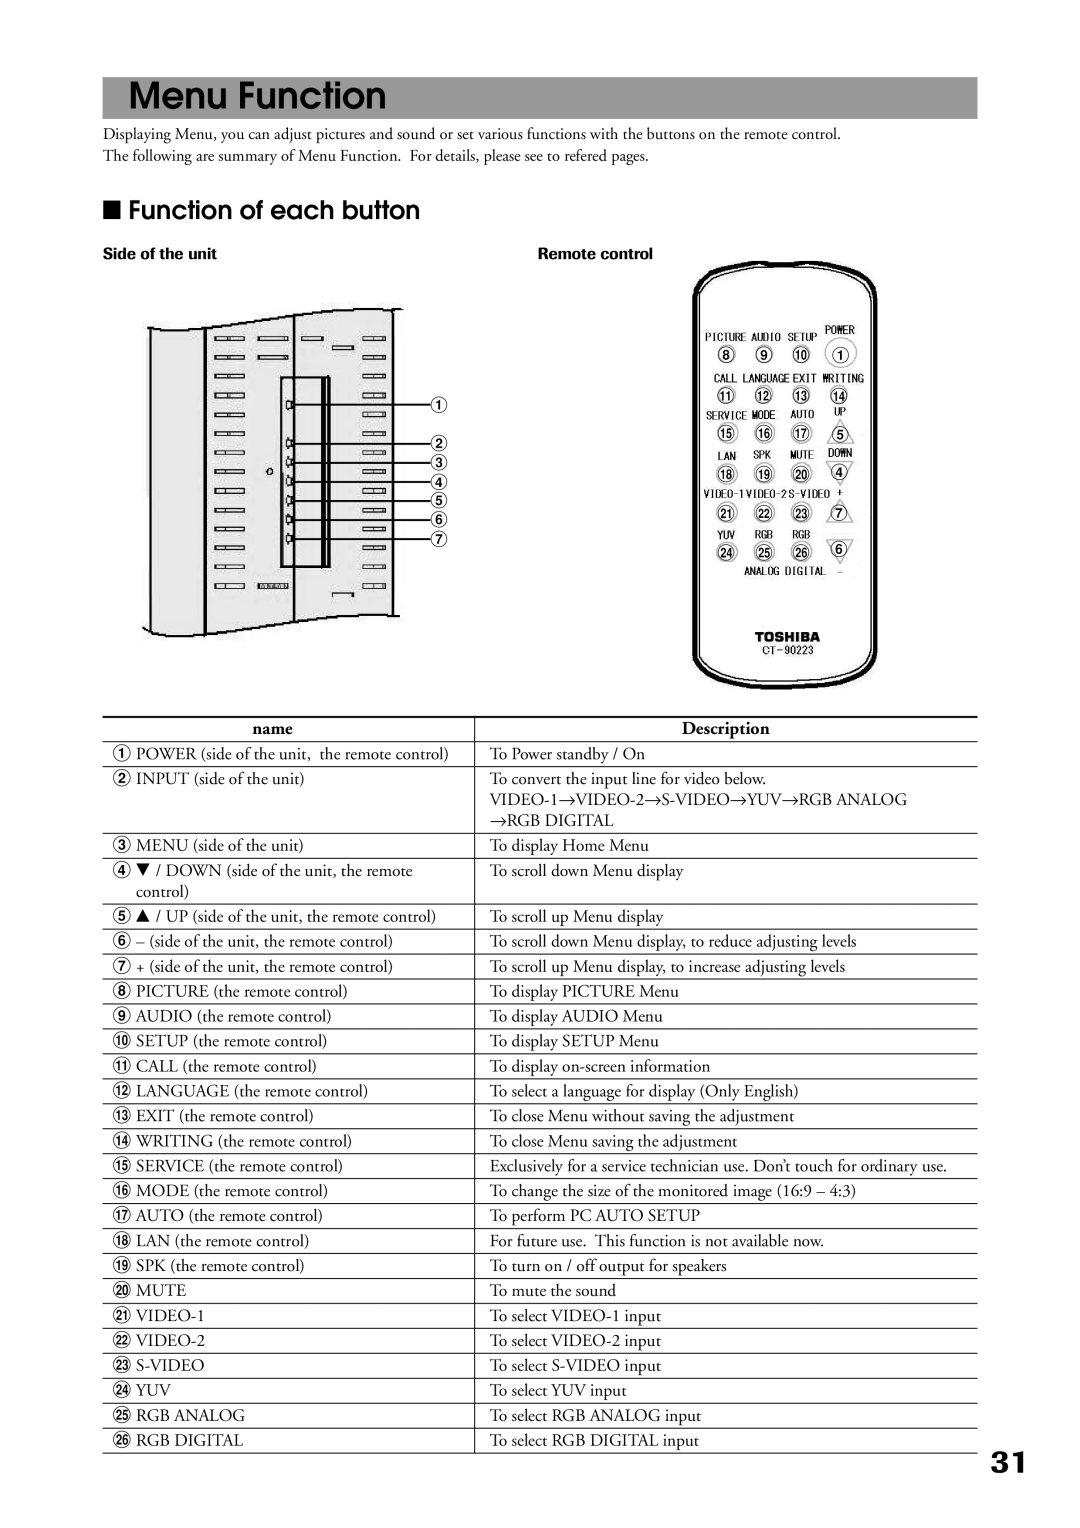
Displaying Menu, you can adjust pictures and sound or set various functions with the buttons on the remote control. The following are summary of Menu Function. For details, please see to refered pages.
L Function of each button
Side of the unit | Remote control |
| 8 | 9 | ! | 1 | |
1 | " | # $ | % | ||
|
|
|
| ||
2 | & | ( ) | 5 | ||
|
|
|
| ||
3 | ~ | + , | 4 | ||
4 | |||||
|
|
|
| ||
5 | - | . / | 7 | ||
6 | |||||
|
|
|
| ||
7 | : ; < | 6 | |||
| |||||
name | Description |
1 POWER (side of the unit, the remote control) | To Power standby / On |
2 INPUT (side of the unit) | To convert the input line for video below. |
| |
| →RGB DIGITAL |
3 MENU (side of the unit) | To display Home Menu |
|
|
4 9 / DOWN (side of the unit, the remote | To scroll down Menu display |
control) |
|
5 8 / UP (side of the unit, the remote control) | To scroll up Menu display |
|
|
6 – (side of the unit, the remote control) | To scroll down Menu display, to reduce adjusting levels |
|
|
7 + (side of the unit, the remote control) | To scroll up Menu display, to increase adjusting levels |
8 PICTURE (the remote control) | To display PICTURE Menu |
|
|
9 AUDIO (the remote control) | To display AUDIO Menu |
|
|
! SETUP (the remote control) | To display SETUP Menu |
" CALL (the remote control) | To display |
|
|
# LANGUAGE (the remote control) | To select a language for display (Only English) |
|
|
$ EXIT (the remote control) | To close Menu without saving the adjustment |
% WRITING (the remote control) | To close Menu saving the adjustment |
|
|
& SERVICE (the remote control) | Exclusively for a service technician use. Don’t touch for ordinary use. |
|
|
( MODE (the remote control) | To change the size of the monitored image (16:9 – 4:3) |
) AUTO (the remote control) | To perform PC AUTO SETUP |
|
|
~ LAN (the remote control) | For future use. This function is not available now. |
|
|
+ SPK (the remote control) | To turn on / off output for speakers |
, MUTE | To mute the sound |
|
|
- | To select |
|
|
. | To select |
/ | To select |
|
|
: YUV | To select YUV input |
|
|
; RGB ANALOG | To select RGB ANALOG input |
< RGB DIGITAL | To select RGB DIGITAL input |
31
