
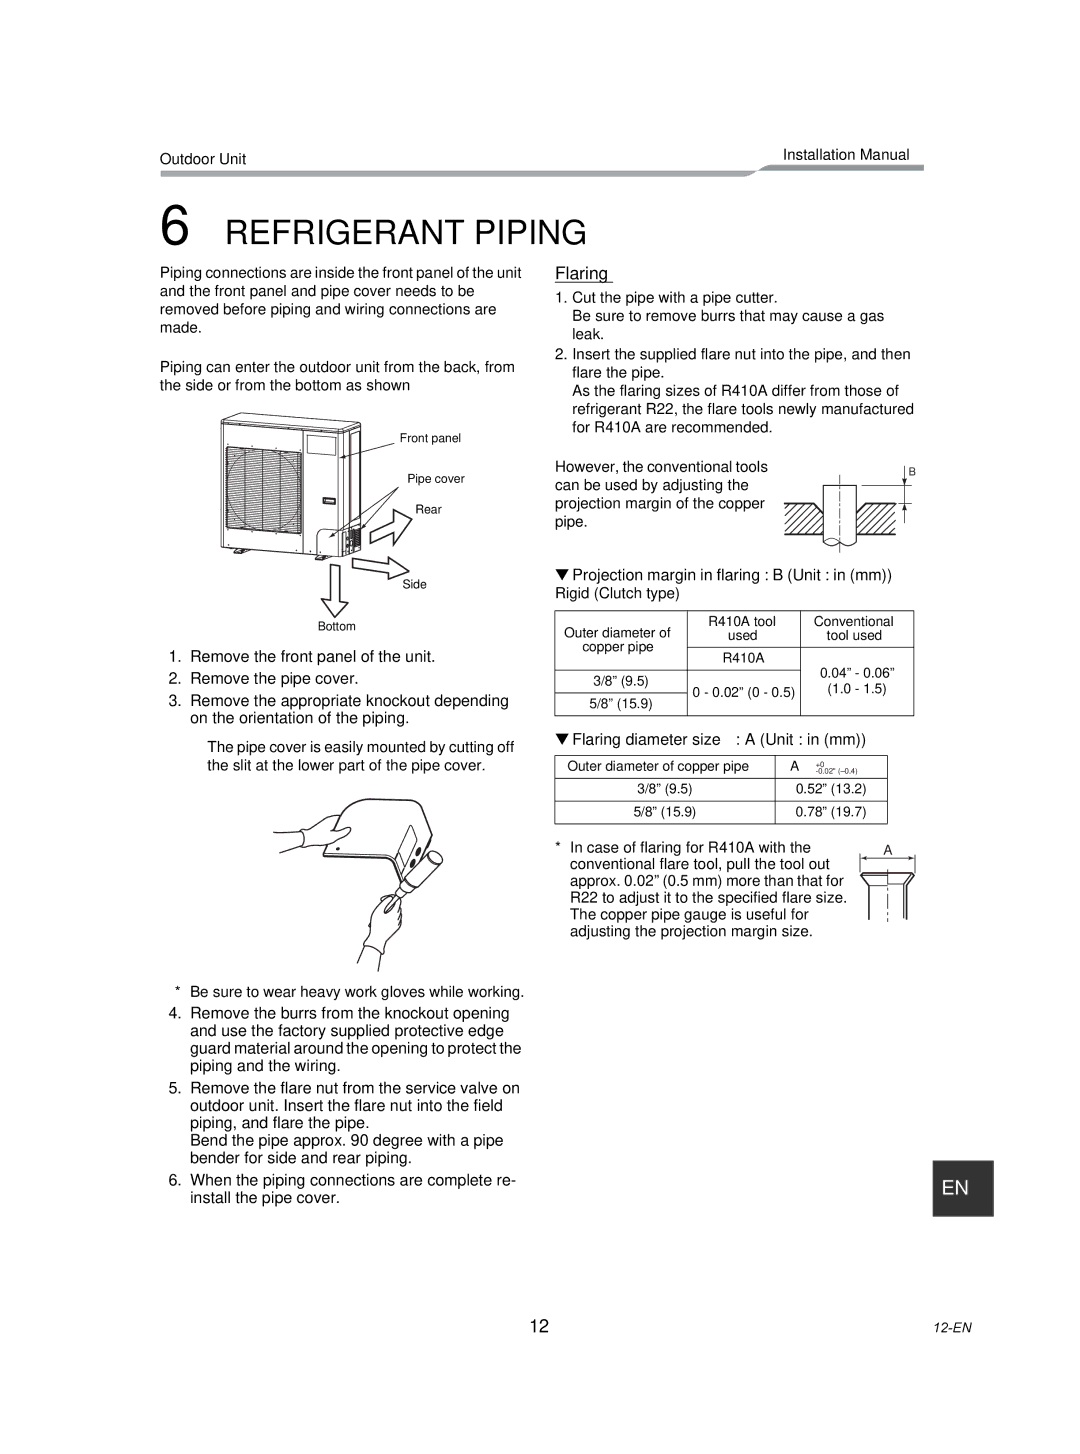
RAV-SP240AT2-UL specifications
The Toshiba RAV-SP240AT2-UL is a state-of-the-art air conditioning unit that showcases Toshiba's commitment to energy efficiency, innovation, and comfort. Designed primarily for commercial use, it stands out as an ideal solution for businesses that require a reliable and effective climate control system.One of the main features of the RAV-SP240AT2-UL is its powerful 24,000 BTU cooling capacity, which allows it to effectively cool larger spaces. This unit functions efficiently even in extreme weather conditions, providing optimal performance regardless of outside temperatures. The RAV-SP240AT2-UL also boasts a heating capacity, making it a versatile option for year-round climate control.
Energy efficiency is a significant characteristic of this model, as it comes equipped with an advanced inverter technology. This technology allows the unit to adjust its cooling and heating output according to the specific requirements of the space. As a result, users can expect lower energy consumption, reduced electricity bills, and a lower carbon footprint. The RAV-SP240AT2-UL has a high Energy Efficiency Ratio (EER) rating that further underscores its energy-saving capabilities.
In terms of installation, the RAV-SP240AT2-UL is designed for easy integration. Its compact size and lightweight design make it suitable for various commercial settings, including offices, retail spaces, and restaurants. The unit can be installed in both horizontal and vertical configurations, providing flexibility to meet the unique layout of any building.
The Toshiba RAV-SP240AT2-UL also includes advanced filtration systems that enhance indoor air quality. Its multi-stage air filtration process removes dust, allergens, and other particulates, ensuring a healthier environment for occupants. Additionally, the unit operates at a low noise level, providing a quiet atmosphere that enhances the comfort of any space.
Another notable technology featured in the RAV-SP240AT2-UL is the Smart Control system, which allows users to monitor and manage their air conditioning remotely. This feature adds convenience and flexibility, enabling businesses to optimize their energy use and maintain a comfortable environment, even from a distance.
Overall, the Toshiba RAV-SP240AT2-UL is a robust and efficient air conditioning solution tailored for commercial spaces. With its blend of power, energy efficiency, and advanced technology, it ensures an optimal climate control experience while promoting sustainability.