Connecting a computer
Before connecting any external equipment, turn off all main power switches. If there is no switch remove the mains plug from the wall socket.
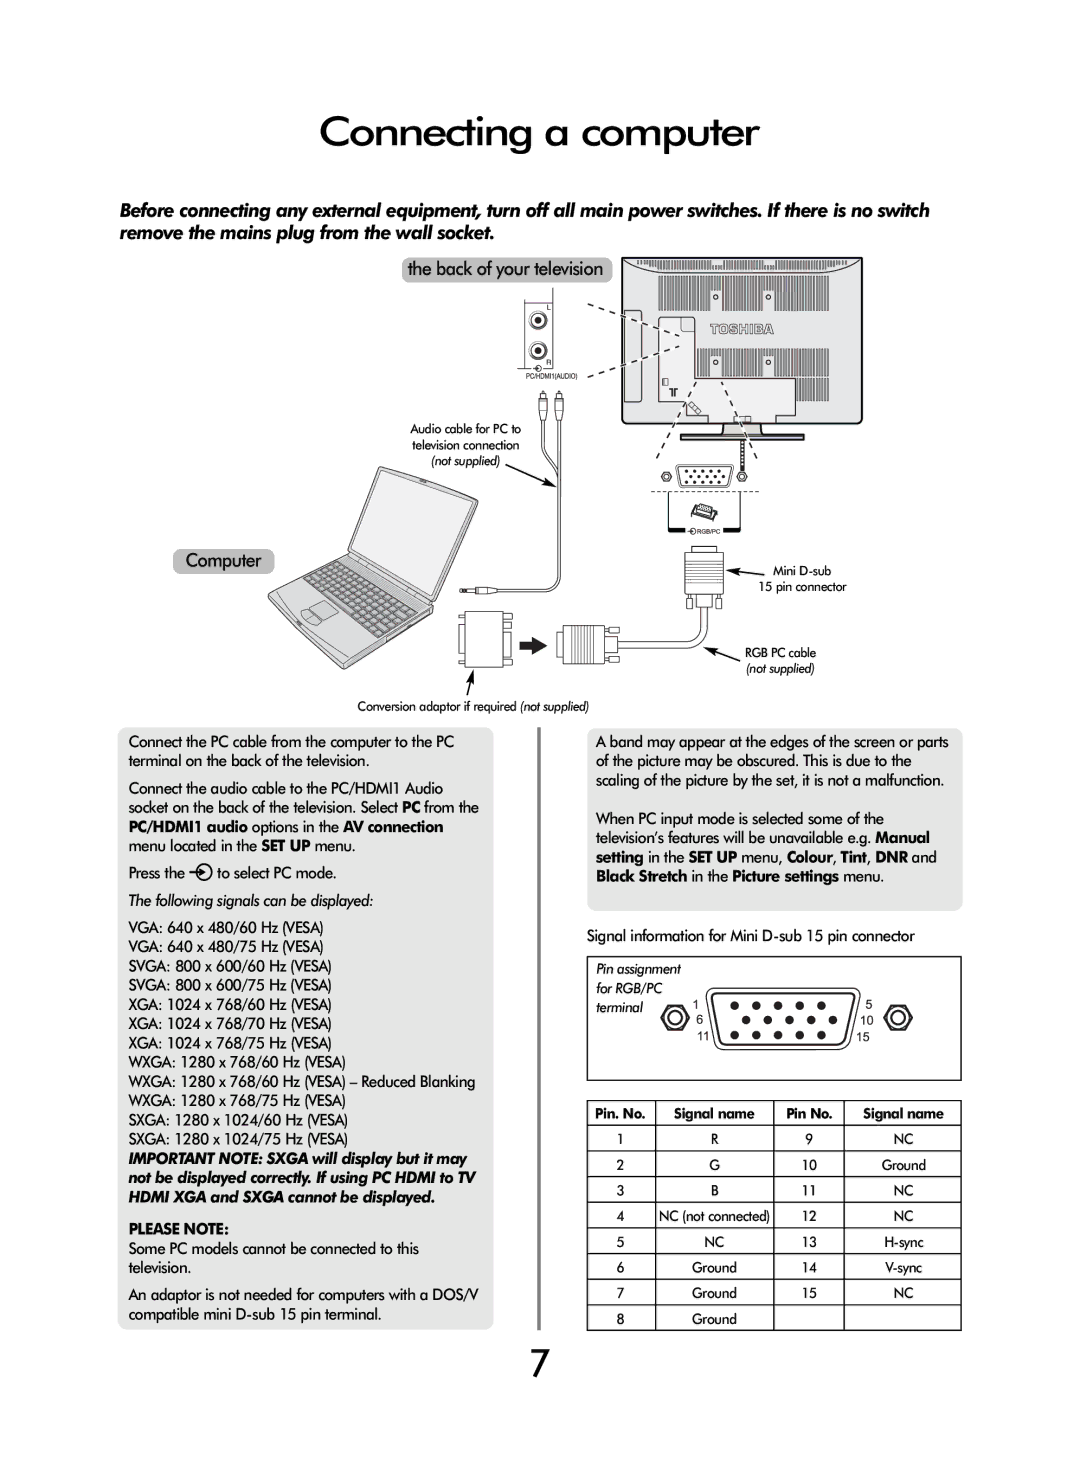
the back of your television
Audio cable for PC to television connection (not supplied)
Computer | Mini |
| |
| 15 pin connector |
![]() RGB PC cable (not supplied)
RGB PC cable (not supplied)
Conversion adaptor if required (not supplied)
Connect the PC cable from the computer to the PC terminal on the back of the television.
Connect the audio cable to the PC/HDMI1 Audio socket on the back of the television. Select PC from the PC/HDMI1 audio options in the AV connection menu located in the SET UP menu.
Press the Bto select PC mode.
The following signals can be displayed:
VGA: 640 x 480/60 Hz (VESA)
VGA: 640 x 480/75 Hz (VESA)
SVGA: 800 x 600/60 Hz (VESA)
SVGA: 800 x 600/75 Hz (VESA)
XGA: 1024 x 768/60 Hz (VESA)
XGA: 1024 x 768/70 Hz (VESA)
XGA: 1024 x 768/75 Hz (VESA)
WXGA: 1280 x 768/60 Hz (VESA)
WXGA: 1280 x 768/60 Hz (VESA) – Reduced Blanking
WXGA: 1280 x 768/75 Hz (VESA)
SXGA: 1280 x 1024/60 Hz (VESA)
SXGA: 1280 x 1024/75 Hz (VESA)
IMPORTANT NOTE: SXGA will display but it may not be displayed correctly. If using PC HDMI to TV HDMI XGA and SXGA cannot be displayed.
PLEASE NOTE:
Some PC models cannot be connected to this television.
An adaptor is not needed for computers with a DOS/V compatible mini
A band may appear at the edges of the screen or parts of the picture may be obscured. This is due to the scaling of the picture by the set, it is not a malfunction.
When PC input mode is selected some of the television’s features will be unavailable e.g. Manual setting in the SET UP menu, Colour, Tint, DNR and Black Stretch in the Picture settings menu.
Signal information for Mini D-sub 15 pin connector
Pin assignment for RGB/PC terminal ![]()
Pin. No. | Signal name | Pin No. | Signal name |
|
|
|
|
1 | R | 9 | NC |
2 | G | 10 | Ground |
3 | B | 11 | NC |
4 | NC (not connected) | 12 | NC |
5 | NC | 13 | |
6 | Ground | 14 | |
7 | Ground | 15 | NC |
8 | Ground |
|
|
7