∙Optimize My Favorites Image Size: When this option is enabled, the “Add to My Favorites” funtion will resize all photos to the Photo frame ’s native 800x480 resolution to maximize storage space.
NOTE:
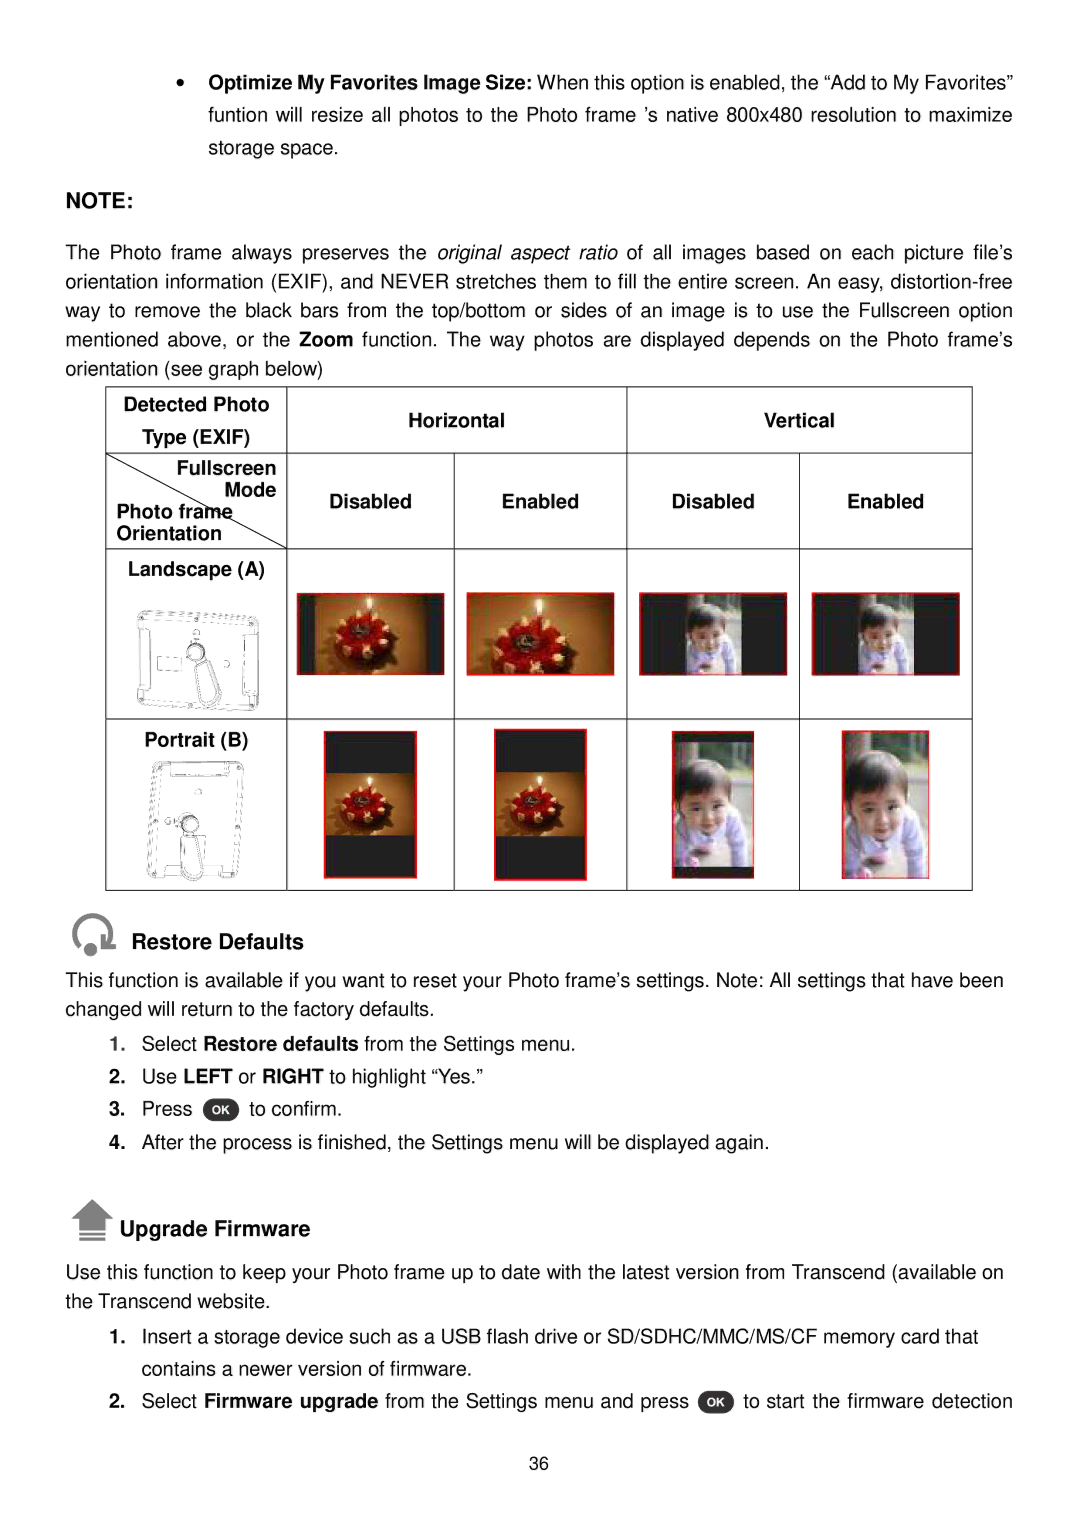
The Photo frame always preserves the original aspect ratio of all images based on each picture file’s orientation information (EXIF), and NEVER stretches them to fill the entire screen. An easy,
Detected Photo | Horizontal |
| Vertical | ||
Type (EXIF) |
| ||||
|
|
|
| ||
|
|
|
|
| |
Fullscreen |
|
|
|
| |
Mode | Disabled | Enabled | Disabled | Enabled | |
Photo frame | |||||
|
|
|
| ||
Orientation |
|
|
|
| |
|
|
|
|
| |
Landscape (A) |
|
|
|
| |
Portrait (B)
Restore Defaults
This function is available if you want to reset your Photo frame’s settings. Note: All settings that have been changed will return to the factory defaults.
1.Select Restore defaults from the Settings menu.
2.Use LEFT or RIGHT to highlight “Yes.”
3.Press ![]() to confirm.
to confirm.
4.After the process is finished, the Settings menu will be displayed again.
Upgrade Firmware
Use this function to keep your Photo frame up to date with the latest version from Transcend (available on the Transcend website.
1.Insert a storage device such as a USB flash drive or SD/SDHC/MMC/MS/CF memory card that contains a newer version of firmware.
2.Select Firmware upgrade from the Settings menu and press ![]() to start the firmware detection
to start the firmware detection
36
