Manuals
/
TRENDnet
/
Computer Equipment
/
Server
TRENDnet
TE100-P1P Hardware Installation, Networking Application, Network Print Server Solution
Models:
TE100-P1P
1
10
63
63
Download
63 pages
23.95 Kb
7
8
9
10
11
12
13
14
<
>
Install
Warranty
The configuration is completed, click Reboot and then Yes to restart the system
Factory Reset
Setup Wizard
Setting TCP/IP Printing Settings
There are three green LED indicators on the rear panel
Power Connector - plug the AC Power Adapter to this jack
Firmware Upgrade
Sharing can be enabled here
Page 10
Image 10
2
H
ARDWARE
I
NSTALLATION
Networking Application
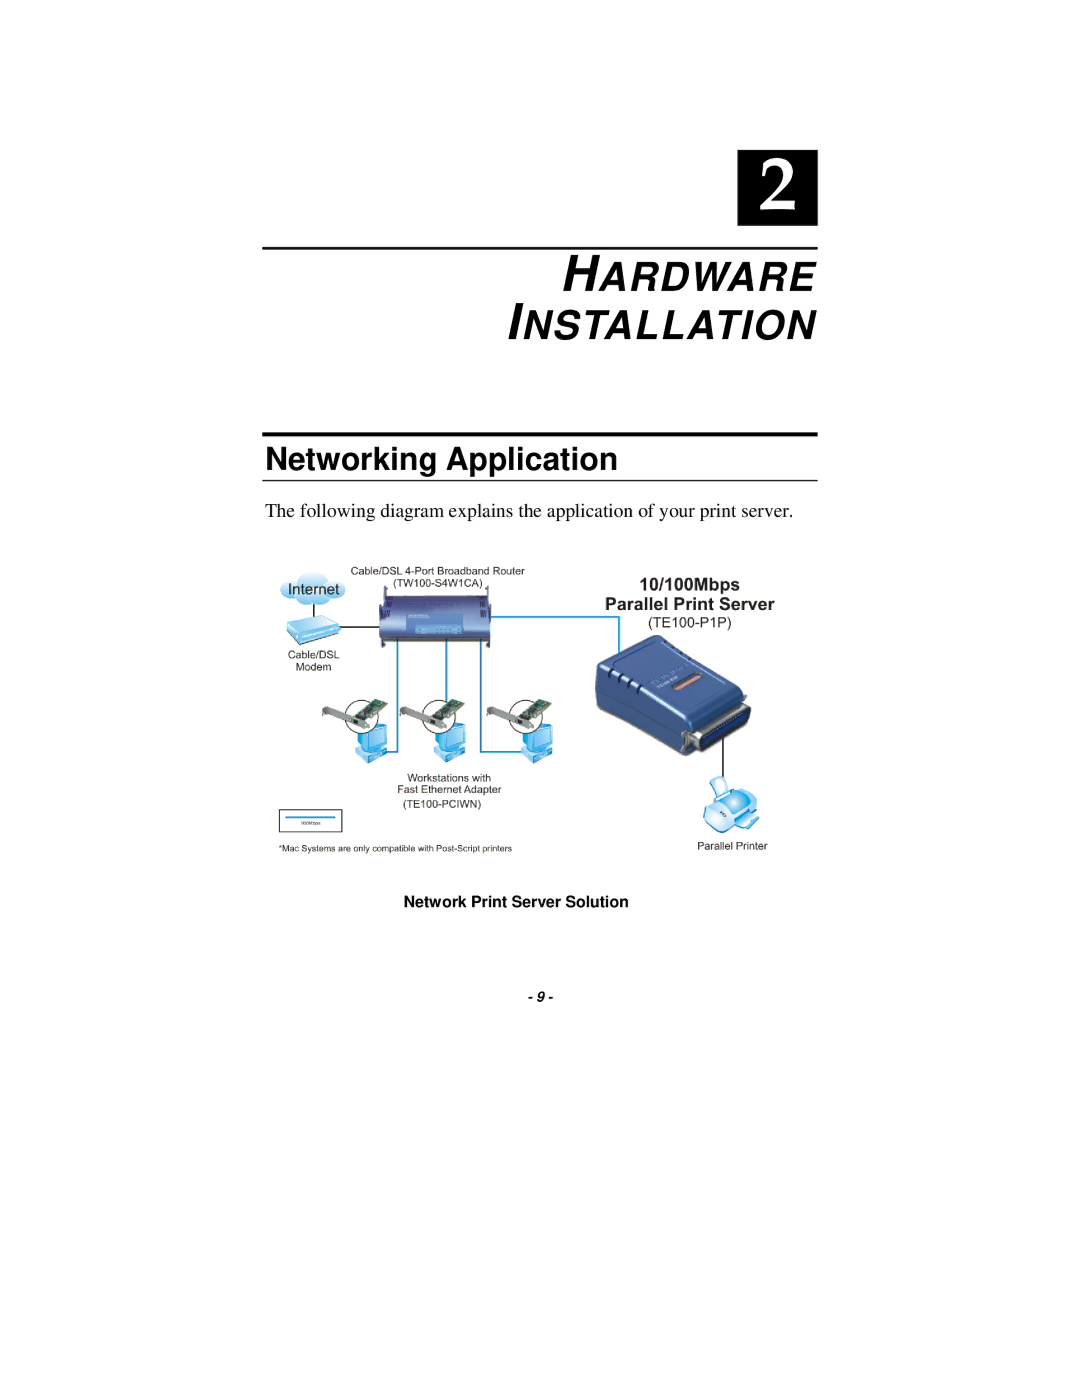
The following diagram explains the application of your print server.
Network Print Server Solution
- 9 -
Page 9
Page 11
Page 10
Image 10
Page 9
Page 11
Contents
Page
USING THE UTILITIES
TABLE OF CONTENTS
HARDWARE INSTALLATION
Installing PS-Utility
S ETTING TCP/IP P RINTING S ETTINGS
A DDING LPR P RINTER P ORTS
P RINTING FROM W INDOWS 95/98/M E
PRINTING IN WINDOWS 2000/XP
ABOUT THIS GUIDE
INTRODUCTION
Package Contents
System Requirements
General Features
Power Connector - plug the AC Power Adapter to this jack
Product View
LAN Connector - plug your LAN cable to this connector
Front View
Steady light confirms that the Print Server is powered
There are three green LED indicators on the rear panel
Power
When it is blinking, the printer connected is printing
The following diagram explains the application of your print server
HARDWARE INSTALLATION
Networking Application
Network Print Server Solution
Installing the Print Server
USING THE UTILITIES
Auto-Run Installation
Installing PS-Utility
PS-Utility
Using PS-Utility
Start\Programs\PS-Utility
Component Features
Control Buttons
Close Click this button to exit PS-Utility
PS Wizard
Choose one connected printer within the network
3. Select one printer port in the Print Server List, and click Next
Choose one connected printer port
Your print server name Your printer port name
4. The configuration is completed, click Reboot and then Yes to restart the system
WEB CONFIGURATION
Web Configuration Utility
Home
The Management Screen of the Configuration Utility
Setup Wizard
System
IP Address
Microsoft Network
Second HTTP Port
Save to Print Server
The Setup Wizard has been completed
Change IP Address
Printer Information
Factory Reset
Please click Yes to restore the factory default setting
Firmware Upgrade
About
This screen displays the information of the print server
95/98/ME
PRINTING IN WINDOWS
Installing the LPR for TCP/IP Printing Client
8. Select the LPR for TCP/IP Printing client and click OK
Adding LPR Printer Ports
6. Click OK to leave the LPR for TCP/IP Printing Properties window
Printing from Windows 95/98/Me
Page
Page
Setting TCP/IP Printing Settings
The parameters are as follows
2000/XP
Setting Up Windows 2000 TCP/IP Printing
Click Start Settings Printers
PRINTING IN WINDOWS
Create a new “Standard TCP/IP Port”
Click “Next”
Select “Custom”, and click “Settings”
Click “Next”
Click “Finish”
Clic
k “Next”
Select a “Printer Name”
Sharing can be enabled here
Also, a Test Page can be printed to confirm proper configuration
Page
Click Start Printer and Faxes
Setting Up Windows XP TCP/IP Printing
Double Click “Add a Printer” Click “Next”
Select “Local Printer” Create a new “Standard TCP/IP Port”
Click “Next”
Select “Custom”, and click “Settings”
Click “Next” Click “Finish”
Click “Next” Select a “Printer Name”
A Test Page can be printed to confirm proper configuration
PRINTING IN MAC OS
Rendezvous Uses in MAC OS
2. Select Rendezvous from the pop-up menu
5. The printer is installed into the system successfully
Limited Warranty
TE100-P1P - 5 Years Warranty