SMART 216 / 232
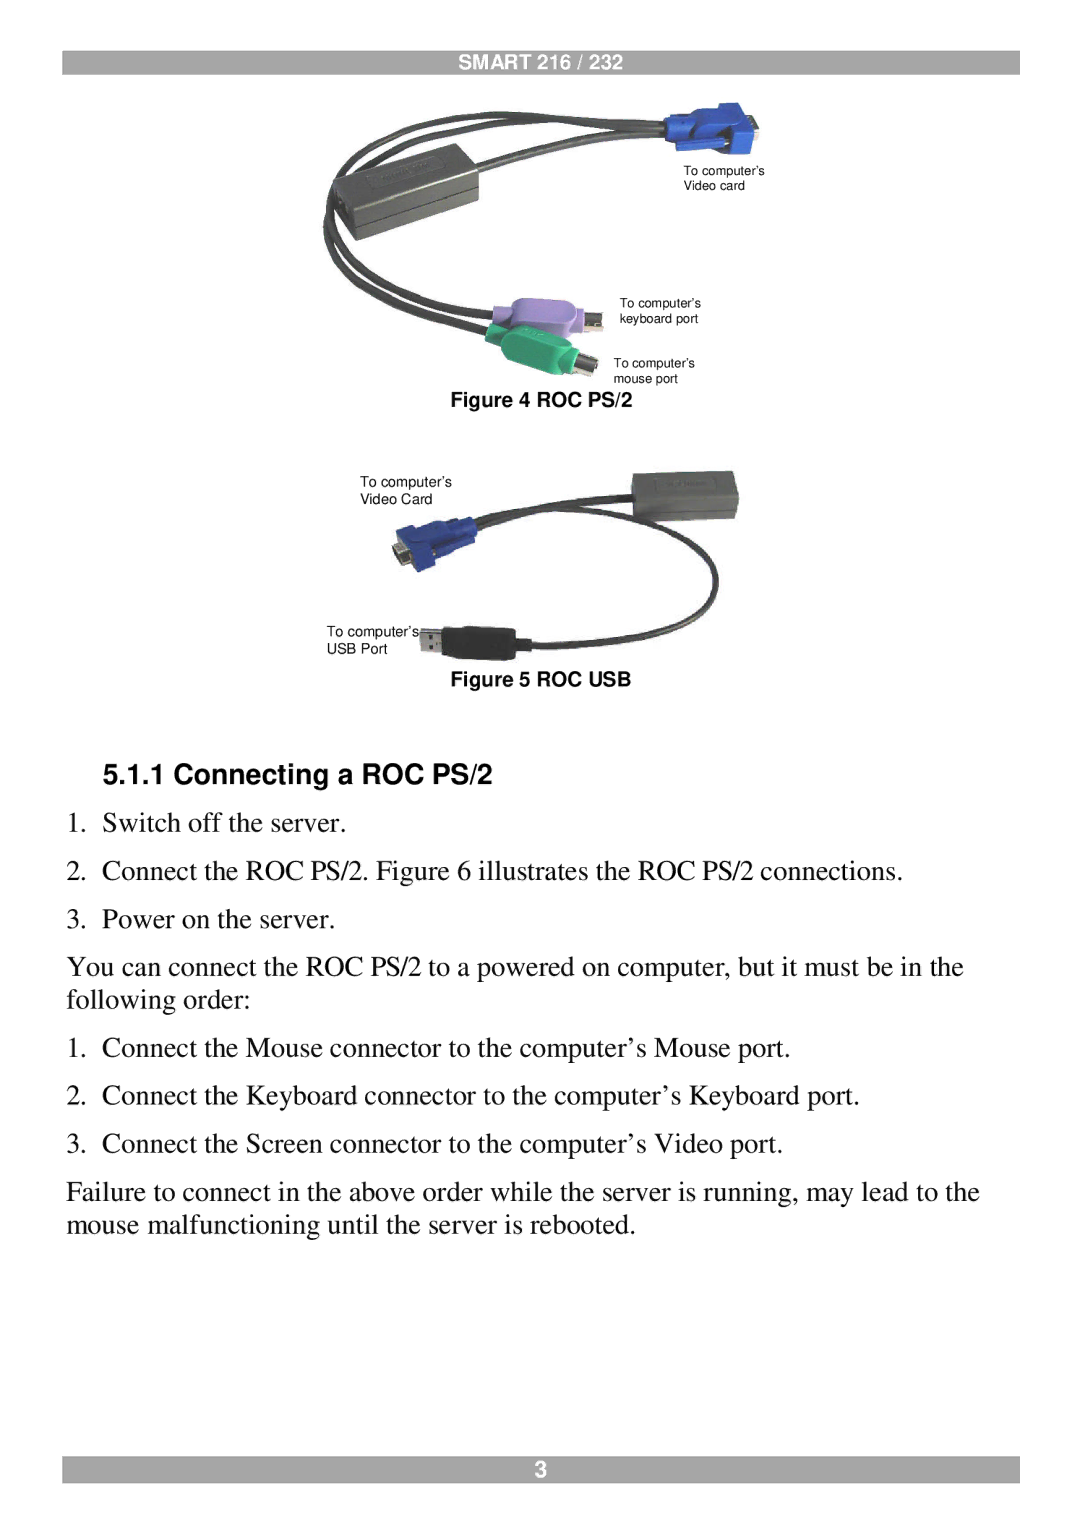
To computer’s
Video card
To computer’s keyboard port
To computer’s mouse port
Figure 4 ROC PS/2
To computer’s
Video Card
To computer’s
USB Port
Figure 5 ROC USB
5.1.1 Connecting a ROC PS/2
1.Switch off the server.
2.Connect the ROC PS/2. Figure 6 illustrates the ROC PS/2 connections.
3.Power on the server.
You can connect the ROC PS/2 to a powered on computer, but it must be in the following order:
1.Connect the Mouse connector to the computer’s Mouse port.
2.Connect the Keyboard connector to the computer’s Keyboard port.
3.Connect the Screen connector to the computer’s Video port.
Failure to connect in the above order while the server is running, may lead to the mouse malfunctioning until the server is rebooted.
3