Mounting
WARNING! Mount your Inverter/Charger BEFORE DC battery and AC power connection. Failure to follow these instructions may lead to personal injury and/or damage to the Inverter/Charger and connected systems.
Tripp Lite manufactures a variety of different Inverter/Chargers with a variety of different mounting options for use in vehicular or non-vehicular applications. Tripp Lite recommends permanent mounting of your Inverter/Charger in any of the configurations illustrated below. User must supply mounting hardware and is responsible for determining if the hardware and mounting surface are suitable to support the weight of the Inverter/Charger. Contact Tripp Lite if you require further assistance in mounting your Inverter/Charger.
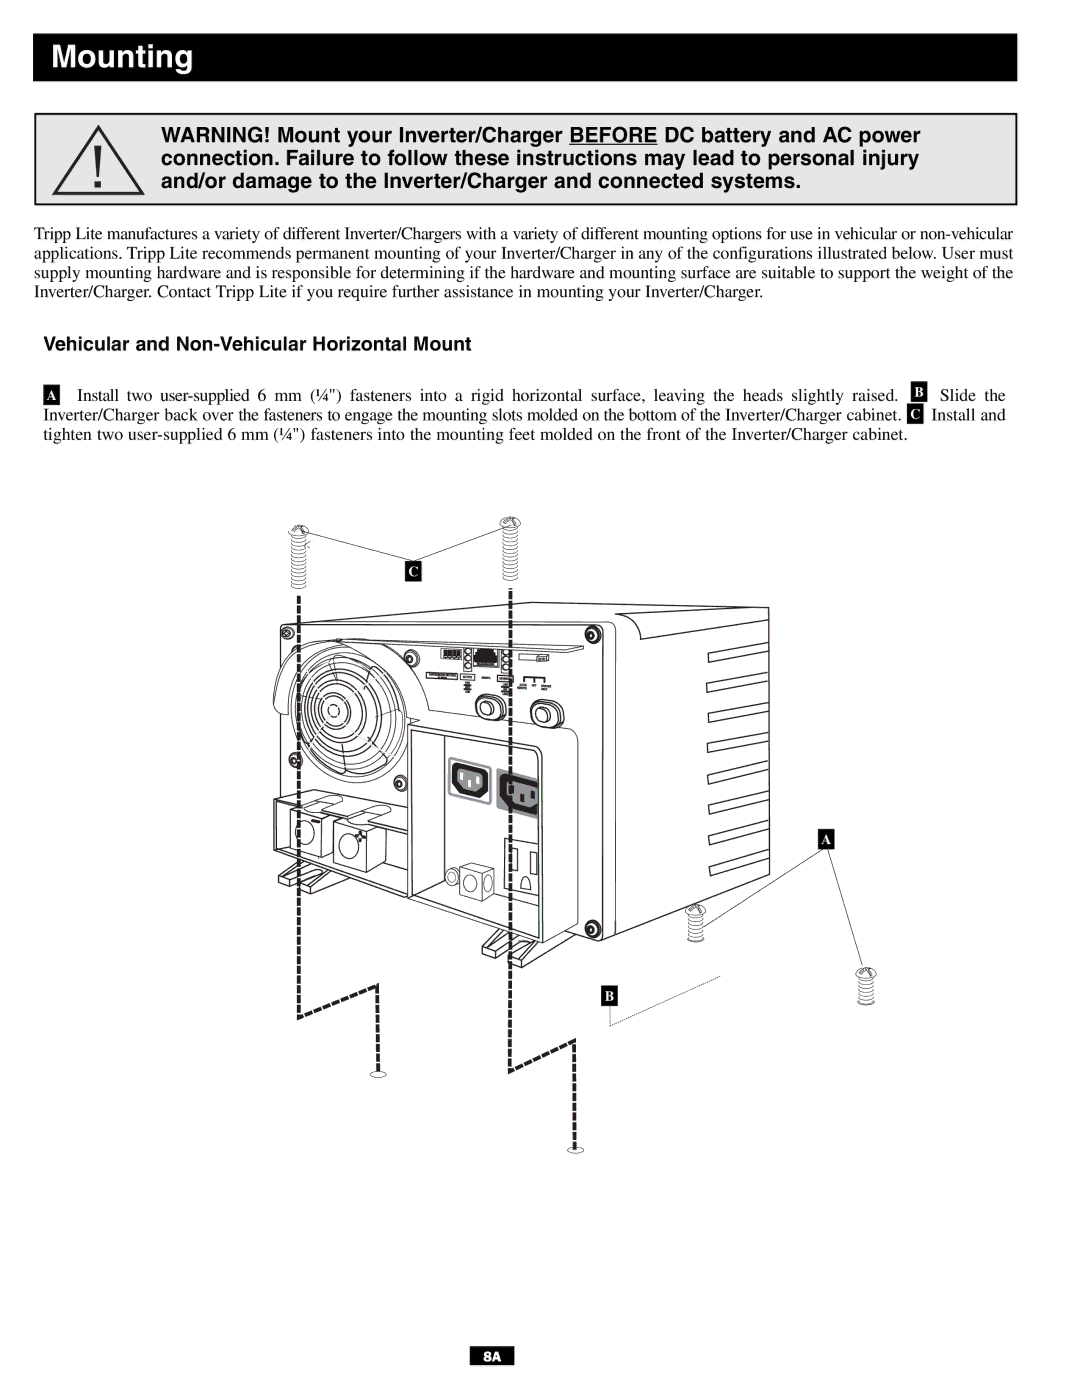
Vehicular and Non-Vehicular Horizontal Mount
AInstall two user-supplied 6 mm (¼") fasteners into a rigid horizontal surface, leaving the heads slightly raised. B Slide the Inverter/Charger back over the fasteners to engage the mounting slots molded on the bottom of the Inverter/Charger cabinet. C Install and tighten two user-supplied 6 mm (¼") fasteners into the mounting feet molded on the front of the Inverter/Charger cabinet.
C
A
B