LCD OSD (On-Screen Display) Configuration
Note: Once the
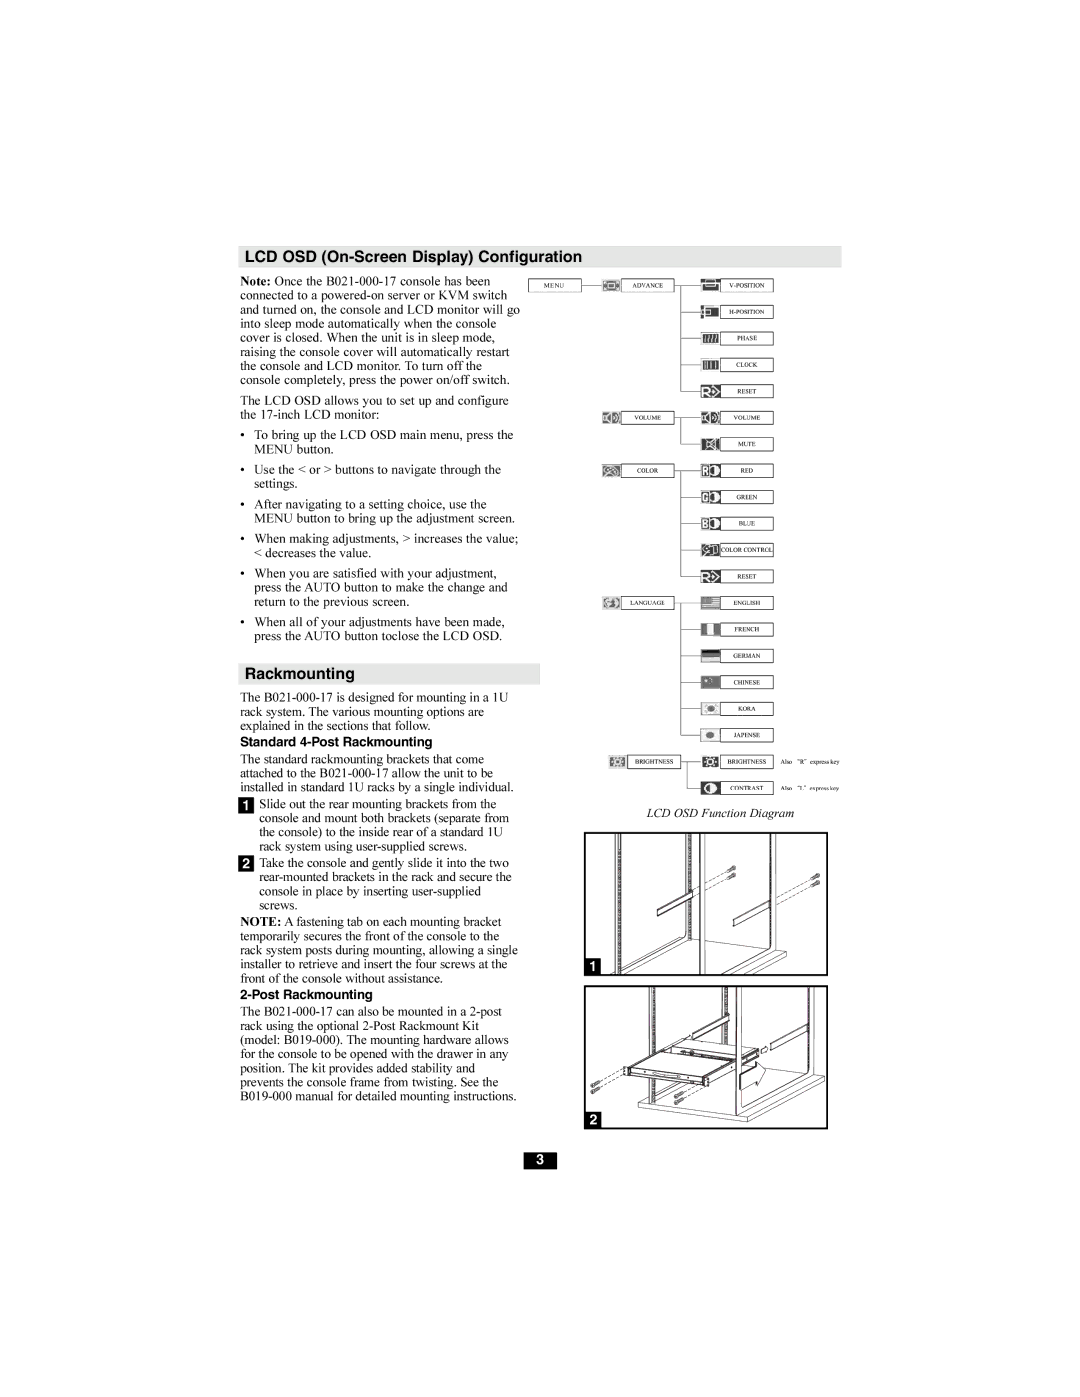
The LCD OSD allows you to set up and configure the
•To bring up the LCD OSD main menu, press the MENU button.
•Use the < or > buttons to navigate through the settings.
•After navigating to a setting choice, use the MENU button to bring up the adjustment screen.
•When making adjustments, > increases the value; < decreases the value.
•When you are satisfied with your adjustment, press the AUTO button to make the change and return to the previous screen.
•When all of your adjustments have been made, press the AUTO button toclose the LCD OSD.
Rackmounting
The
Standard 4-Post Rackmounting
The standard rackmounting brackets that come attached to the
1Slide out the rear mounting brackets from the console and mount both brackets (separate from the console) to the inside rear of a standard 1U rack system using
2Take the console and gently slide it into the two
NOTE: A fastening tab on each mounting bracket temporarily secures the front of the console to the rack system posts during mounting, allowing a single installer to retrieve and insert the four screws at the front of the console without assistance.
2-Post Rackmounting
The
LCD OSD Function Diagram
1 |
2 |
3
