
B034-002-R specifications
The Tripp Lite B034-002-R is a versatile and reliable KVM switch designed for users who need to control multiple computers from a single keyboard, monitor, and mouse setup. Tailored for small to medium businesses as well as home office environments, this KVM switch simplifies the management of multiple systems while maximizing space and efficiency.One of the main features of the Tripp Lite B034-002-R is its support for two computers, making it an ideal choice for users who operate multiple systems simultaneously. With a seamless switch between devices, it allows users to easily share peripherals like a monitor and keyboard without the hassle of constantly reconnecting cables.
The device supports resolutions up to 1920 x 1440, ensuring that users can enjoy high-quality visuals and clarity while working on their computers. This feature is particularly beneficial for professionals who require detailed graphics or for those who engage in multimedia tasks where high resolution is critical.
In terms of connectivity, the Tripp Lite B034-002-R comes equipped with various input and output options, including VGA ports for video input and standard USB connectors for peripheral connections. This versatility supports a wide array of devices, making it compatible with many computers and ensuring easy integration into existing setups.
The switch is plug-and-play, which means that users can set it up quickly without the need for additional software or drivers. This facilitates a smooth installation process, allowing users to begin utilizing the KVM functionality almost immediately after unpacking the device.
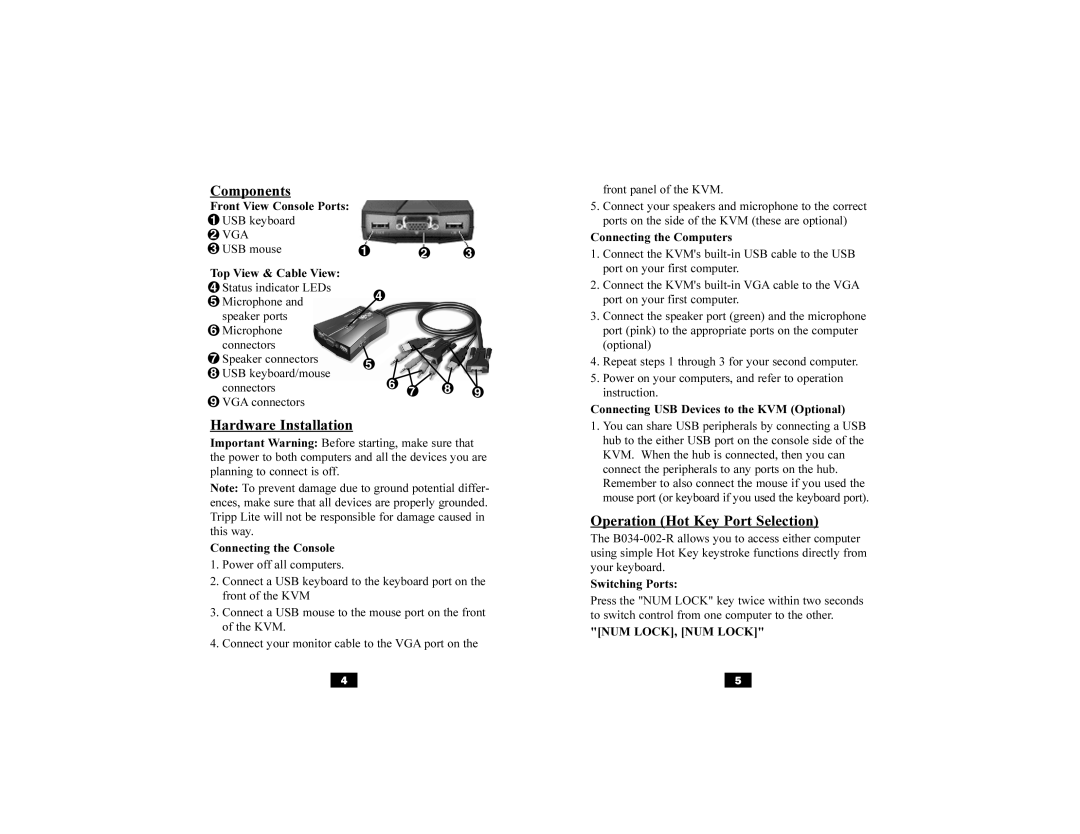
Another distinctive feature of the B034-002-R is its compact design. Its small footprint allows it to fit seamlessly into any workspace, while its durable construction ensures longevity. The unit is also equipped with LED indicators that show the status of each connected computer, providing users with clear visual feedback.
In summary, the Tripp Lite B034-002-R is a powerful KVM switch that offers robust functionality, high-resolution support, and a user-friendly plug-and-play design. With its ability to manage two computers from a single set of peripherals, it stands out as a practical solution for efficient workspace management, making it an excellent choice for both professional and personal use. The combination of its compatibility, compactness, and ease of use positions the Tripp Lite B034-002-R as a reliable tool for anyone looking to streamline their technology setup.