
B125-101-60-WP, B125-101-60 specifications
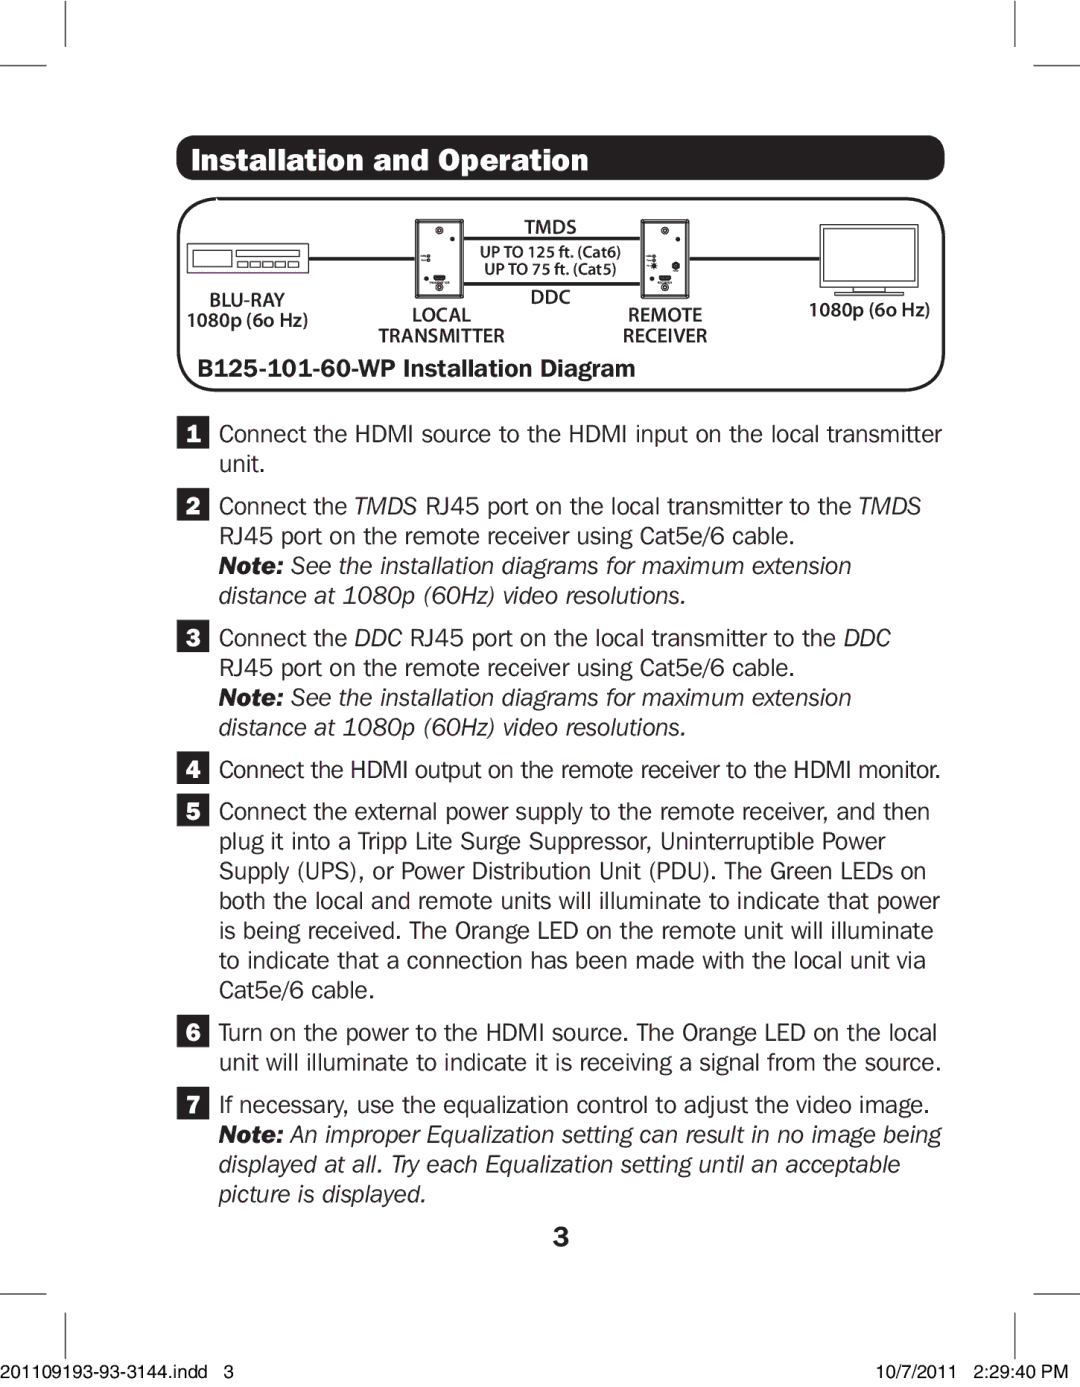
Tripp Lite B125-101-60 and B125-101-60-WP are sophisticated video extenders designed to transmit HDMI signals over long distances, ensuring high-quality audio and video performance. These devices are particularly beneficial for situations that require HDMI signal extension beyond standard cable limits, making them ideal for environments like conference rooms, classrooms, and control centers.One of the main features of the B125-101-60 is its ability to extend HDMI signals up to 60 meters (197 feet) over a single Cat6 cable. This significant range allows for versatile installation options, especially in large spaces where conventional HDMI cables would not reach. The extension technology utilizes advanced HDBaseT technology, which enables long-distance transmission without compromising on signal quality.
The B125-101-60 also supports resolutions up to 1080p (1920 x 1080), making it suitable for high-definition video applications. It accommodates various audio formats, providing a complete audio-visual experience ideal for streaming content, presentations, or media playback. The device boasts a plug-and-play design, which means users can set it up without requiring any additional software or hardware, making it user-friendly and efficient.
The B125-101-60-WP variant is tailored for wall-plate installations, providing a more aesthetically pleasing solution for permanent setups. This model integrates seamlessly into the wall, minimizing clutter and maintaining a clean look in professional environments. Both models come equipped with power over Ethernet (PoE) capabilities, allowing the use of a single power source for both the transmitter and receiver units, thus simplifying wiring and installation.
Built with durability in mind, the Tripp Lite extenders feature rugged housing that can withstand the rigors of daily use, along with integrated surge protection to safeguard against electrical spikes. As a testament to its engineering, the B125-101-60 and B125-101-60-WP are compatible with a wide range of HDMI-capable devices, providing flexibility when connecting sources like Blu-ray players, computers, and game consoles to displays.
In summary, Tripp Lite B125-101-60 and B125-101-60-WP are innovative solutions for extending HDMI signals seamlessly over long distances. Combining advanced technologies, high-definition support, and user-friendly features, they are excellent tools for enhancing any AV setup while ensuring reliable performance.