SR14 specifications
The Tripp Lite SR14 is a well-regarded server rack designed for efficient organization, cooling, and security of your server and networking equipment. With a height of 14U, the rack offers ample space for mounting various components, making it ideal for small to medium-sized IT setups.One of the main features of the Tripp Lite SR14 is its sturdy construction. Built with heavy-duty steel, the rack provides a robust framework capable of supporting significant weights of hardware. This strength ensures that your equipment remains secure and stable, even in demanding environments. Additionally, the rack’s design incorporates perforated front and rear doors, which facilitate optimal airflow and cooling, helping to maintain the ideal operating temperature for your valuable equipment.
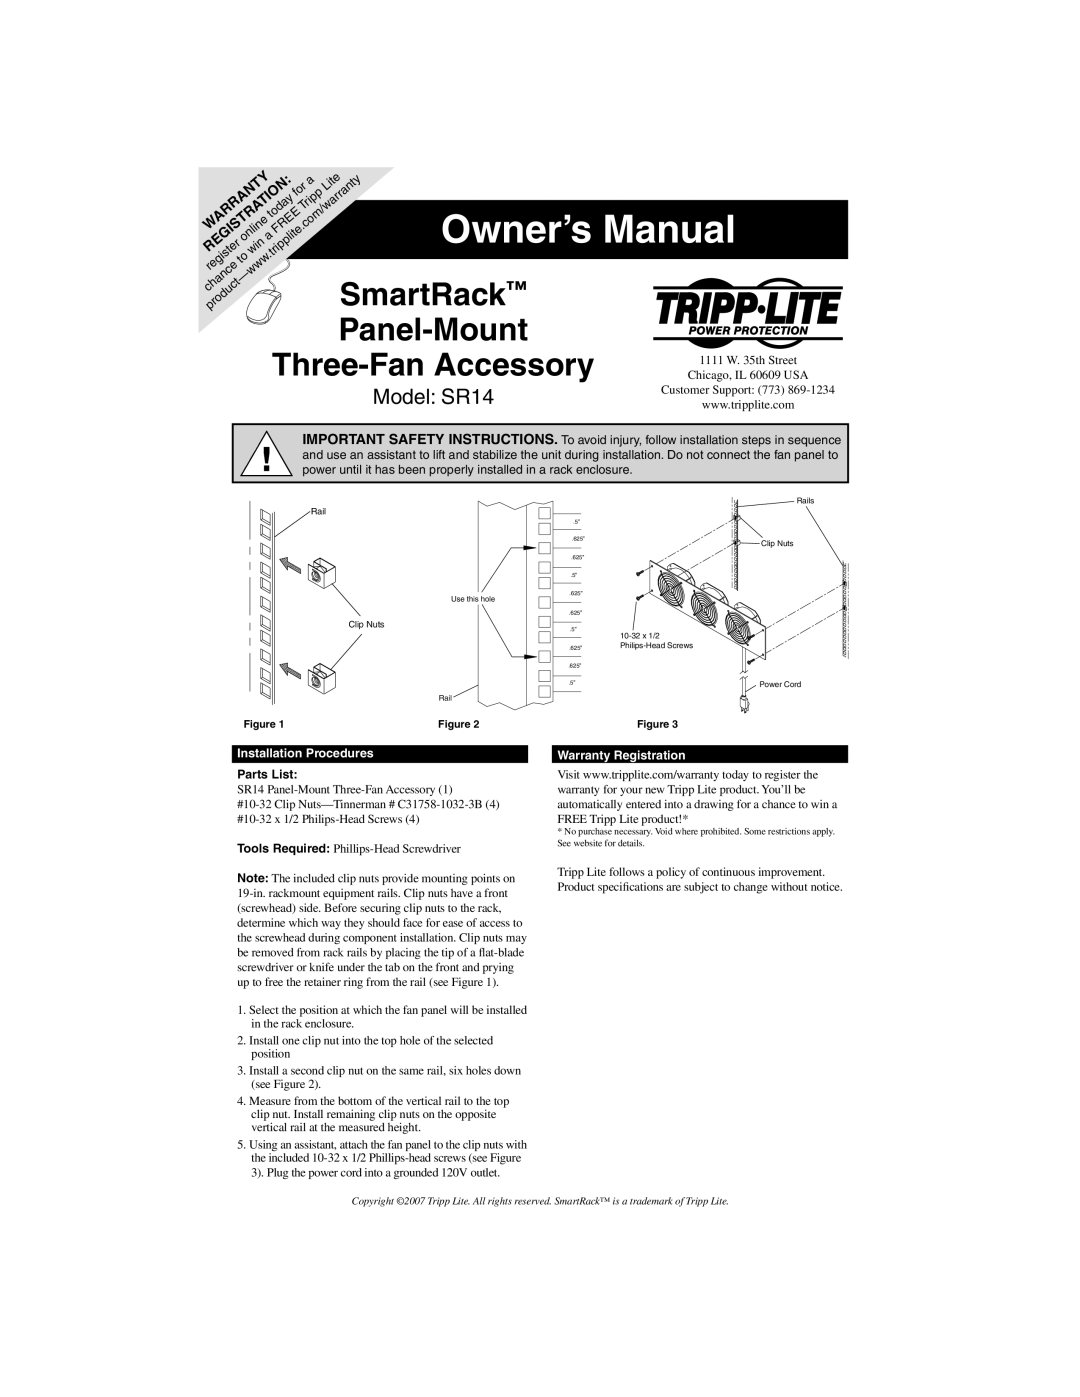
The Tripp Lite SR14 is designed with versatility in mind. It features adjustable mounting rails that accommodate a wide range of 19-inch devices, including servers, network switches, and audio-visual equipment. This flexibility is crucial for businesses seeking to customize their setups based on specific operational requirements. The rack also includes a removable side panel, which simplifies access for maintenance and upgrades.
Another significant characteristic of the Tripp Lite SR14 is its security features. The rack comes equipped with lockable front and rear doors, providing peace of mind by protecting your equipment from unauthorized access. This security aspect is vital for organizations managing sensitive data or operating in compliance-regulated environments.
In terms of power management, the SR14 can integrate with Tripp Lite's power distribution units (PDUs), allowing for efficient power management and ensuring that all equipment is reliably powered. The incorporation of cable management options helps to keep the rack organized and reduces the risk of clutter, which can obstruct airflow and create risks for overheating.
Overall, the Tripp Lite SR14 is an excellent choice for anyone in need of a reliable, secure, and flexible server rack solution. Its combination of durability, effective cooling design, security features, and ease of access makes it a favored option in the server rack market. Whether for corporate environments, data centers, or personal setups, the SR14 meets a range of requirements, making it a practical investment for your server and network management needs.