5.Enclosure Configuration
5.1Door Locks
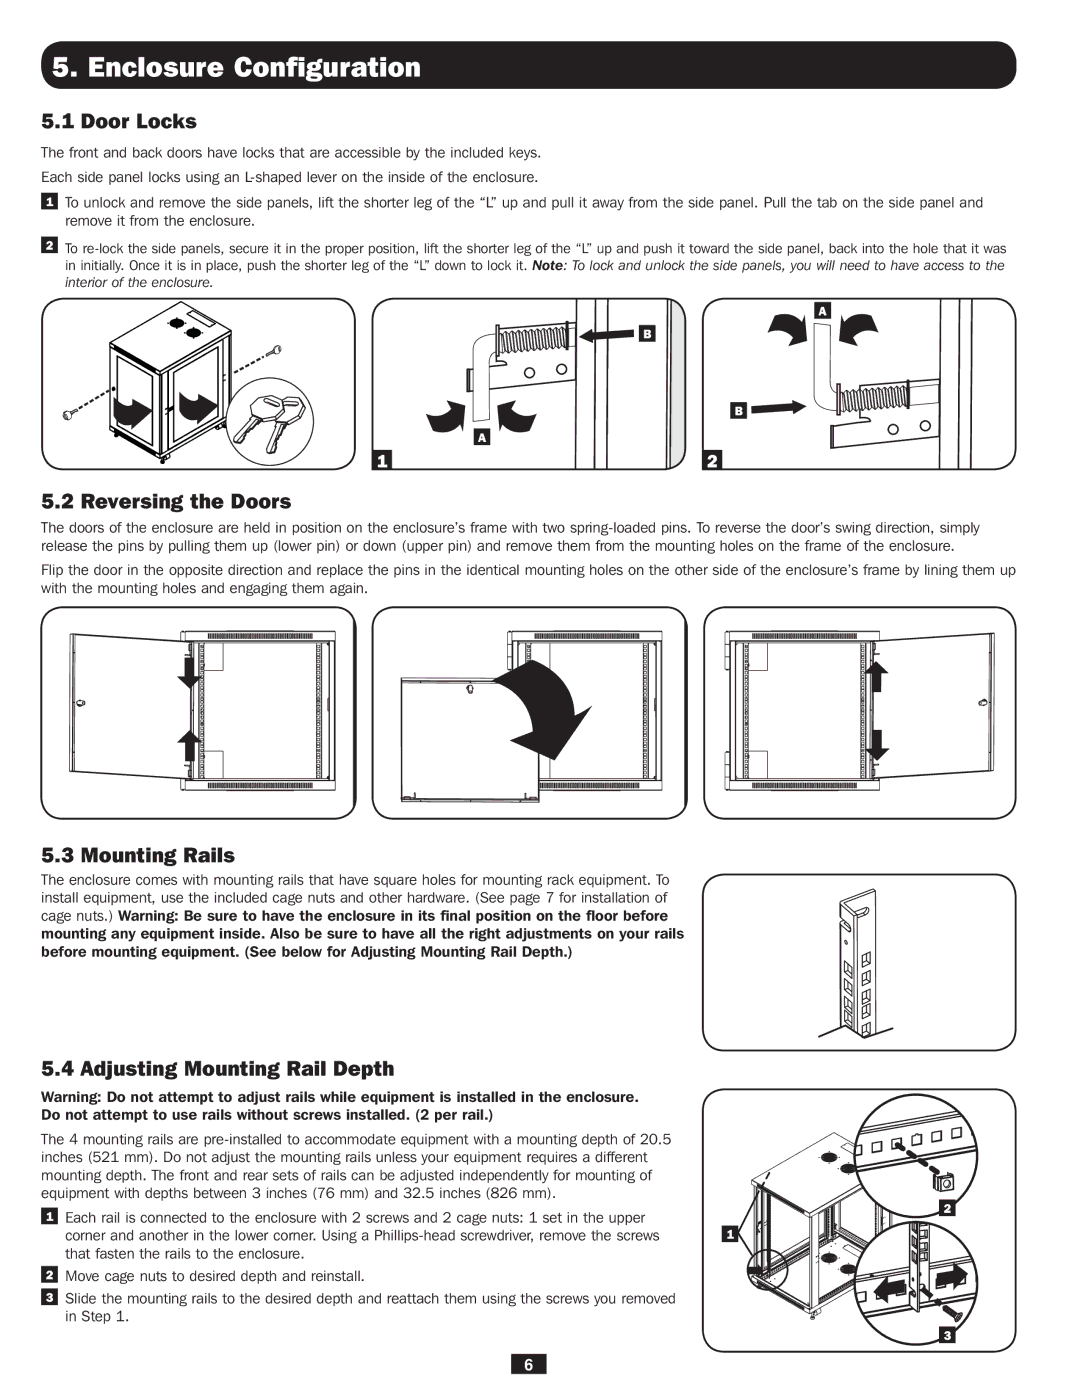
The front and back doors have locks that are accessible by the included keys.
Each side panel locks using an
1To unlock and remove the side panels, lift the shorter leg of the “L” up and pull it away from the side panel. Pull the tab on the side panel and remove it from the enclosure.
2To
A
B
B
A
1 | 2 |
5.2 Reversing the Doors
The doors of the enclosure are held in position on the enclosure’s frame with two
Flip the door in the opposite direction and replace the pins in the identical mounting holes on the other side of the enclosure’s frame by lining them up with the mounting holes and engaging them again.
5.3 Mounting Rails
The enclosure comes with mounting rails that have square holes for mounting rack equipment. To install equipment, use the included cage nuts and other hardware. (See page 7 for installation of cage nuts.) Warning: Be sure to have the enclosure in its final position on the floor before mounting any equipment inside. Also be sure to have all the right adjustments on your rails before mounting equipment. (See below for Adjusting Mounting Rail Depth.)
5.4 Adjusting Mounting Rail Depth
Warning: Do not attempt to adjust rails while equipment is installed in the enclosure.
Do not attempt to use rails without screws installed. (2 per rail.)
The 4 mounting rails are
Each rail is connected to the enclosure with 2 screws and 2 cage nuts: 1 set in the upper | 2 |
| |
corner and another in the lower corner. Using a | 1 |
that fasten the rails to the enclosure. |
|
![]() Move cage nuts to desired depth and reinstall.
Move cage nuts to desired depth and reinstall.
![]() Slide the mounting rails to the desired depth and reattach them using the screws you removed in Step 1.
Slide the mounting rails to the desired depth and reattach them using the screws you removed in Step 1.
3
6