Tripp Lite SREXTENDER owner manual Frame Assembly continued

Models: SREXTENDER

1 7
Download 7 pages 3.32 Kb
Page 3
Image 3
1 – Frame Assembly (continued)

1 – Frame Assembly (continued)

1-2(For 25U enclosures, skip this step.) Align the set of four screw

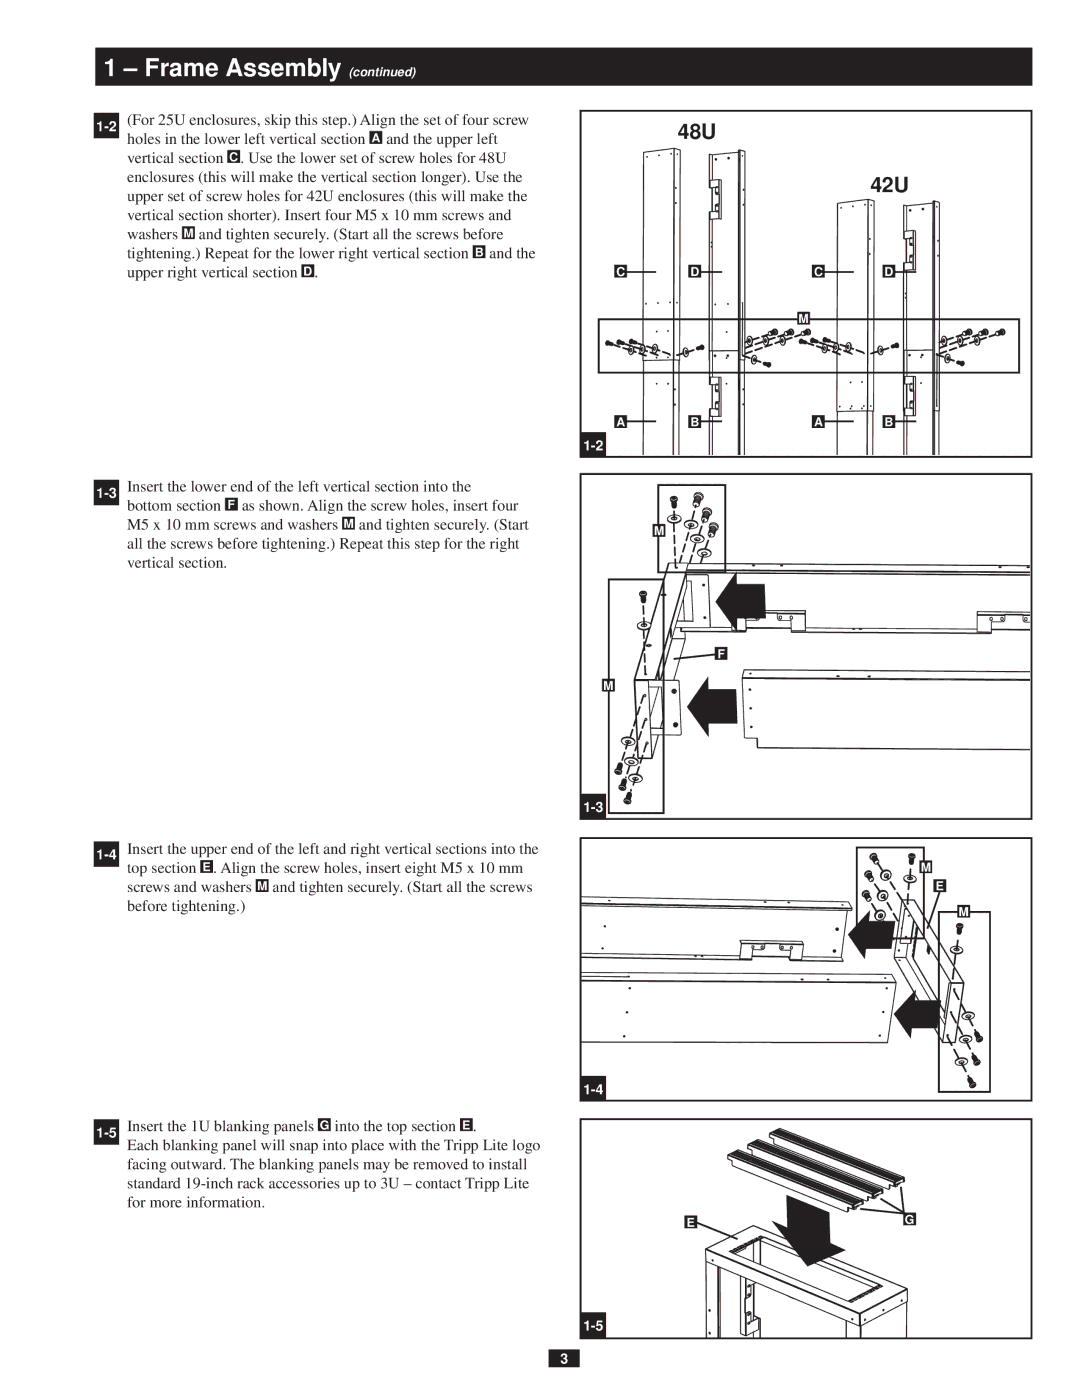
holes in the lower left vertical section A and the upper left vertical section C . Use the lower set of screw holes for 48U enclosures (this will make the vertical section longer). Use the upper set of screw holes for 42U enclosures (this will make the vertical section shorter). Insert four M5 x 10 mm screws and washers M and tighten securely. (Start all the screws before tightening.) Repeat for the lower right vertical section B and the upper right vertical section D .

1-3Insert the lower end of the left vertical section into the bottom section F as shown. Align the screw holes, insert four M5 x 10 mm screws and washers M and tighten securely. (Start all the screws before tightening.) Repeat this step for the right vertical section.

1-4Insert the upper end of the left and right vertical sections into the top section E . Align the screw holes, insert eight M5 x 10 mm screws and washers M and tighten securely. (Start all the screws before tightening.)

1-5Insert the 1U blanking panels G into the top section E .

Each blanking panel will snap into place with the Tripp Lite logo facing outward. The blanking panels may be removed to install standard 19-inch rack accessories up to 3U – contact Tripp Lite for more information.


48U


42U

C

D

C

D


M


A

B

A

B

1-2


M


F


M


1-3


M


E


M

1-4


E

G

1-5


3

Page 3
Image 3
Tripp Lite SREXTENDER owner manual Frame Assembly continued