Quick Installation
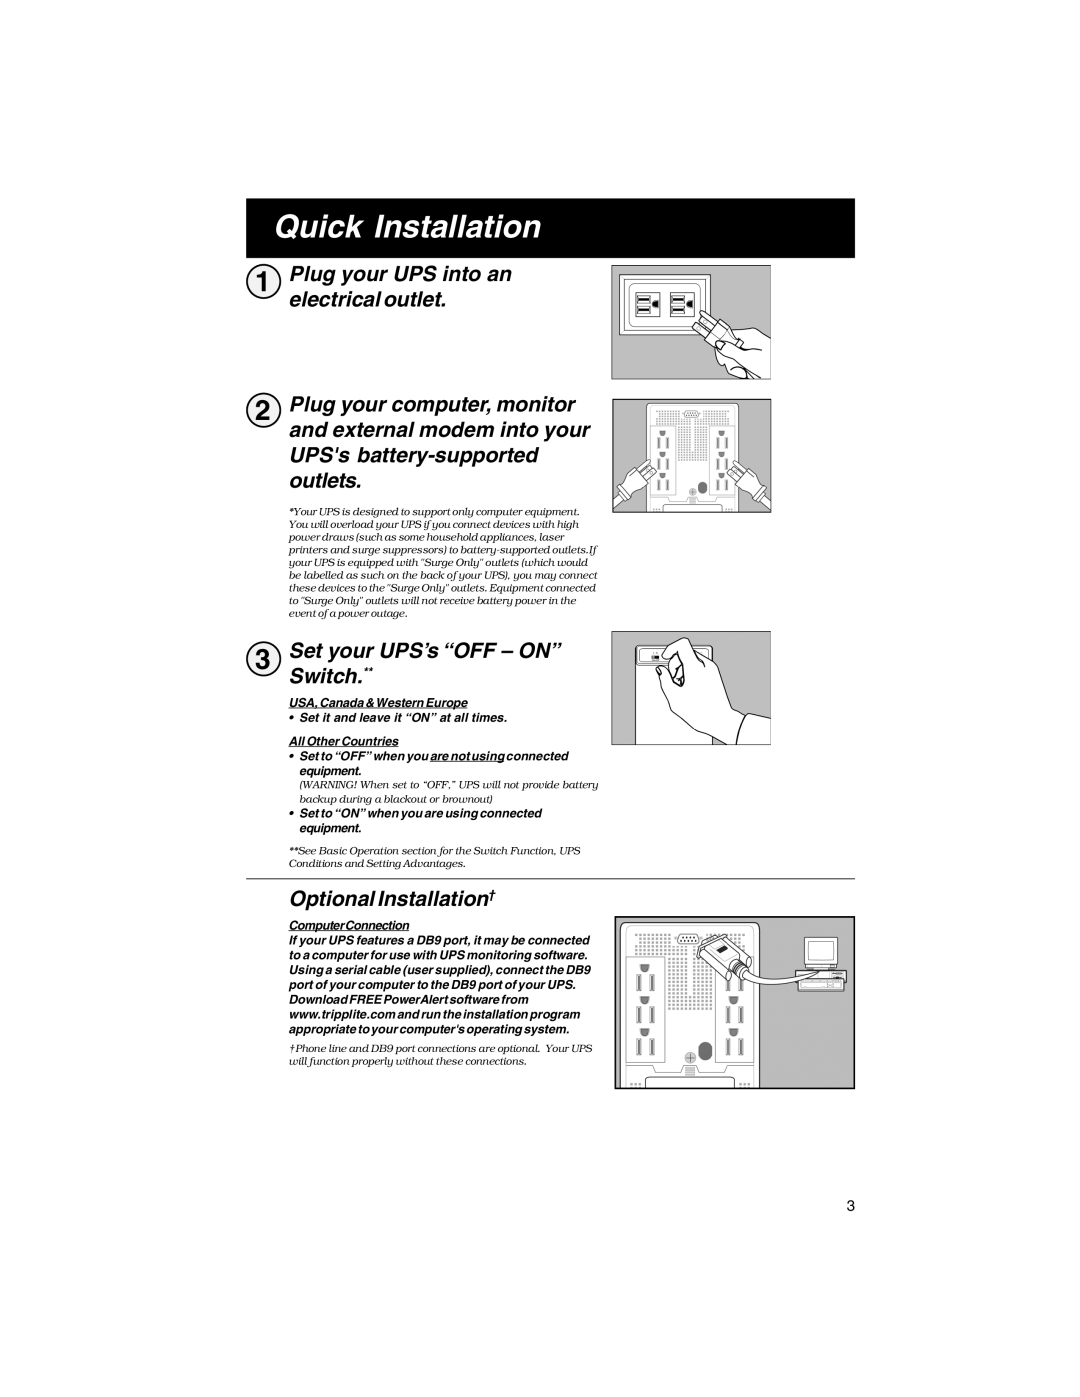
1 Plug your UPS into an electrical outlet.
2 Plug your computer, monitor and external modem into your UPS's
*Your UPS is designed to support only computer equipment. You will overload your UPS if you connect devices with high power draws (such as some household appliances, laser printers and surge suppressors) to
3 | Set your UPS’s “OFF – ON” |
| Switch.** |
USA, Canada & Western Europe
• Set it and leave it “ON” at all times.
All Other Countries
•Set to “OFF” when you are not using connected equipment.
(WARNING! When set to “OFF,” UPS will not provide battery backup during a blackout or brownout)
•Set to “ON” when you are using connected equipment.
**See Basic Operation section for the Switch Function, UPS Conditions and Setting Advantages.
Optional Installation†
ComputerConnection
If your UPS features a DB9 port, it may be connected to a computer for use with UPS monitoring software. Using a serial cable (user supplied), connect the DB9 port of your computer to the DB9 port of your UPS.
Download FREE PowerAlert software from www.tripplite.com and run the installation program appropriate to your computer's operating system.
†Phone line and DB9 port connections are optional. Your UPS will function properly without these connections.
3