
1030 specifications
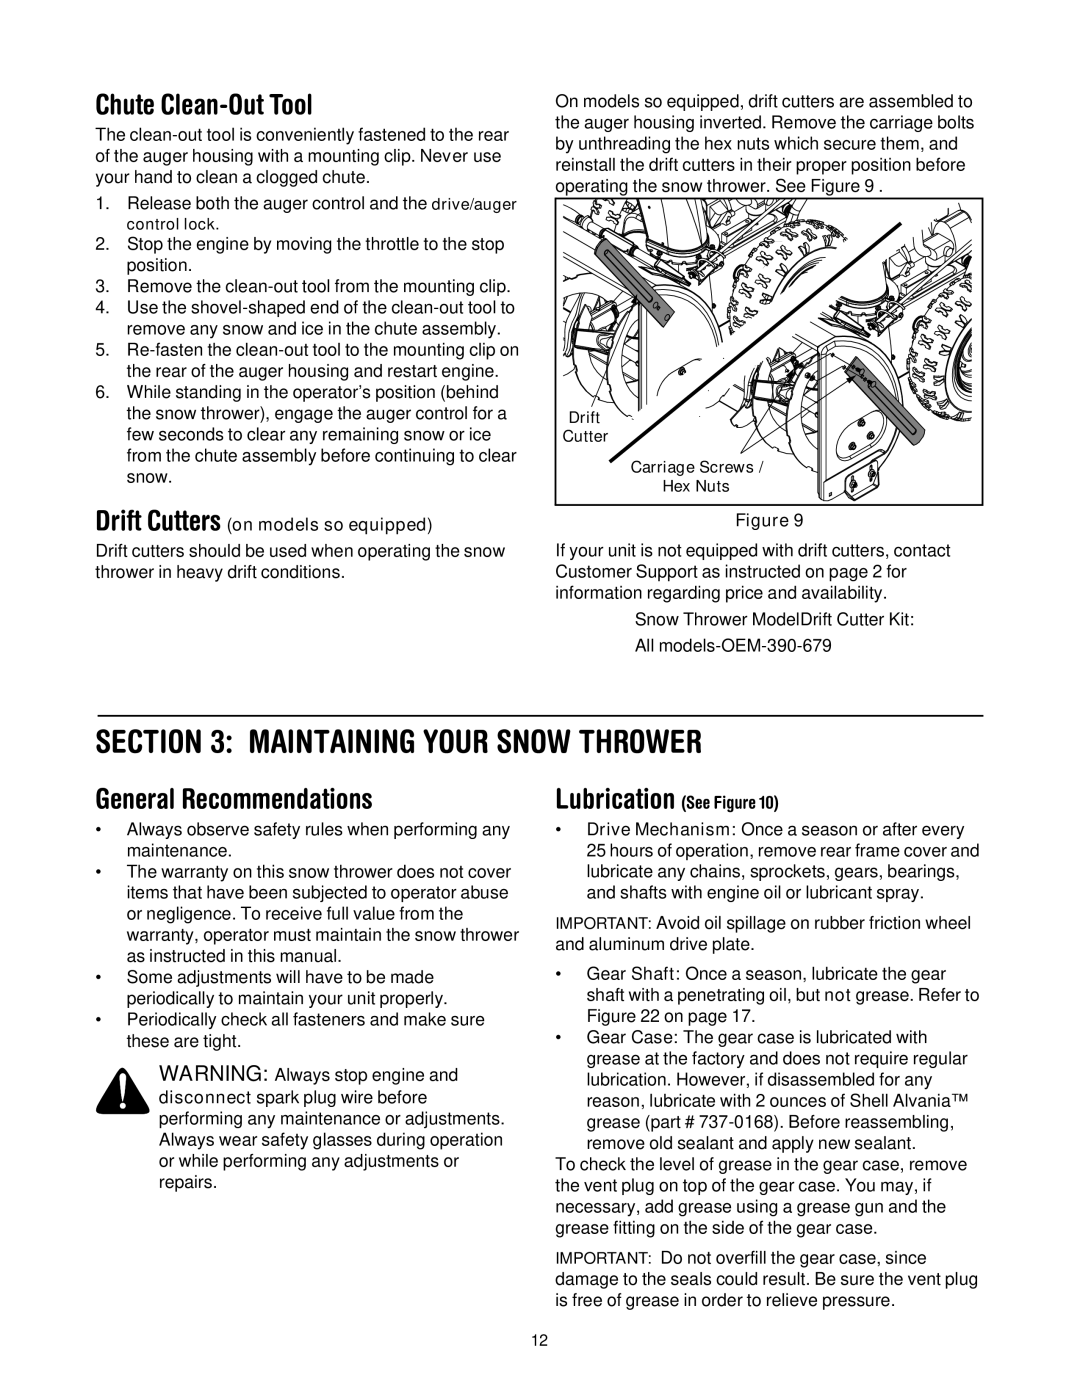
The Troy-Bilt 1030 is a powerful and versatile snow blower designed to tackle the toughest winter conditions. With its robust construction and innovative features, it stands out as a reliable choice for homeowners who need to clear snow from large driveways and walkways.One of the main features of the Troy-Bilt 1030 is its 2-stage snow removal system. This system utilizes an auger to collect the snow and a powerful impeller to propel it out through the discharge chute. This dual mechanism allows for efficient snow clearing, making it capable of handling heavy and compacted snow. With a clearing width of 30 inches and a depth of up to 23 inches, the Troy-Bilt 1030 can significantly reduce the time and effort needed to clear extensive areas.
Equipped with a robust 10.5 HP engine, the Troy-Bilt 1030 provides ample power to manage various snow conditions, including ice and slush. Its recoil start and electric start option offer convenience, allowing users to start the machine effortlessly even in the coldest temperatures. The snow blower’s adjustable speed transmission features six forward and two reverse speeds, allowing for smooth operation and flexibility while navigating various terrains.
Another standout feature is the 200-degree adjustable chute, which gives users the control needed to direct snow precisely where it needs to go. This feature minimizes the chances of snow being blown back onto the cleared area, enhancing overall efficiency. The chute also features a quick-release mechanism that allows for easy adjustments on the go.
The Troy-Bilt 1030 is built with user comfort in mind, featuring ergonomic hand grips and easy-to-reach controls, ensuring a comfortable experience even during prolonged use. Its durable construction, complete with a reinforced steel frame and housing, provides long-lasting performance season after season.
Safety is prioritized with features like the safety key, which prevents accidental starts, and the in-dash headlight, enhancing visibility during early morning or late evening snow removal. For added peace of mind, the Troy-Bilt 1030 comes with a warranty, reflecting the manufacturer’s commitment to quality and reliability.
In summary, the Troy-Bilt 1030 is ideal for homeowners looking for a sturdy, efficient snow blower capable of handling heavy snowfall. With its powerful engine, advanced features, and user-friendly design, it makes winter maintenance more manageable and less time-consuming. This snow blower is a smart investment for anyone living in areas prone to heavy winter weather, ensuring that you can keep your property safe and accessible all season long.