22Section 5: Maintenance
WARNING
Before inspecting, cleaning or servicing the machine, shut off engine, wait for all moving parts to come to a complete stop, disconnect spark plug wire and move wire away from spark plug. Remove the key from the keyswitch on units so equipped.
Failure to follow these instructions can result in serious personal injury or property damage.
CAUTION
Incorrect cable adjustment could cause the wheels and tines to rotate unexpect- edly. Follow adjustment procedures carefully. Failure to do so could result in personal injury or property damage.
Checking Forward Belt Tension
1.Before checking, shut off engine, allow the engine and muffler to cool down, dis- connect the spark plug wire, remove the ignition key on electric start models.
2.The coiled part of the forward clutch spring (E, Figure
Adjusting the Forward Clutch Cable
Do this procedure if the forward clutch spring measurement is not correct (see Checking Forward Belt Tension).
1.Before adjusting the belt, shut off
engine, allow the engine and muffler to cool down, disconnect the spark plug wire, and remove the ignition key on elec- tric start models.
B
AMore Belt Tension. ![]()
Figure 5-12: Move forward clutch cable adjuster down for more belt tension.
2.Belt adjustments are done with the
forward clutch cable adjuster (F, Figure 5- 10). Use two 1/2",
3.Move cable adjuster (B, Figure
4.Hand tighten the jam nuts and pull the Forward Clutch Control levers up against the handlebar. Measure the spring coil (Figure
5.Tighten both jam nuts securely.
Checking and Adjusting Reverse Clutch Belt Tension
Checking Reverse Clutch Belt Tension
The reverse clutch belt (D, Figure
Adjusting Reverse Clutch Belt
1.Before adjusting the belt, shut off
engine, allow the engine and muffler to cool down, disconnect the spark plug wire, and remove the ignition key on elec- tric start models.
C
Figure 5-13: Belt cover.
2.Remove the two nuts (C, Figure
3.Reverse belt tension adjustments are done with the reverse clutch cable adjuster located on the left side of the machine near the engine (D, Figure
| E |
D | F |
| Move cable |
| adjuster away |
| from pulleys to |
| increase reverse |
| belt tension. |
Figure 5-14: Reverse clutch cable adjuster. Left-side view with belt cover removed.
4.Move the cable adjuster (D, Figure
5.Tighten both jam nuts securely.
6.Reinstall the belt cover.
7.Move the unit to an open area and test the reverse operation. Repeat this proce- dure if the unit does not respond when the reverse clutch is engaged.
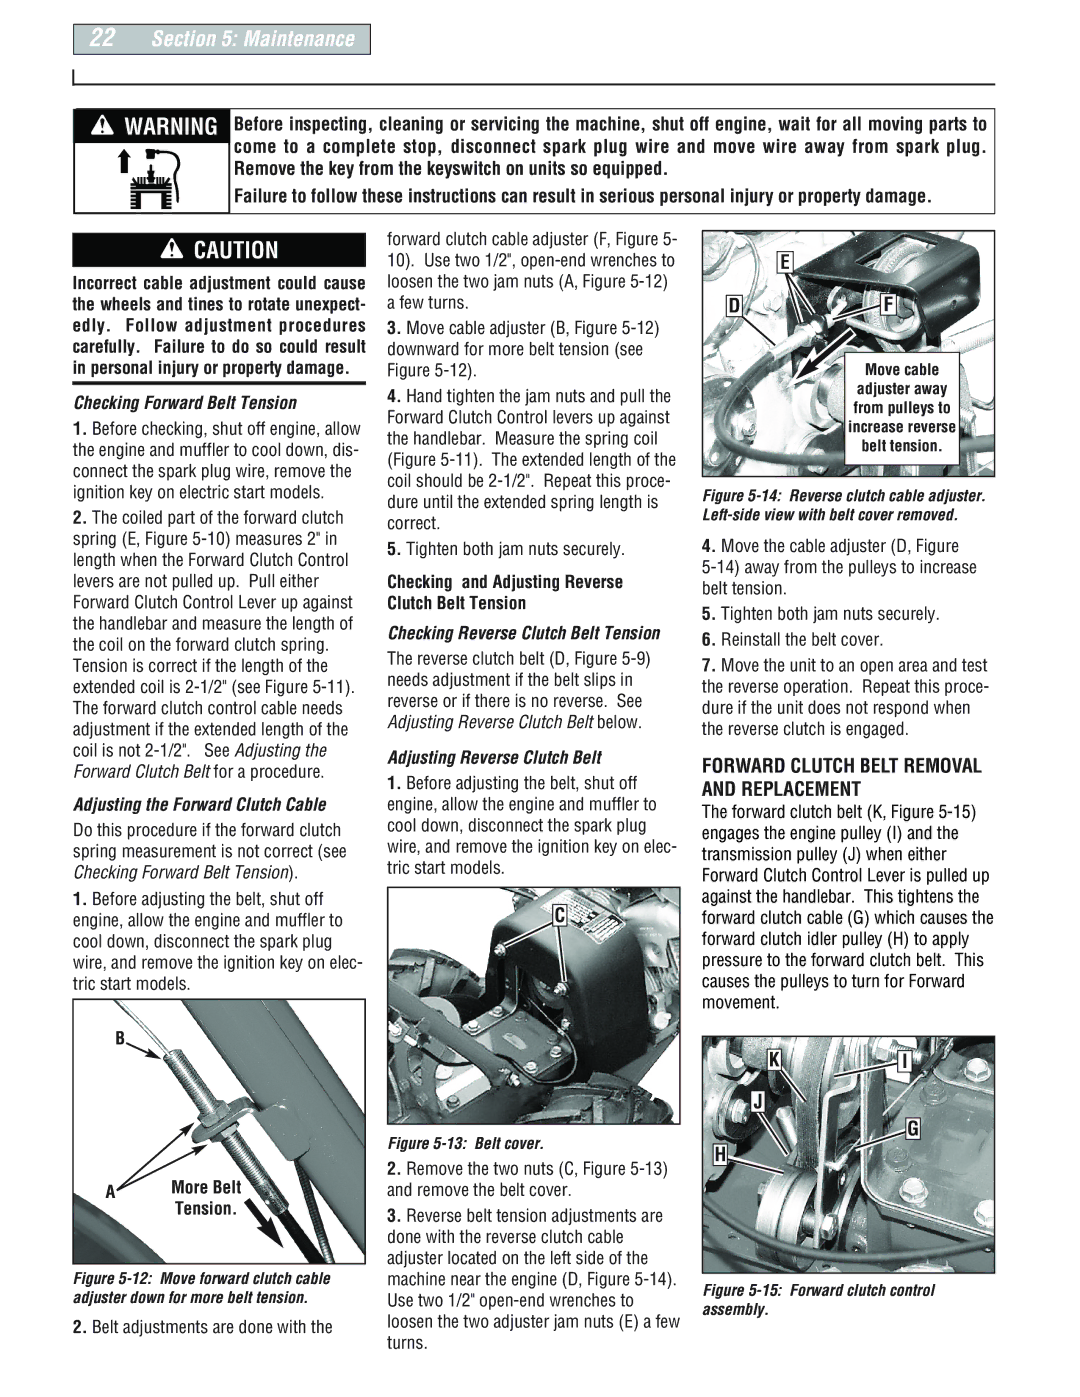
FORWARD CLUTCH BELT REMOVAL AND REPLACEMENT
The forward clutch belt (K, Figure
K ![]() I
I
J
G
H