•Remove the carriage bolts and flange lock nuts which attach the two skid shoes to the snow thrower on two sides. See Figure 16.
Figure 16
•Reassemble new skid shoes with the hardware removed earlier. Make certain the skid shoes are adjusted to be level.
•To remove the shave plate, remove the carriage bolts and flange lock nuts which attach the shave plate to the snow thrower housing. See Figure 17.
Carriage | Shear Pin Bow Tie Cotter Pin |
Bolt |
|
Flange Lock | Shave |
Nut | Plate |
Figure 17
•Reassemble the new shave plate, with heads of carriage bolts to the inside of the housing. Tighten securely.
Belt Removal And Replacement
Auger Belts
NOTE: It is necessary to remove both belts in order to change either one. If changing just one belt, be certain to check the condition of the other belt.
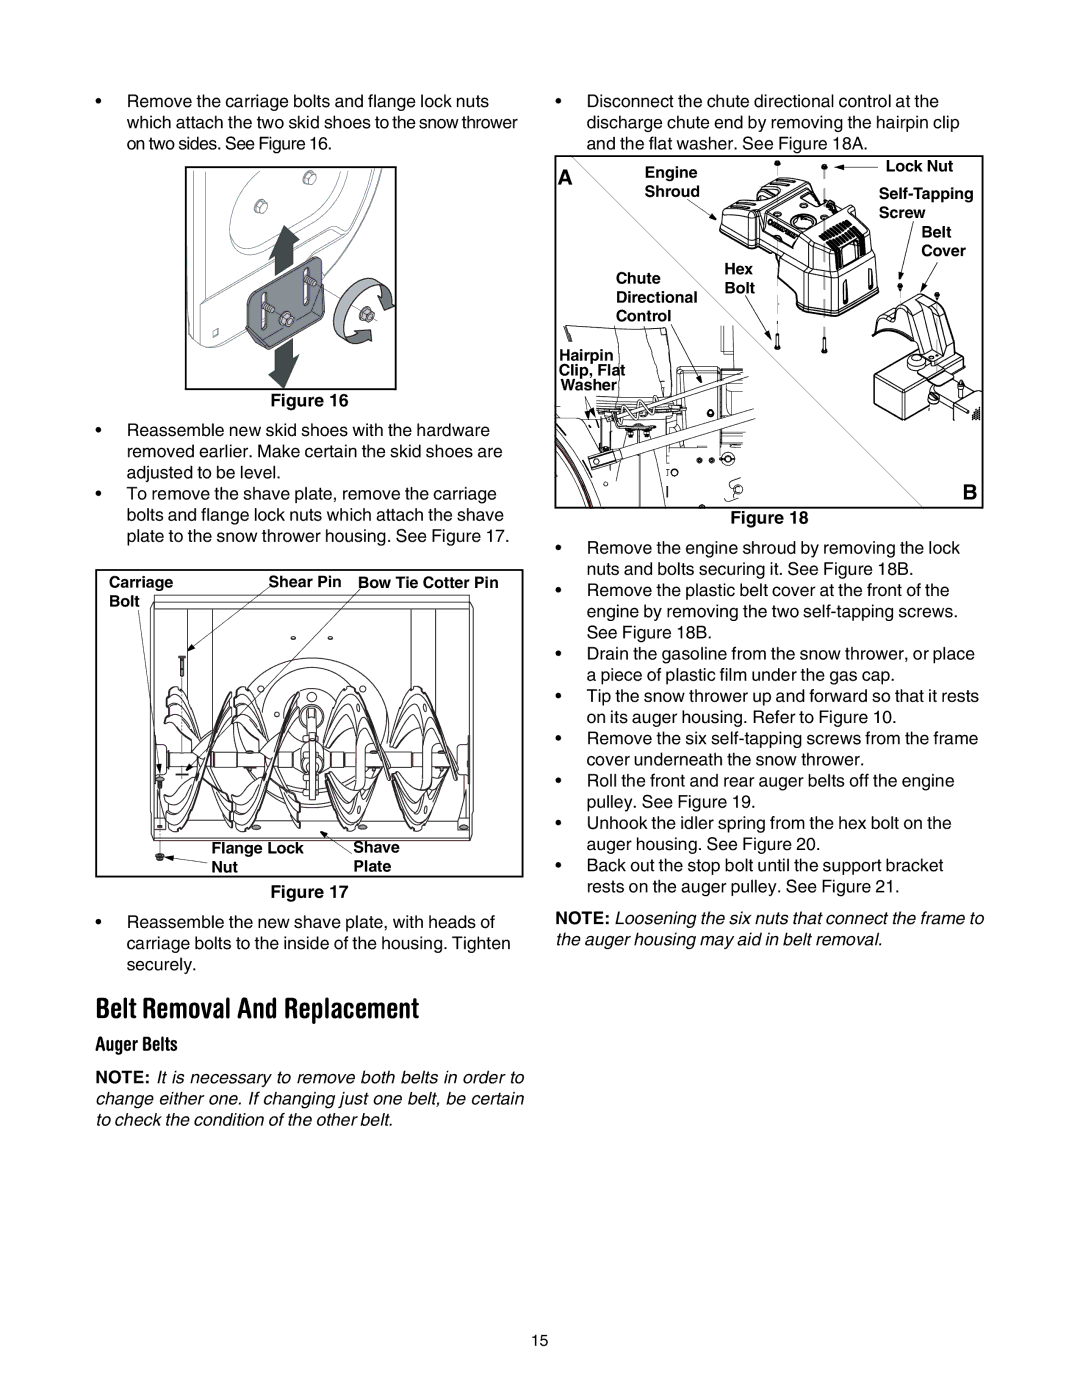
•Disconnect the chute directional control at the discharge chute end by removing the hairpin clip and the flat washer. See Figure 18A.
A | Engine | Lock Nut | |
| Shroud | ||
|
| Screw | |
|
| Belt | |
|
| Cover | |
| Chute | Hex | |
| Bolt | ||
| Directional | ||
|
| ||
| Control |
| |
Hairpin |
|
| |
Clip, Flat |
| ||
Washer |
| ||
|
| B | |
Figure 18
•Remove the engine shroud by removing the lock nuts and bolts securing it. See Figure 18B.
•Remove the plastic belt cover at the front of the engine by removing the two
•Drain the gasoline from the snow thrower, or place a piece of plastic film under the gas cap.
•Tip the snow thrower up and forward so that it rests on its auger housing. Refer to Figure 10.
•Remove the six
•Roll the front and rear auger belts off the engine pulley. See Figure 19.
•Unhook the idler spring from the hex bolt on the auger housing. See Figure 20.
•Back out the stop bolt until the support bracket rests on the auger pulley. See Figure 21.
NOTE: Loosening the six nuts that connect the frame to the auger housing may aid in belt removal.
15