
2115R specifications
The U-Line 2115R is a premium undercounter refrigerator designed to enhance the functionality and aesthetic of any modern kitchen or entertaining space. This model combines sleek design with advanced technology, making it a popular choice among homeowners and culinary enthusiasts alike.One of the standout features of the U-Line 2115R is its impressive capacity of 5.2 cubic feet, which efficiently accommodates a variety of beverages and perishables. Its adjustable shelving and door bins allow for customizable storage, providing versatility to organize items as needed. The unit is equipped with a specialized beverage shelf that is perfect for storing wine and champagne bottles, making it an exceptional choice for social gatherings.
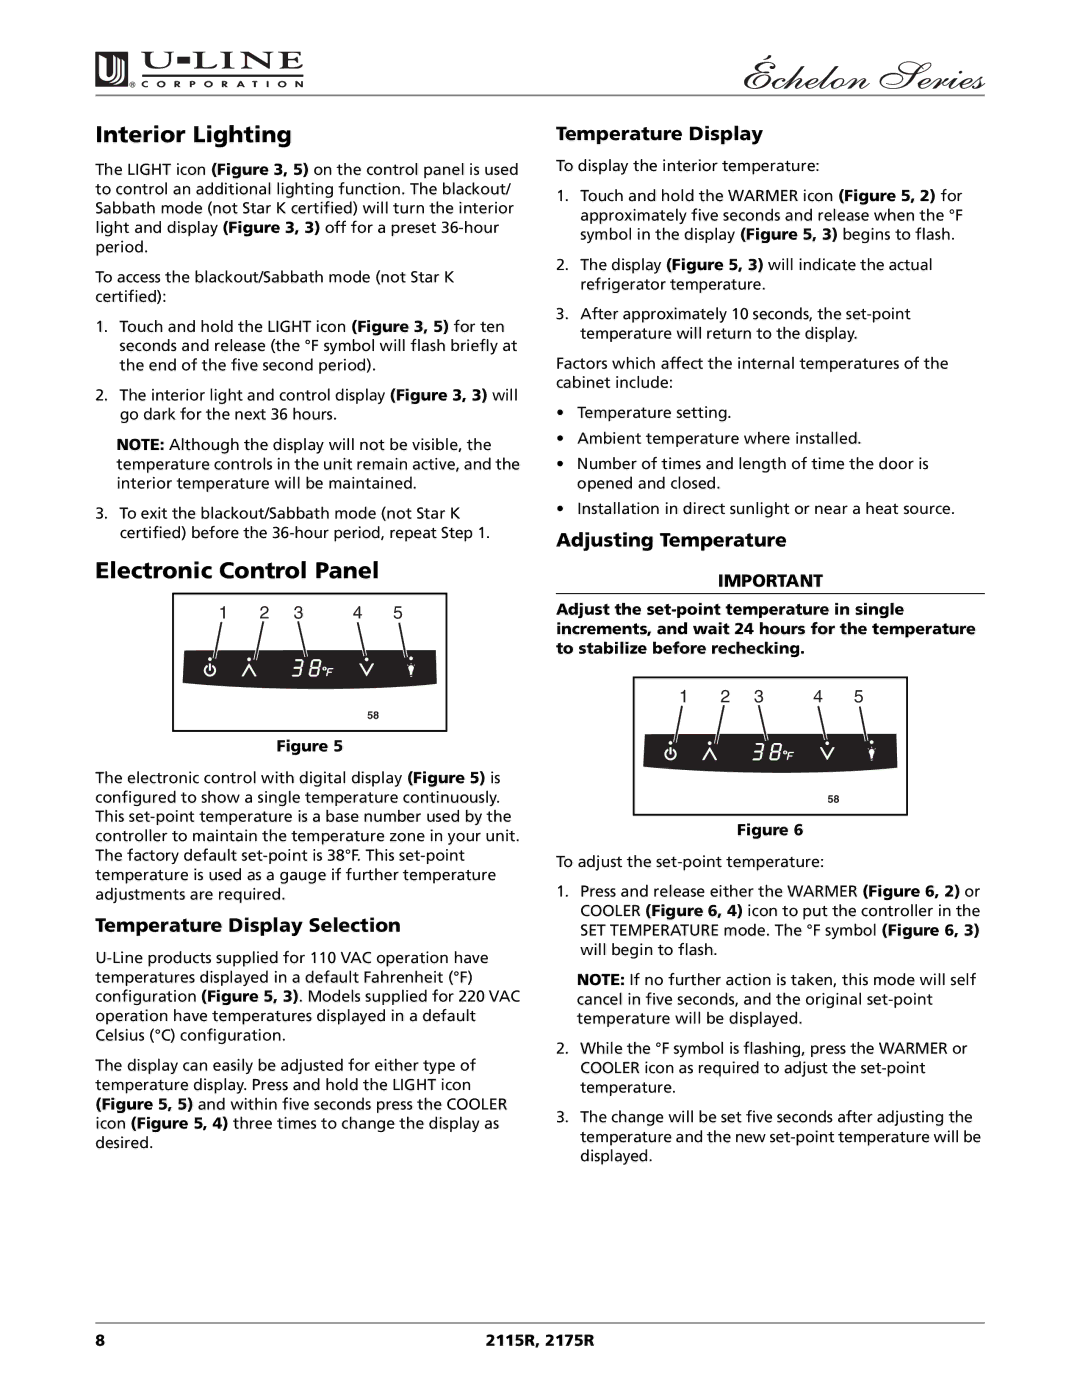
The U-Line 2115R operates on a frost-free cooling system, ensuring that the internal temperature remains consistent and food stays fresh. The temperature range is adjustable between 34°F to 40°F, and a digital touch control allows for easy monitoring and adjustments. This feature is key to maintaining the perfect climate for both perishable food items and beverages.
One of the significant technologies incorporated into the U-Line 2115R is its low-energy consumption design. U-Line’s commitment to sustainability means this model not only performs well but is also energy-efficient, helping users save on utility bills while minimizing their environmental impact. Its advanced compressor technology includes vibration reduction features, ensuring quiet operation—a considerable benefit in open-concept living spaces.
The exterior of the U-Line 2115R is characterized by a sturdy stainless steel finish, which provides durability and a modern look. The unit comes with a professional handle that adds to its contemporary appeal. Additionally, the integrated design allows for flush installation, seamlessly fitting into cabinetry for a built-in appearance that elevates the overall design of your kitchen.
Another valuable characteristic of the U-Line 2115R is its LED lighting, which illuminates the interior while using minimal energy. This ambient lighting makes it easy to see your items at a glance, adding both functionality and style.
In conclusion, the U-Line 2115R is a versatile, stylish undercounter refrigerator that offers advanced features, energy efficiency, and practical design. Whether you're a home chef, a wine enthusiast, or simply looking to upgrade your kitchen's functionality, the U-Line 2115R stands out as an excellent choice. Its combination of smart technology and sophisticated aesthetics makes it a desirable appliance in any home.