Standard Drawers
Checking Drawer Alignment
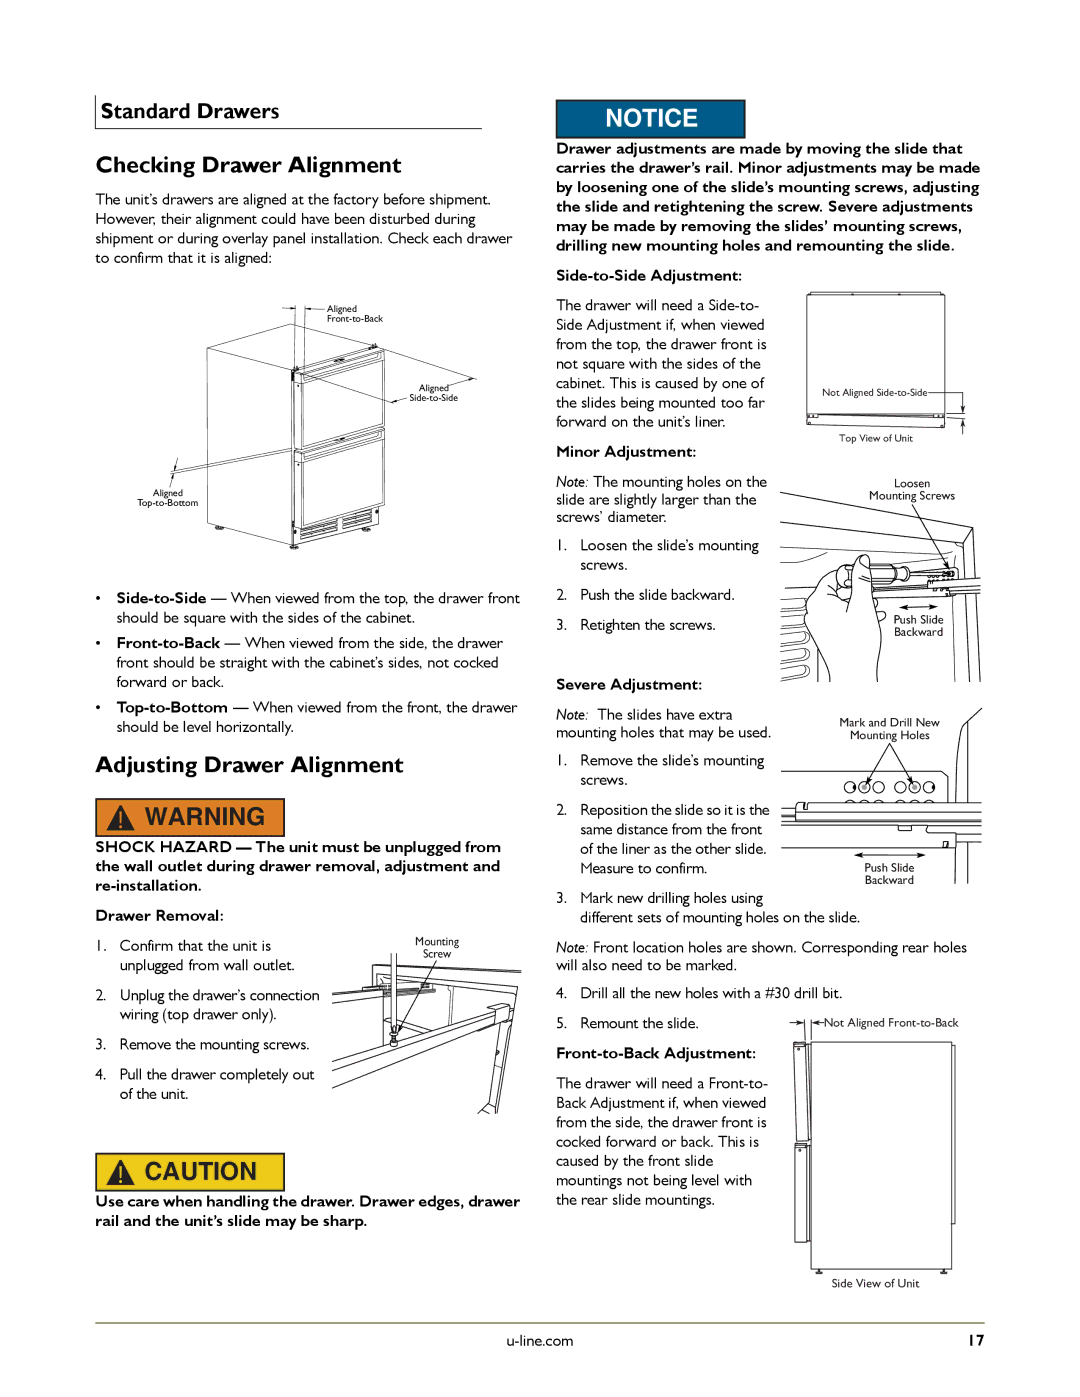
The unit’s drawers are aligned at the factory before shipment. However, their alignment could have been disturbed during shipment or during overlay panel installation. Check each drawer to confirm that it is aligned:
NOTICE
Drawer adjustments are made by moving the slide that carries the drawer’s rail. Minor adjustments may be made by loosening one of the slide’s mounting screws, adjusting the slide and retightening the screw. Severe adjustments may be made by removing the slides’ mounting screws, drilling new mounting holes and remounting the slide.
![]()
![]() Aligned
Aligned
Aligned
![]()
Aligned
•
•
•
Adjusting Drawer Alignment
!WARNING
SHOCK HAZARD — The unit must be unplugged from the wall outlet during drawer removal, adjustment and
The drawer will need a
Minor Adjustment:
Note: The mounting holes on the slide are slightly larger than the screws’ diameter.
1.Loosen the slide’s mounting screws.
2.Push the slide backward.
3.Retighten the screws.
Severe Adjustment:
Note: The slides have extra mounting holes that may be used.
1.Remove the slide’s mounting screws.
2.Reposition the slide so it is the same distance from the front of the liner as the other slide. Measure to confirm.
Not Aligned ![]()
Top View of Unit
Loosen
Mounting Screws
![]() Push Slide
Push Slide
Backward
Mark and Drill New
Mounting Holes
Push Slide
Backward
Drawer Removal:
1. Confirm that the unit is | Mounting |
unplugged from wall outlet. | Screw |
|
2. Unplug the drawer’s connection wiring (top drawer only).
3. Remove the mounting screws.
4.Pull the drawer completely out of the unit.
!CAUTION
Use care when handling the drawer. Drawer edges, drawer rail and the unit’s slide may be sharp.
3.Mark new drilling holes using
different sets of mounting holes on the slide.
Note: Front location holes are shown. Corresponding rear holes will also need to be marked.
4. Drill all the new holes with a #30 drill bit.
5. Remount the slide. |
| Not Aligned |
| ||
|
|
|
Front-to-Back Adjustment:
The drawer will need a
Side View of Unit
17 |