
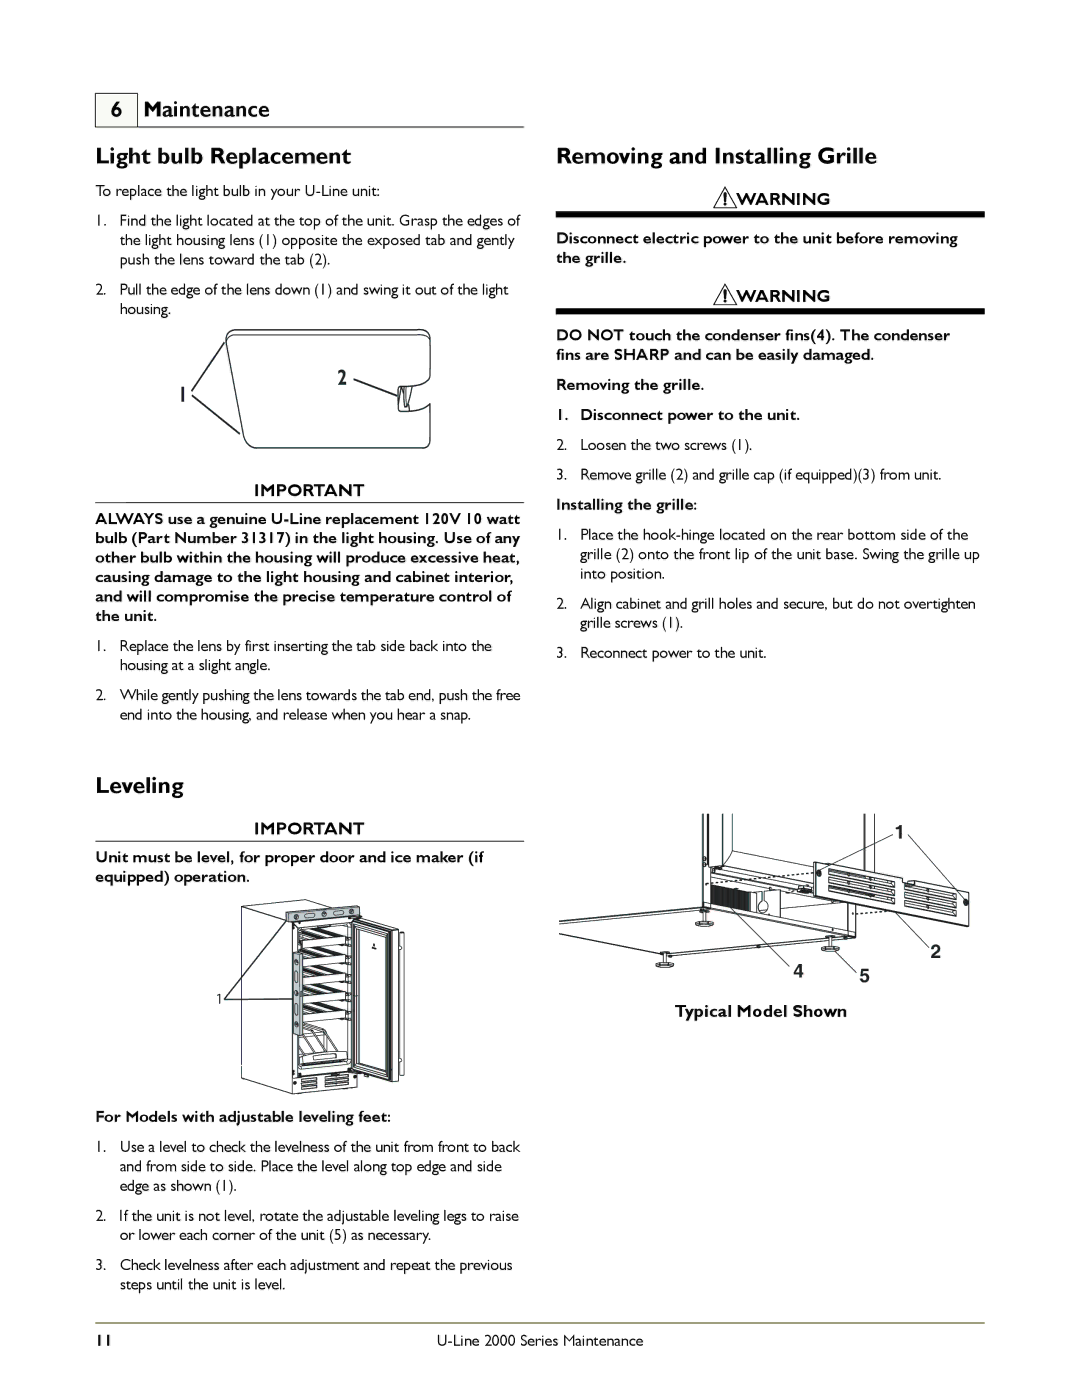
U-2115RB-00, U-2175BEVCS-02, U-2115WCS-00, U-2115WCOL-00, U-2175BEVCOL-00 specifications
U-Line U-2175 series of products exemplifies cutting-edge design and technology in the realm of under-counter refrigeration. This series includes models such as U-2175WCCS-00, U-2175WCCS-22, U-2175WCCOL-60, U-2175WCCOL-02, and U-2175BEVCS-00, each offering unique features tailored to enhance your home or commercial space.The U-2175WCCS-00 and U-2175WCCS-22 are undercounter wine and beverage centers, boasting a sleek and modern aesthetic. They feature U-Line's exclusive convection cooling system, which ensures that beverages are cooled evenly and efficiently across the unit. These models come with adjustable shelves that accommodate a variety of bottle sizes, from standard wine bottles to larger formats, allowing for flexibility in storage. The glass doors of these models provide visibility while protecting the contents from UV light, preserving the quality of your beverages. Additionally, the LED lighting illuminates the interior, not only enhancing visibility but also creating an inviting ambiance.
The U-2175WCCOL-60 and U-2175WCCOL-02 models are designed with a focus on versatility and capacity. These units feature solid doors and a high-profile design, making them an elegant addition to any decor. The customizable, integrated design allows for a seamless installation within existing cabinetry, perfect for modern kitchens and bars. These models are equipped with U-Line’s advanced temperature control technology, enabling precise temperature management for different types of wine or beverages, ensuring they are served at the optimal temperature.
For those interested in a dedicated beverage cooler, the U-2175BEVCS-00 excels in this area. This model is specifically designed to store a wide variety of canned and bottled beverages, with spacious shelves that can be adjusted to fit drinks of varying sizes. The unit’s powerful cooling system works quietly and efficiently, allowing users to enjoy chilled refreshments without disrupting their environment. Moreover, with features like door locks and security settings, this model guarantees the safety of your prized collection.
In conclusion, the U-Line U-2175 series represents a blend of functionality, style, and advanced technology. Whether for wine enthusiasts or casual entertainers, these models provide the perfect solution for beverage storage and display, making them an invaluable addition to any home or business. Their innovative designs prioritize both aesthetics and practicality, ensuring your beverages are stored optimally while enhancing your space’s overall appeal.