Slide-Out Range Hood specifications
The Whirlpool Slide-Out Range Hood is a sophisticated kitchen appliance designed to enhance cooking experiences while maintaining a clean and stylish kitchen environment. This innovative range hood stands out for its blend of functionality, versatility, and modern aesthetics.One of the key features of the Whirlpool Slide-Out Range Hood is its space-saving design. The slide-out mechanism allows the hood to remain hidden when not in use, providing an unobtrusive appearance that integrates seamlessly into your kitchen cabinetry. When needed, it easily extends downward to capture smoke, steam, and cooking odors, making it an ideal choice for both small and open-concept kitchens.
The range hood is equipped with powerful ventilation capabilities, featuring multiple fan speeds that can be adjusted according to your cooking needs. Whether you are simmering a delicate sauce or searing meat at high temperatures, the strength of the ventilation ensures optimal air quality in your kitchen. The range hood also includes a built-in grease filter that effectively traps grease and particulates, contributing to a cleaner cooking environment.
In terms of noise levels, the Whirlpool Slide-Out Range Hood offers quiet operation, allowing you to enjoy conversations or music while cooking. Its streamlined motor design minimizes sound, making it a practical choice for family gatherings or entertaining guests.
Moreover, the Whirlpool range hood incorporates modern technologies such as LED lighting. The bright, energy-efficient lights illuminate your cooking surface, providing better visibility during meal preparation. This feature not only enhances safety but also adds an elegant touch to your kitchen aesthetic.
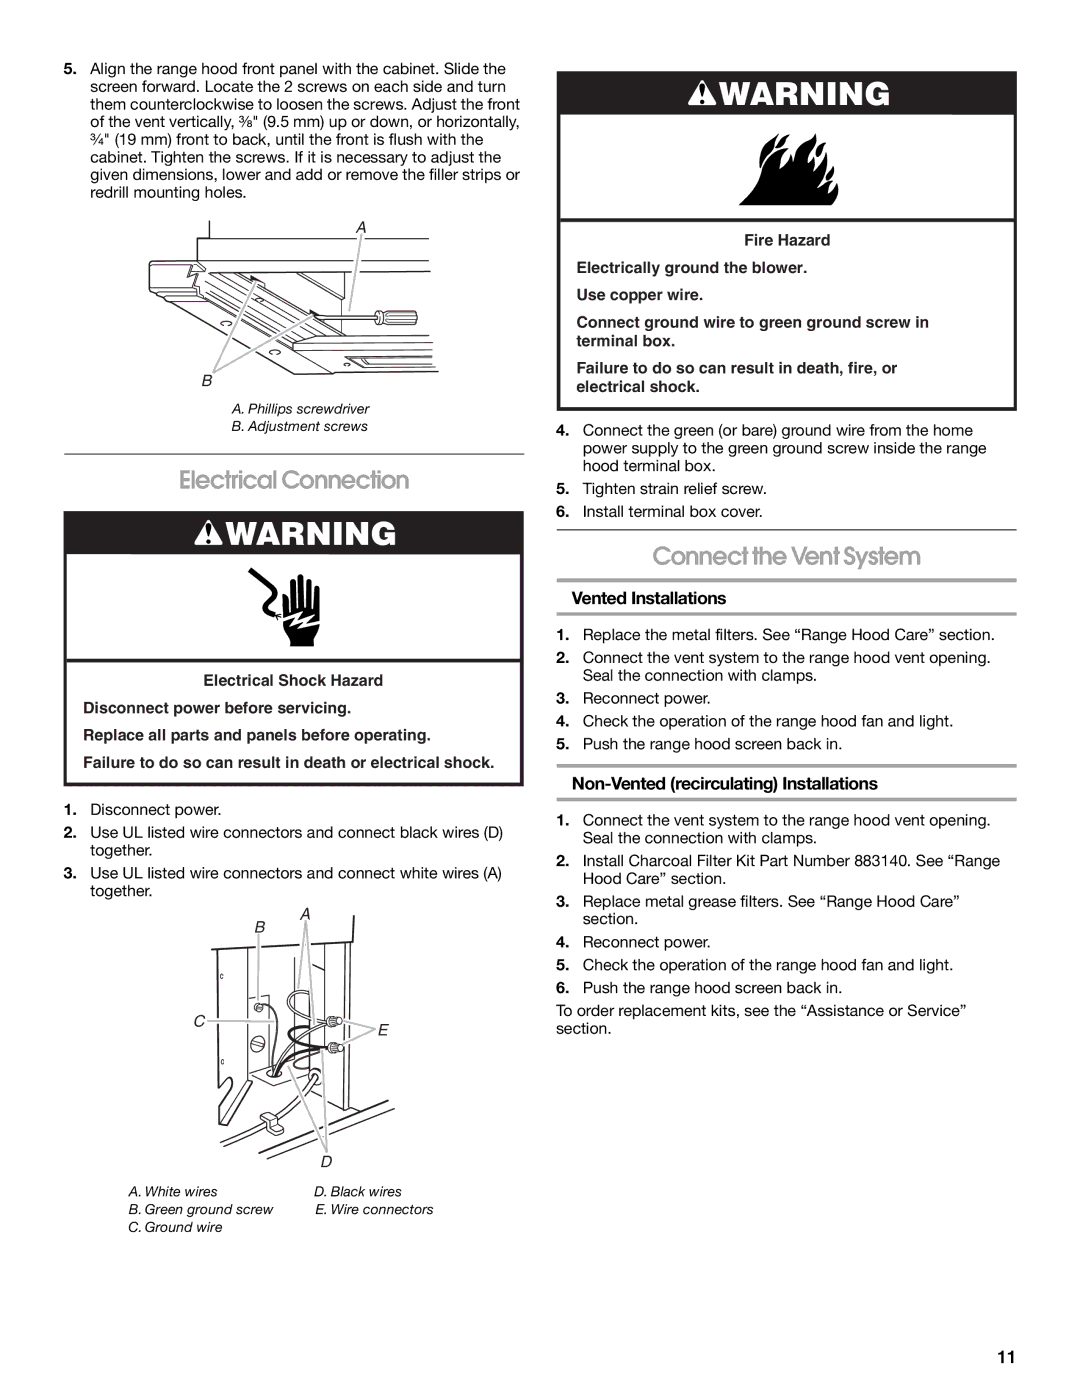
The installation of the Whirlpool Slide-Out Range Hood is user-friendly, benefiting from detailed instructions that simplify the process. It is designed to be compatible with various kitchen layouts, making it a versatile choice for renovations or new builds.
Additional characteristics include an easy-to-clean exterior, user-friendly control panels, and compatibility with ducted or ductless ventilation systems. This adaptability ensures that homeowners can select the best option for their kitchen setup.
In summary, the Whirlpool Slide-Out Range Hood combines style, efficiency, and modern features, making it an essential addition to any kitchen. Its ability to provide powerful ventilation while blending seamlessly into cabinetry elevates the cooking experience, making it a popular choice among homeowners.