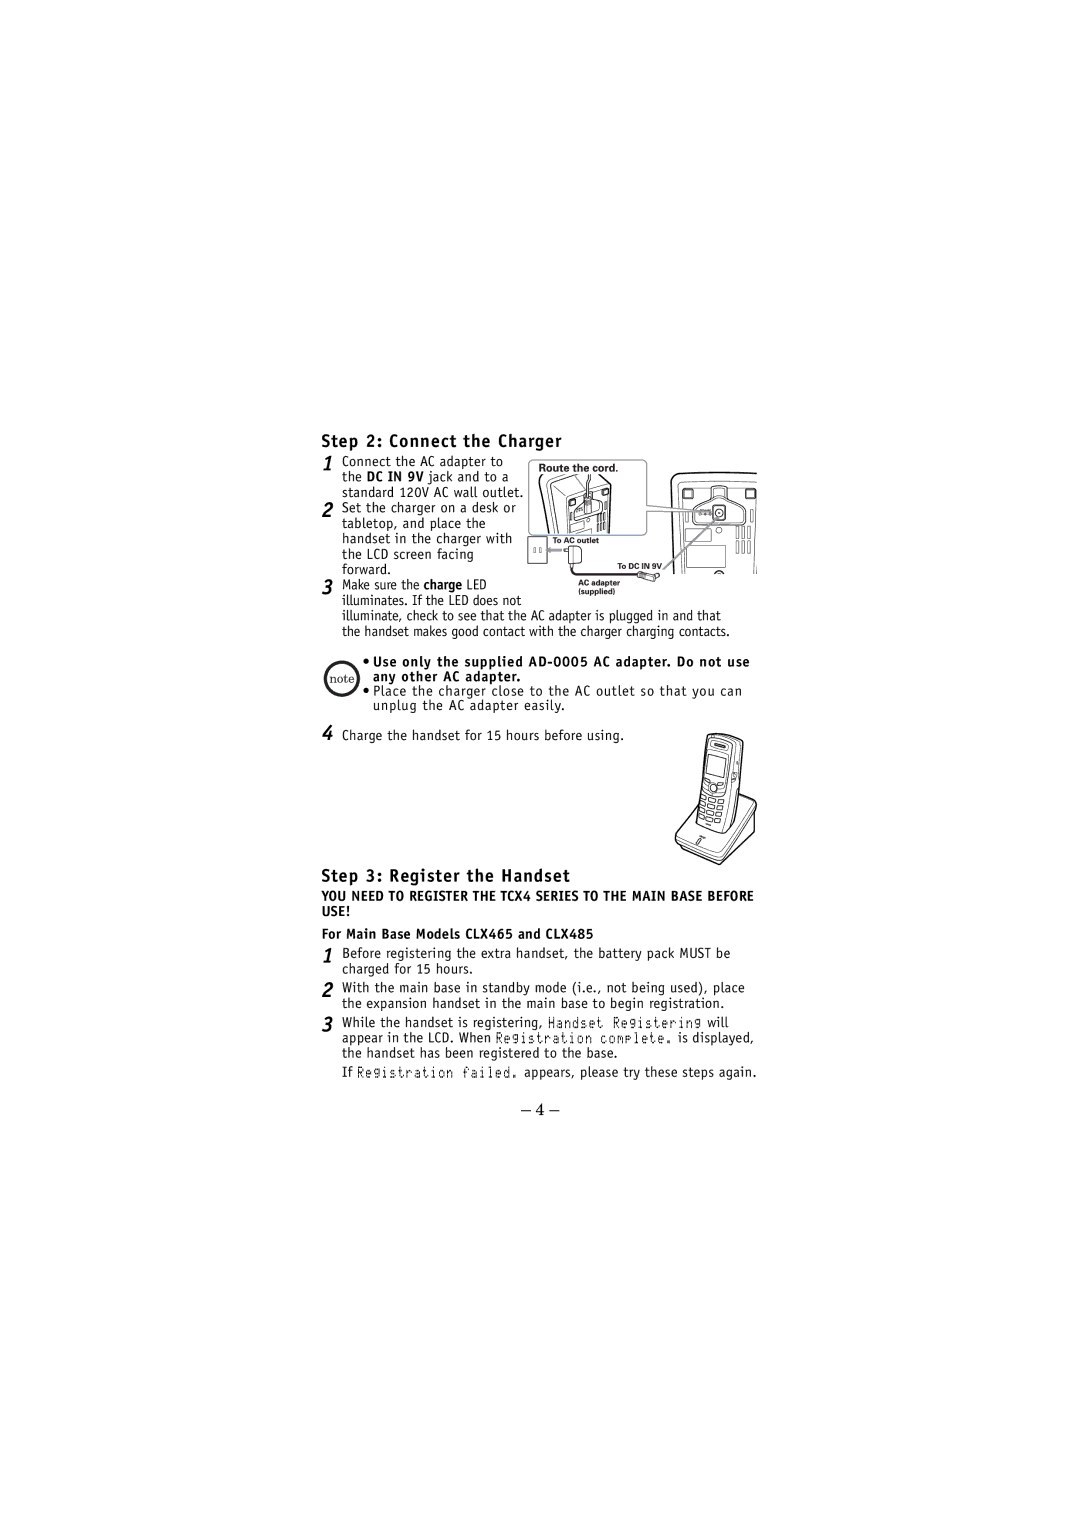
Step 2: Connect the Charger
1 Connect the AC adapter to the DC IN 9V jack and to a
standard 120V AC wall outlet. 2 Set the charger on a desk or
tabletop, and place the handset in the charger with
the LCD screen facing
forward. 3 Make sure the charge LED
illuminates. If the LED does not
illuminate, check to see that the AC adapter is plugged in and that the handset makes good contact with the charger charging contacts.
•Use only the supplied
any other AC adapter.
•Place the charger close to the AC outlet so that you can unplug the AC adapter easily.
4 Charge the handset for 15 hours before using.
Step 3: Register the Handset
YOU NEED TO REGISTER THE TCX4 SERIES TO THE MAIN BASE BEFORE USE!
For Main Base Models CLX465 and CLX485
1
2
Before registering the extra handset, the battery pack MUST be charged for 15 hours.
With the main base in standby mode (i.e., not being used), place the expansion handset in the main base to begin registration.
3 While the handset is registering, Handset Registering will appear in the LCD. When Registration complete. is displayed, the handset has been registered to the base.
If Registration failed. appears, please try these steps again.
– 4 –
