WARNING: Always wear safety goggles or safety glasses with side shields when operating
tools. Failure to do so could result in objects being thrown into your eyes, resulting in possible serious injury.
_ WARNING: Do not allow familiarity with your drill to make you careless. Remember that a careless fraction of a second is sufficient to inflict
severe injury.
CHARGING BATTERY PACK
The battery pack for this tool has been shipped in a low charge condition to prevent possible problems.
Therefore, you should charge it at least 3 hours prior to use.
Note: Batteries will not reach full charge the first time they are charged. Allow several cycles (ddlling followed by recharging) for them to become fully charged.
TO CHARGE
•Charge battery pack only with the charger provided.
•Make sure power supply Is normal house voltage, 120 volts, 60 Hz, AC only.
•Connect charger to battery pack by inserting charger plug into input jack. As shown in figure 1, input jack is located on the back side of battery pack.
•Note: Battery pack can remain on your drill or be
removed while charging. When battery pack is out of the drill, be careful not to touch both terminals
with a metal object. Touching both terminals with a metal object will short out the battery pack.
•Connect charger to power supply.
•The charge indicator light (LED), located on the battery pack, will light up and glow when the charger is properly connected to power supply. This light indicates the charger is operating properly. It will remain on until charger is disconnected from power supply. The light only glows while your tool is charging, not during use.
•After normalusage, 3 hoursof chargingtime is required to be full/charged.
•The batterypack willbecome slightlywarm tothe touch whilecharging.This is normaland does not indicatea problem.
•Do not operate the tool while it is connected to the charger. The driving ability will not increase.
•Do not place charger in an area of extreme heat or cold. It will work best at normal room temperature.
CAUTION: Your drill'sbattery pack contains special high temperature batteries to help prevent battery damage when left on charge for extended periods of time. However, once the batteries become fully charged, we recommend that you unplug your charger from power supply and disconnect it from the battery pack.
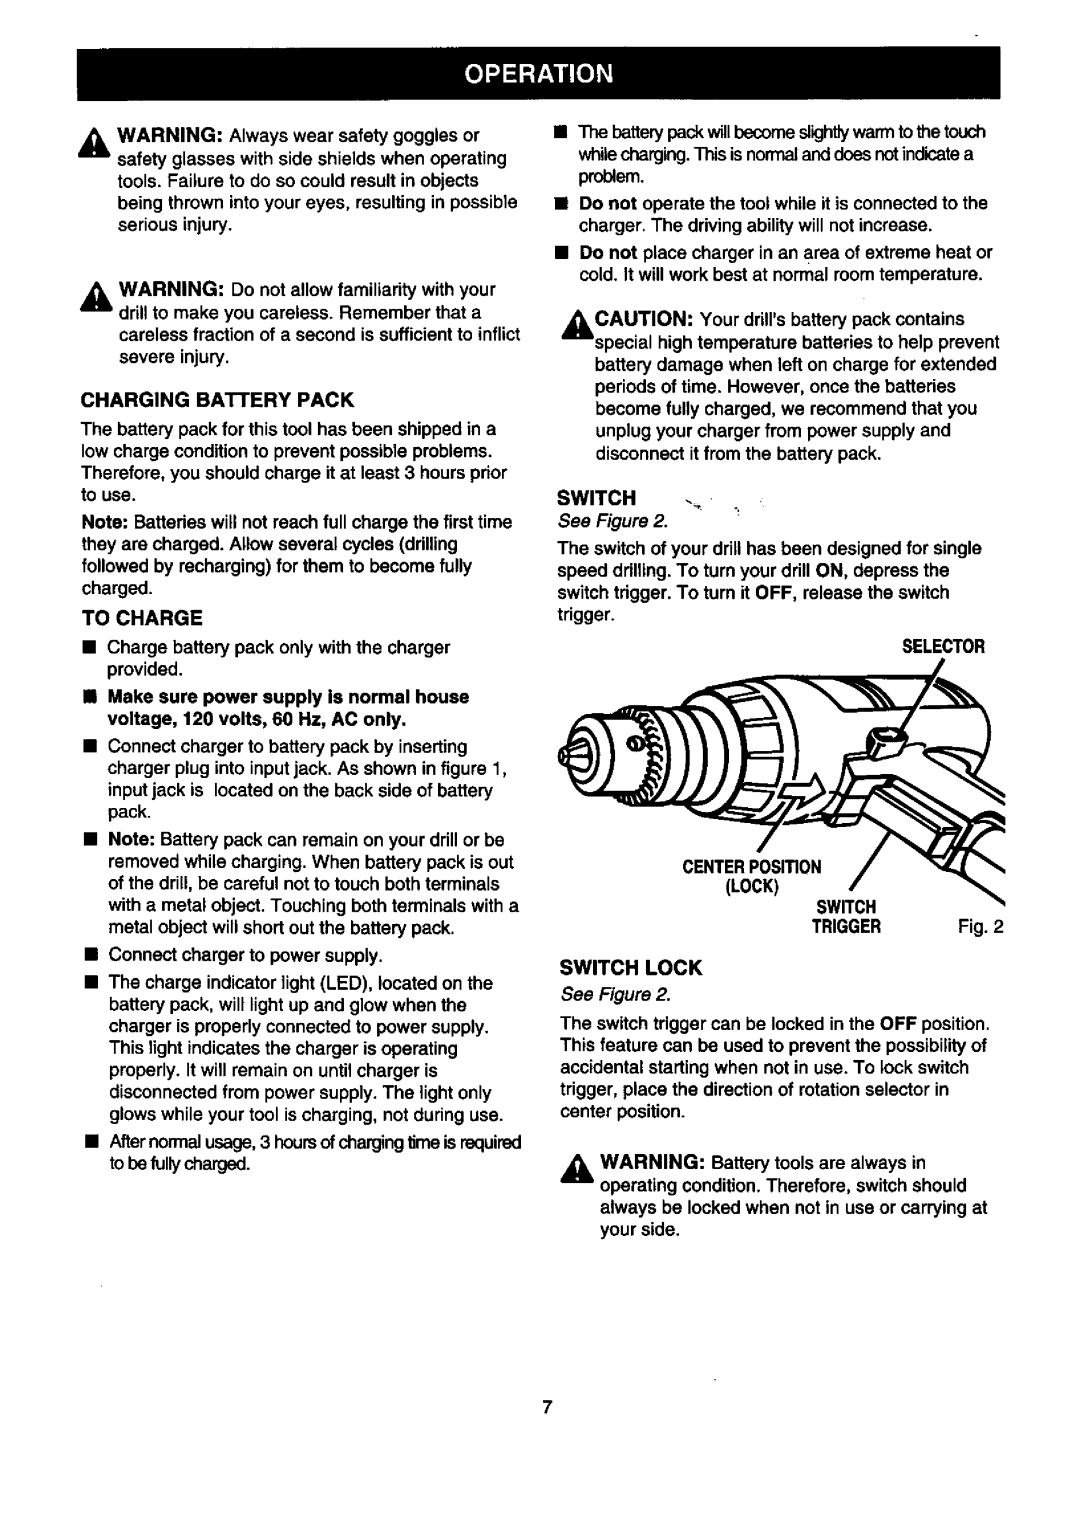
SWITCH ._
See Figure 2.
The switch of your drill has been designed for single speed drilling. To turn your drill ON, depress the switch trigger. To turn it OFF, release the switch trigger.
SELECTOR
CENTERPosm0N |
|
(LOCK) |
|
SWITCH |
|
TRIGGER | Fig. 2 |
SWITCH LOCK
See Figure 2.
The switch trigger can be locked in the OFF position. This feature can be used to prevent the possibility of accidental starting when not in use. To lock switch trigger, place the direction of rotation selector in center position.
_ WARNING: Battery tools are always in operating condition. Therefore, switch should always be locked when not in use or carrying at your side.
7